CNC homemade v1.0
This is my first CNC machine assembled with my own hands from available materials. The cost price of the machine is about $170.
I wanted to assemble the CNC machine tool for a long time. Basically, I need it for cutting plywood and plastic, cutting some details for modeling, home-making and other machines. Collect the machine tool scratched for almost two years, during this time collected details, electronics and knowledge.
The machine is budgetary, its cost is minimal. Next, I will use words that a normal person may seem very scary and this can scare off the self-built machine, but in fact it's all very simple and easy to master in a few days.
Electronics assembled on Arduino + firmware GRBL
CNC shield v3 Update: there is a new version of the boardv4
Power supply 24 volts 15 amperes
Video about that how to sing :) CNC machine tools.

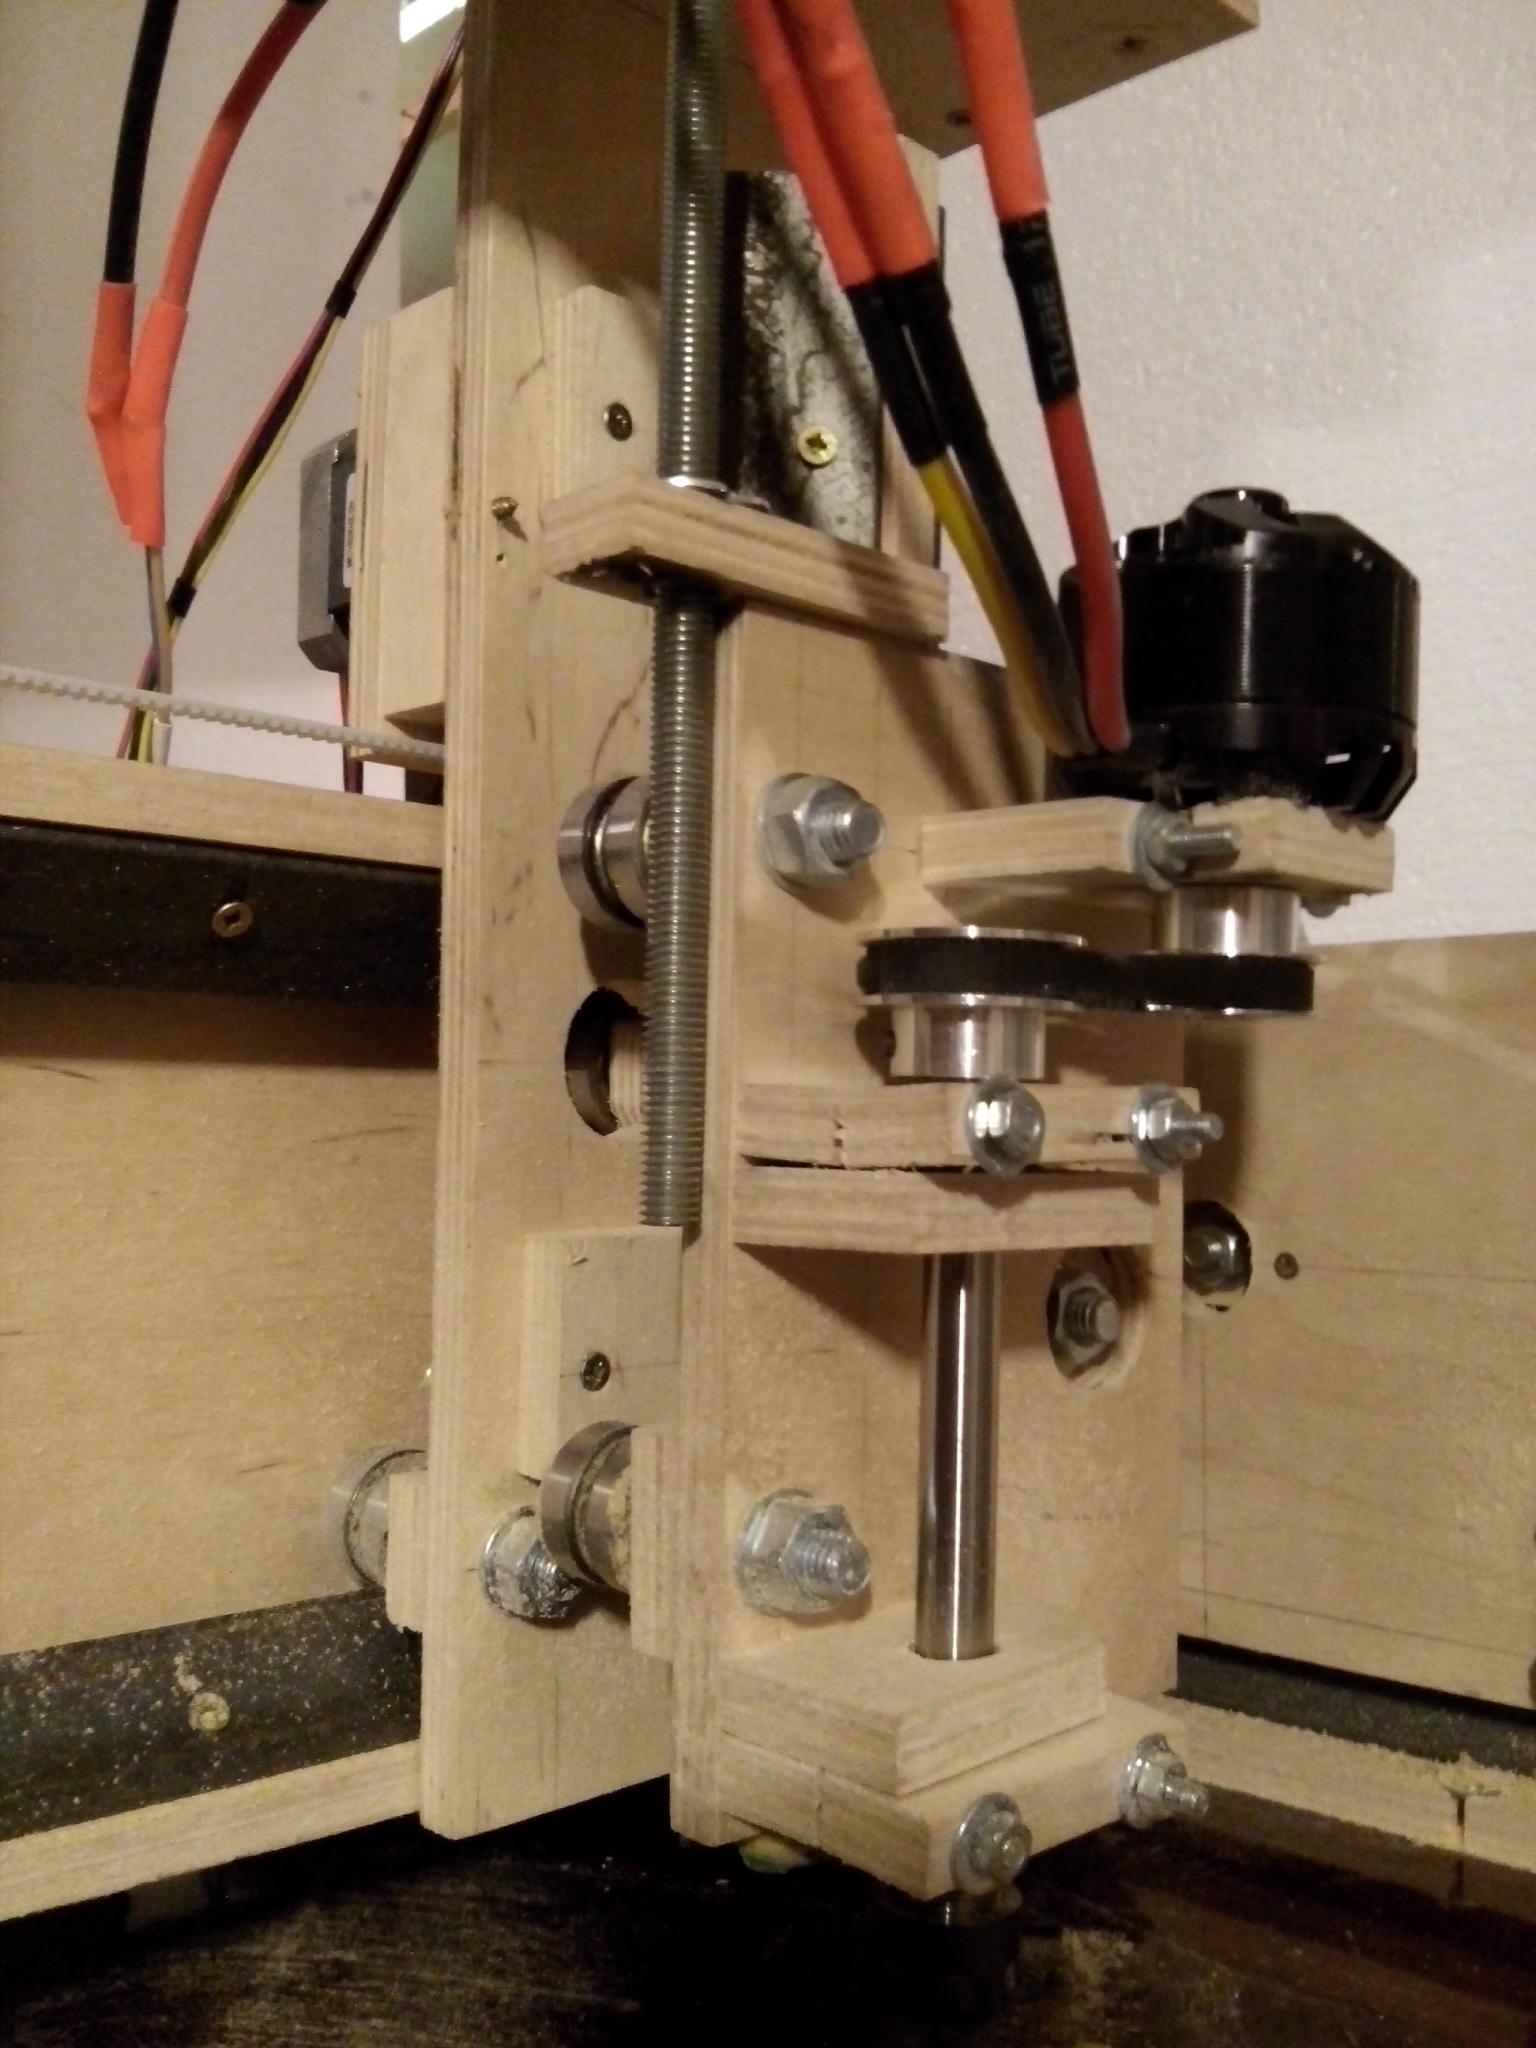
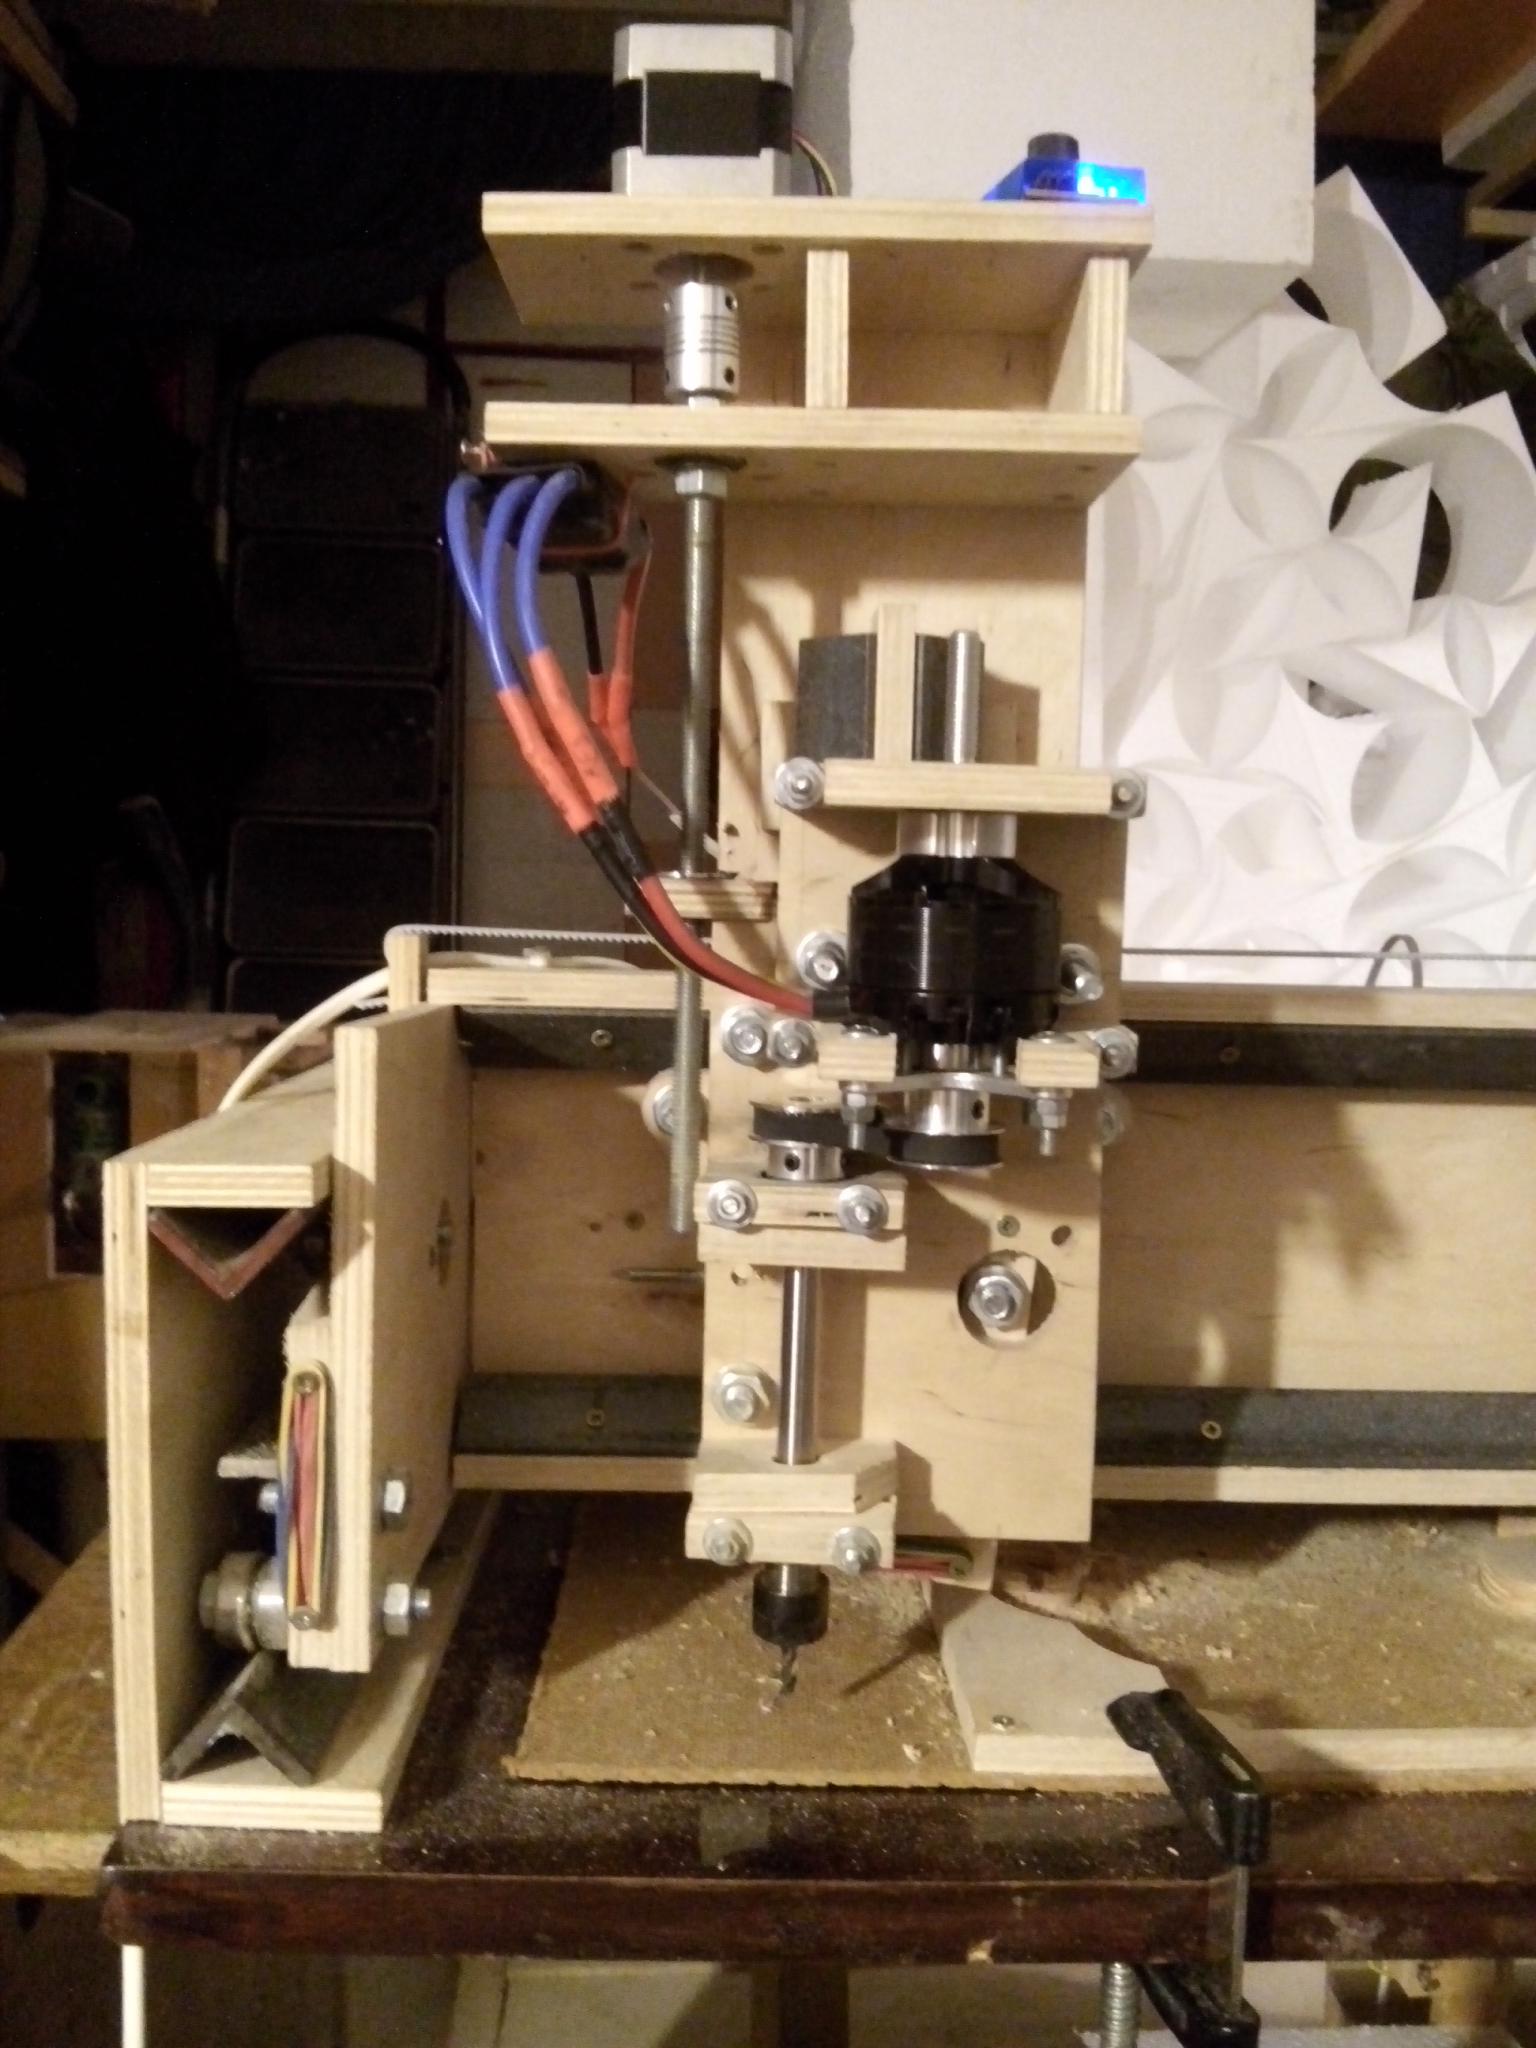
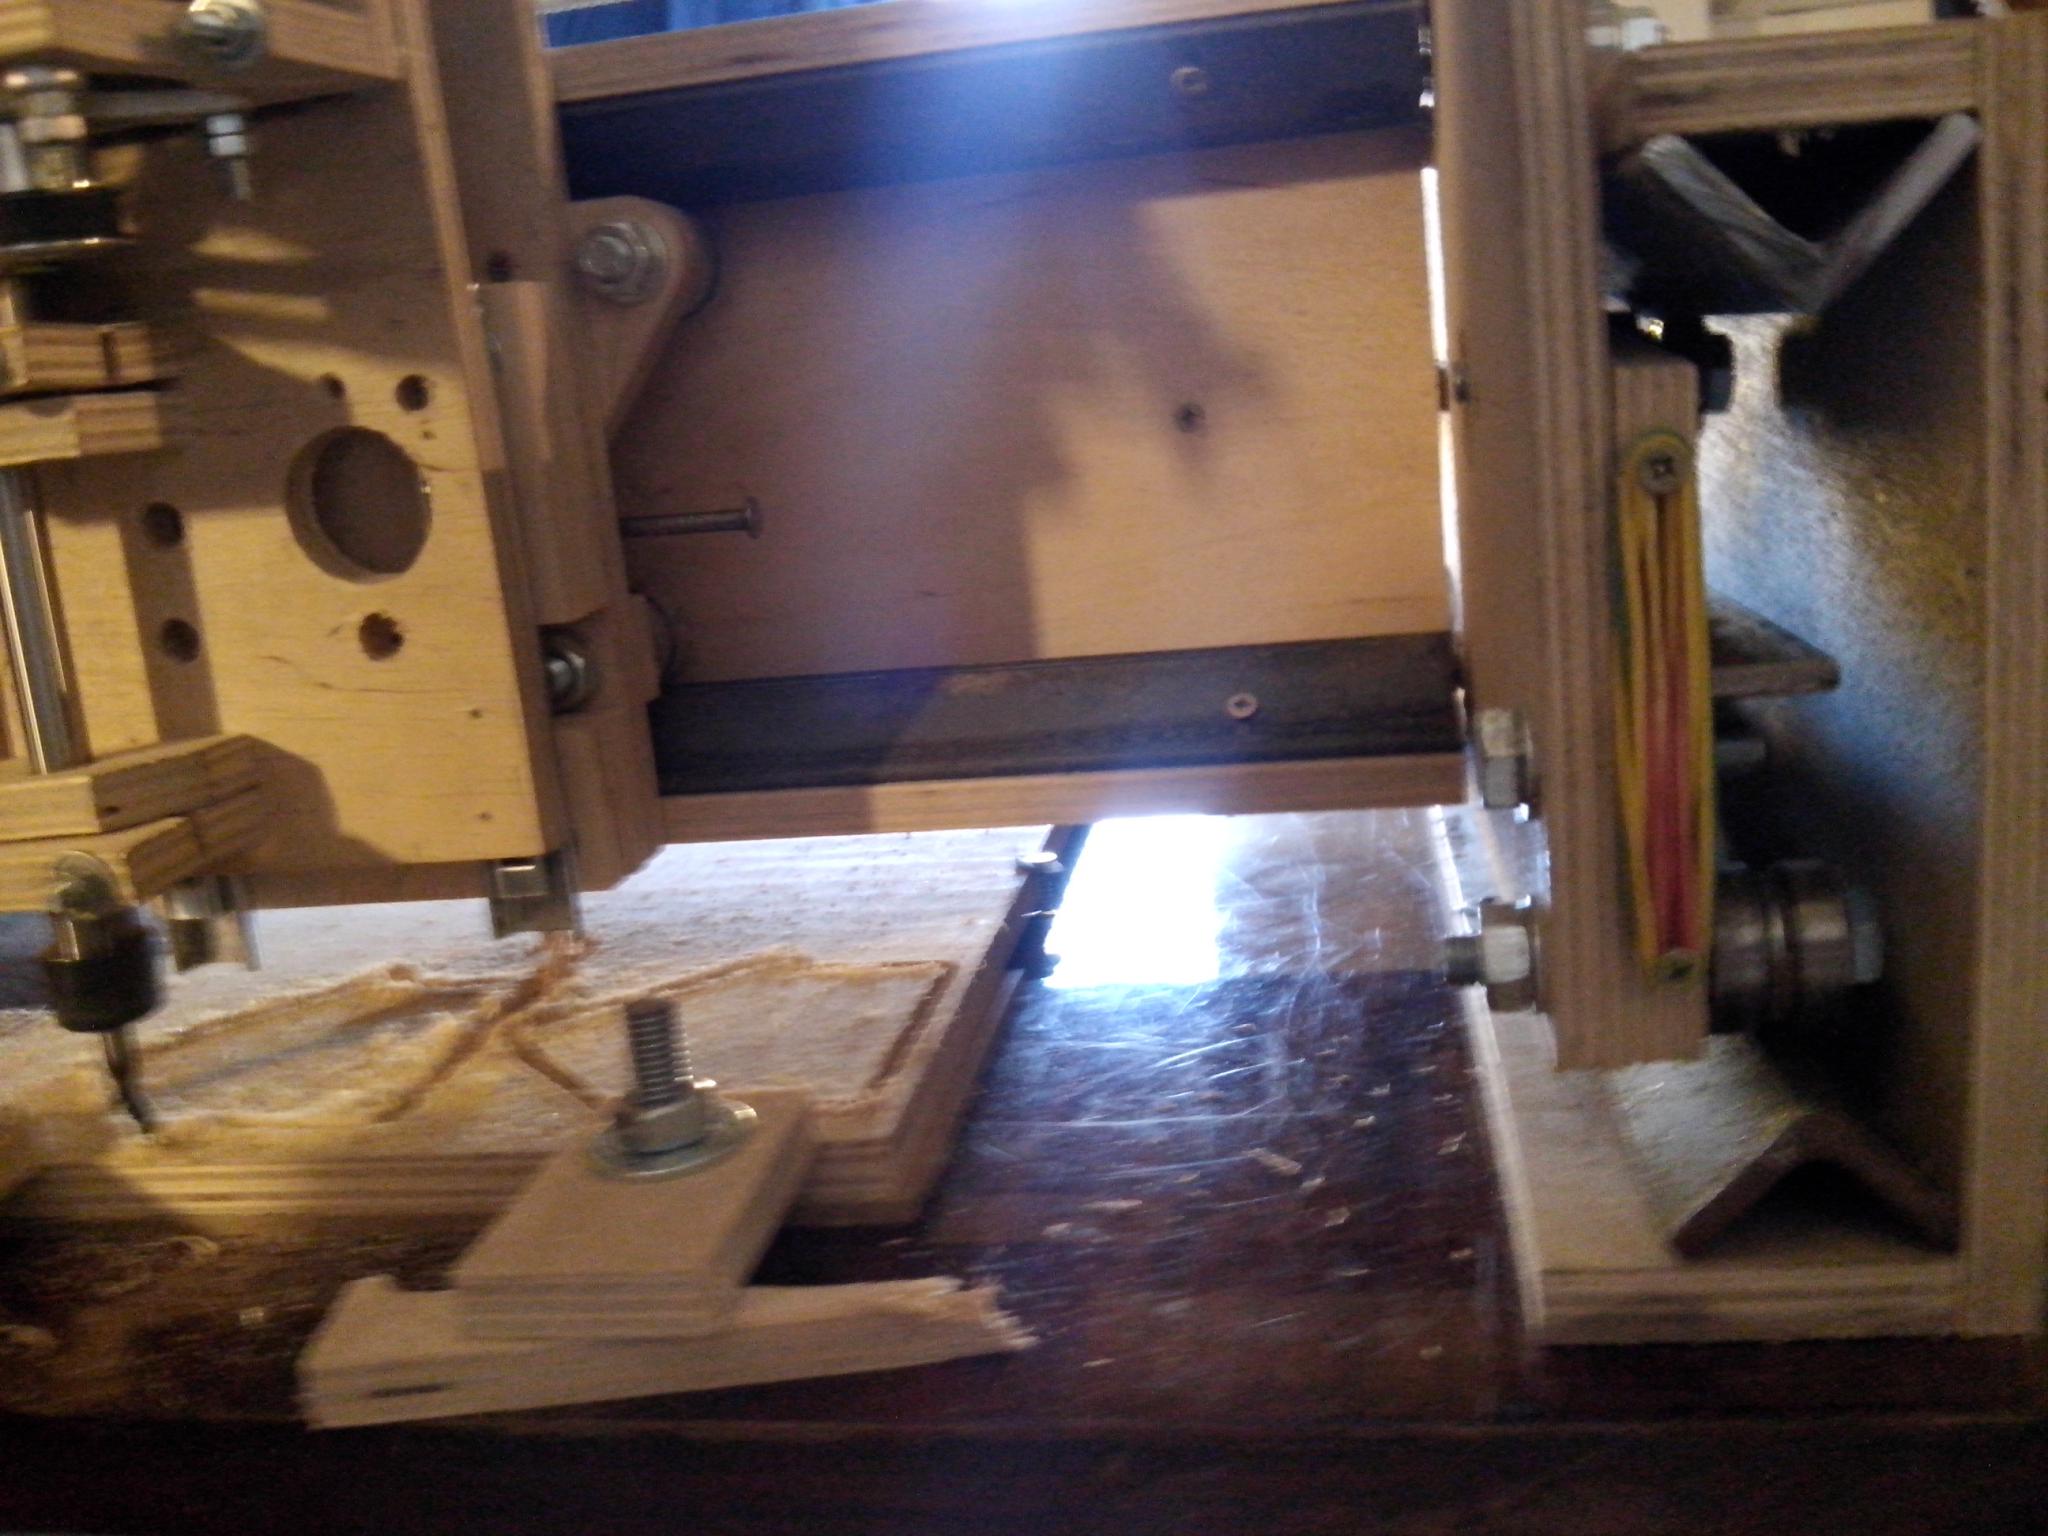
The mechanics are the most simple, the plywood frame 10mm + screws and bolts 8mm, linear guides from the metal corner 25*25*3 мм + bearings 8*7*22 мм. The Z axis moves on the stud M8, and the X and Y axes on belts T2.5.
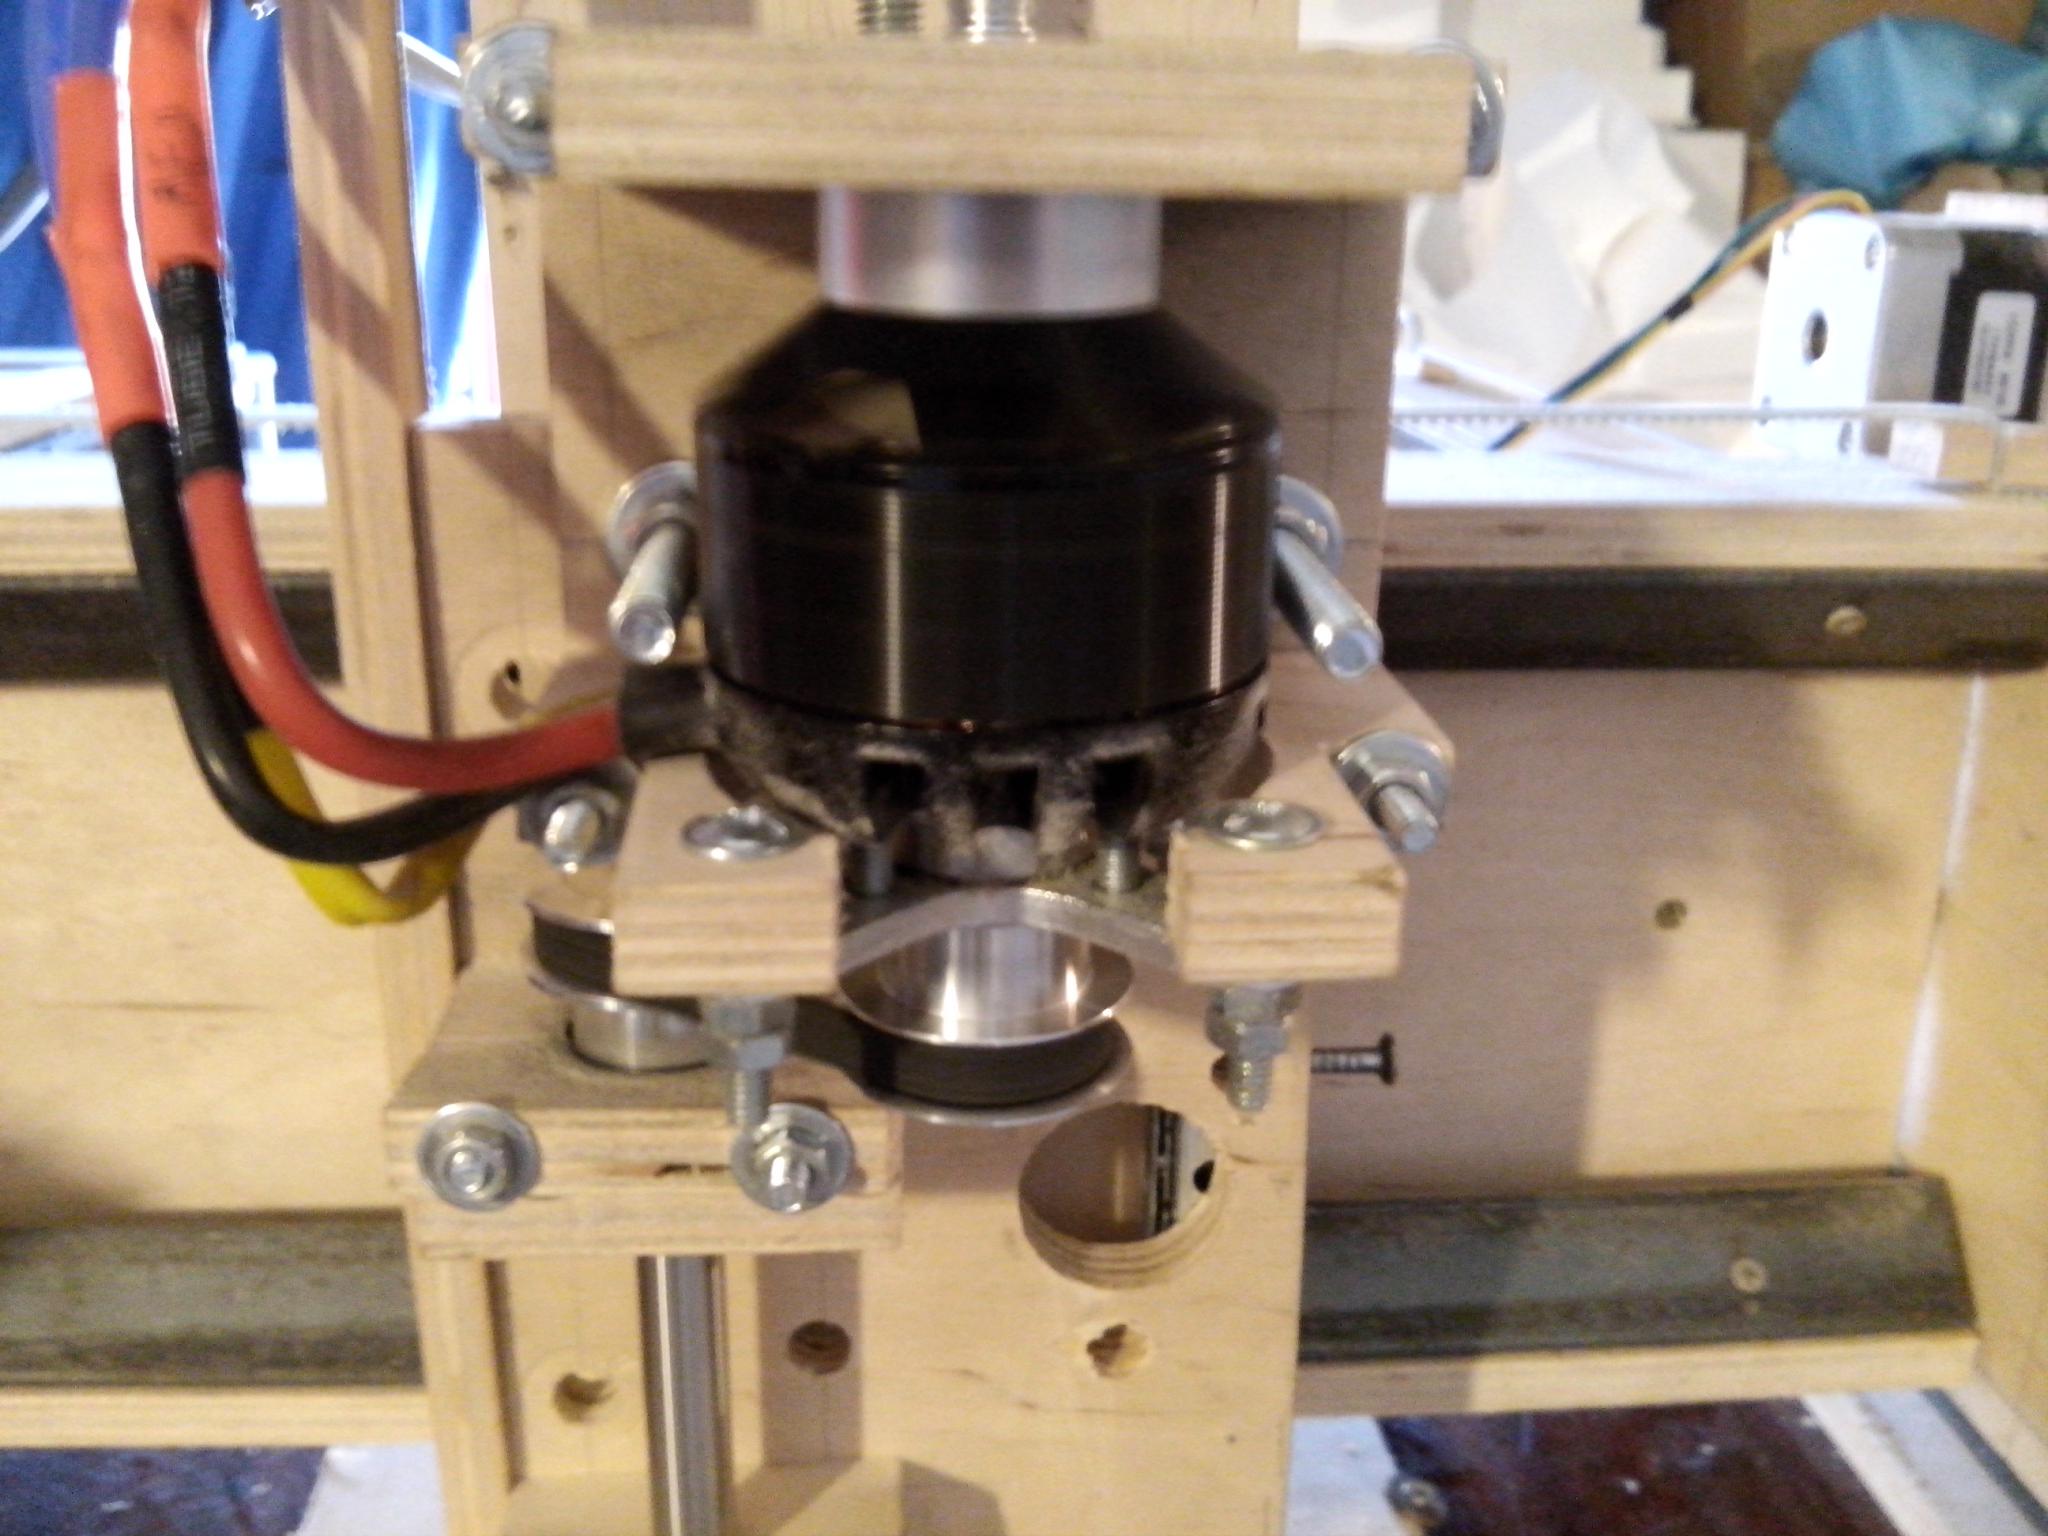
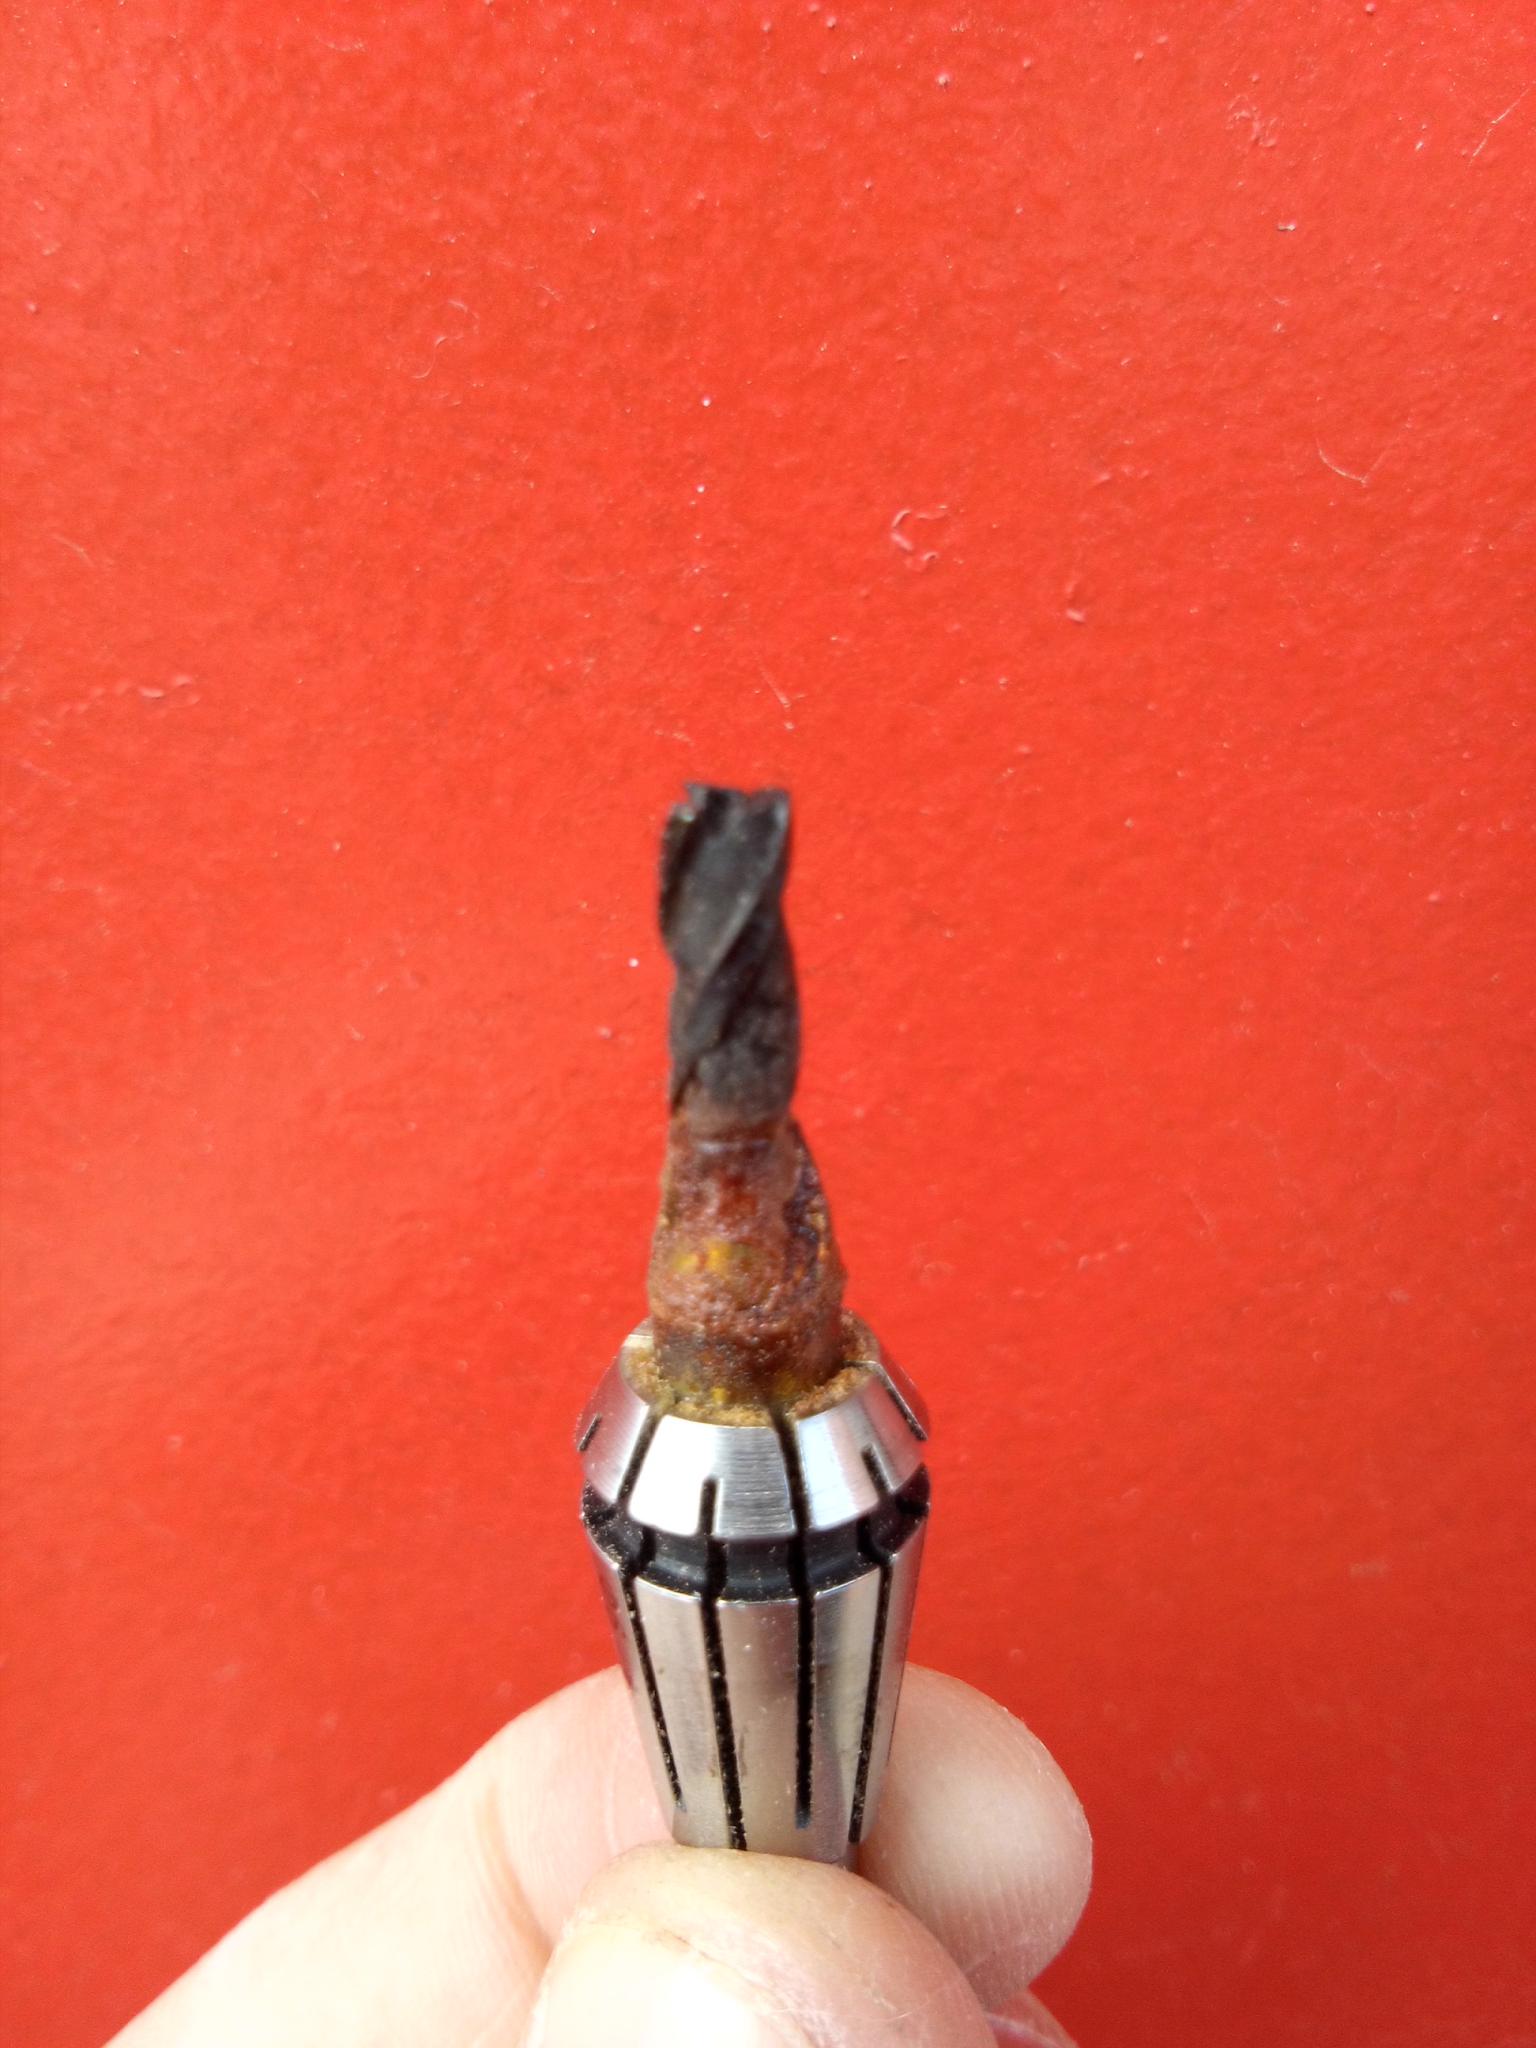
Spindle for CNC self-made, assembled from brushless motor and collet clamp + gear belt drive. It should be noted that the spindle motor is powered by the main power supply 24 volt. In the technical specifications it is indicated that the motor is at 80 amperes, but actually it consumes 4 amperes under a serious load. I can not explain why this happens, but the motor works perfectly and does its job.

Initially, the Z axis was on self-made linear guides from corners and bearings, I later remade it, the pictures and the description below.
The working space is approximately 45 cm in X and 33 cm in Y, according to Z 4 cm. Given the first experience, the next machine I will do with large dimensions and I will put two motors on the X axis, one from each side. This is due to the large shoulder and load on it, when the work is carried out at the maximum distance along the Y axis. Now there is one motor and this leads to distortion of the parts, the circle turns out to be slightly ellipsic due to the emerging deflection of the carriage on X.
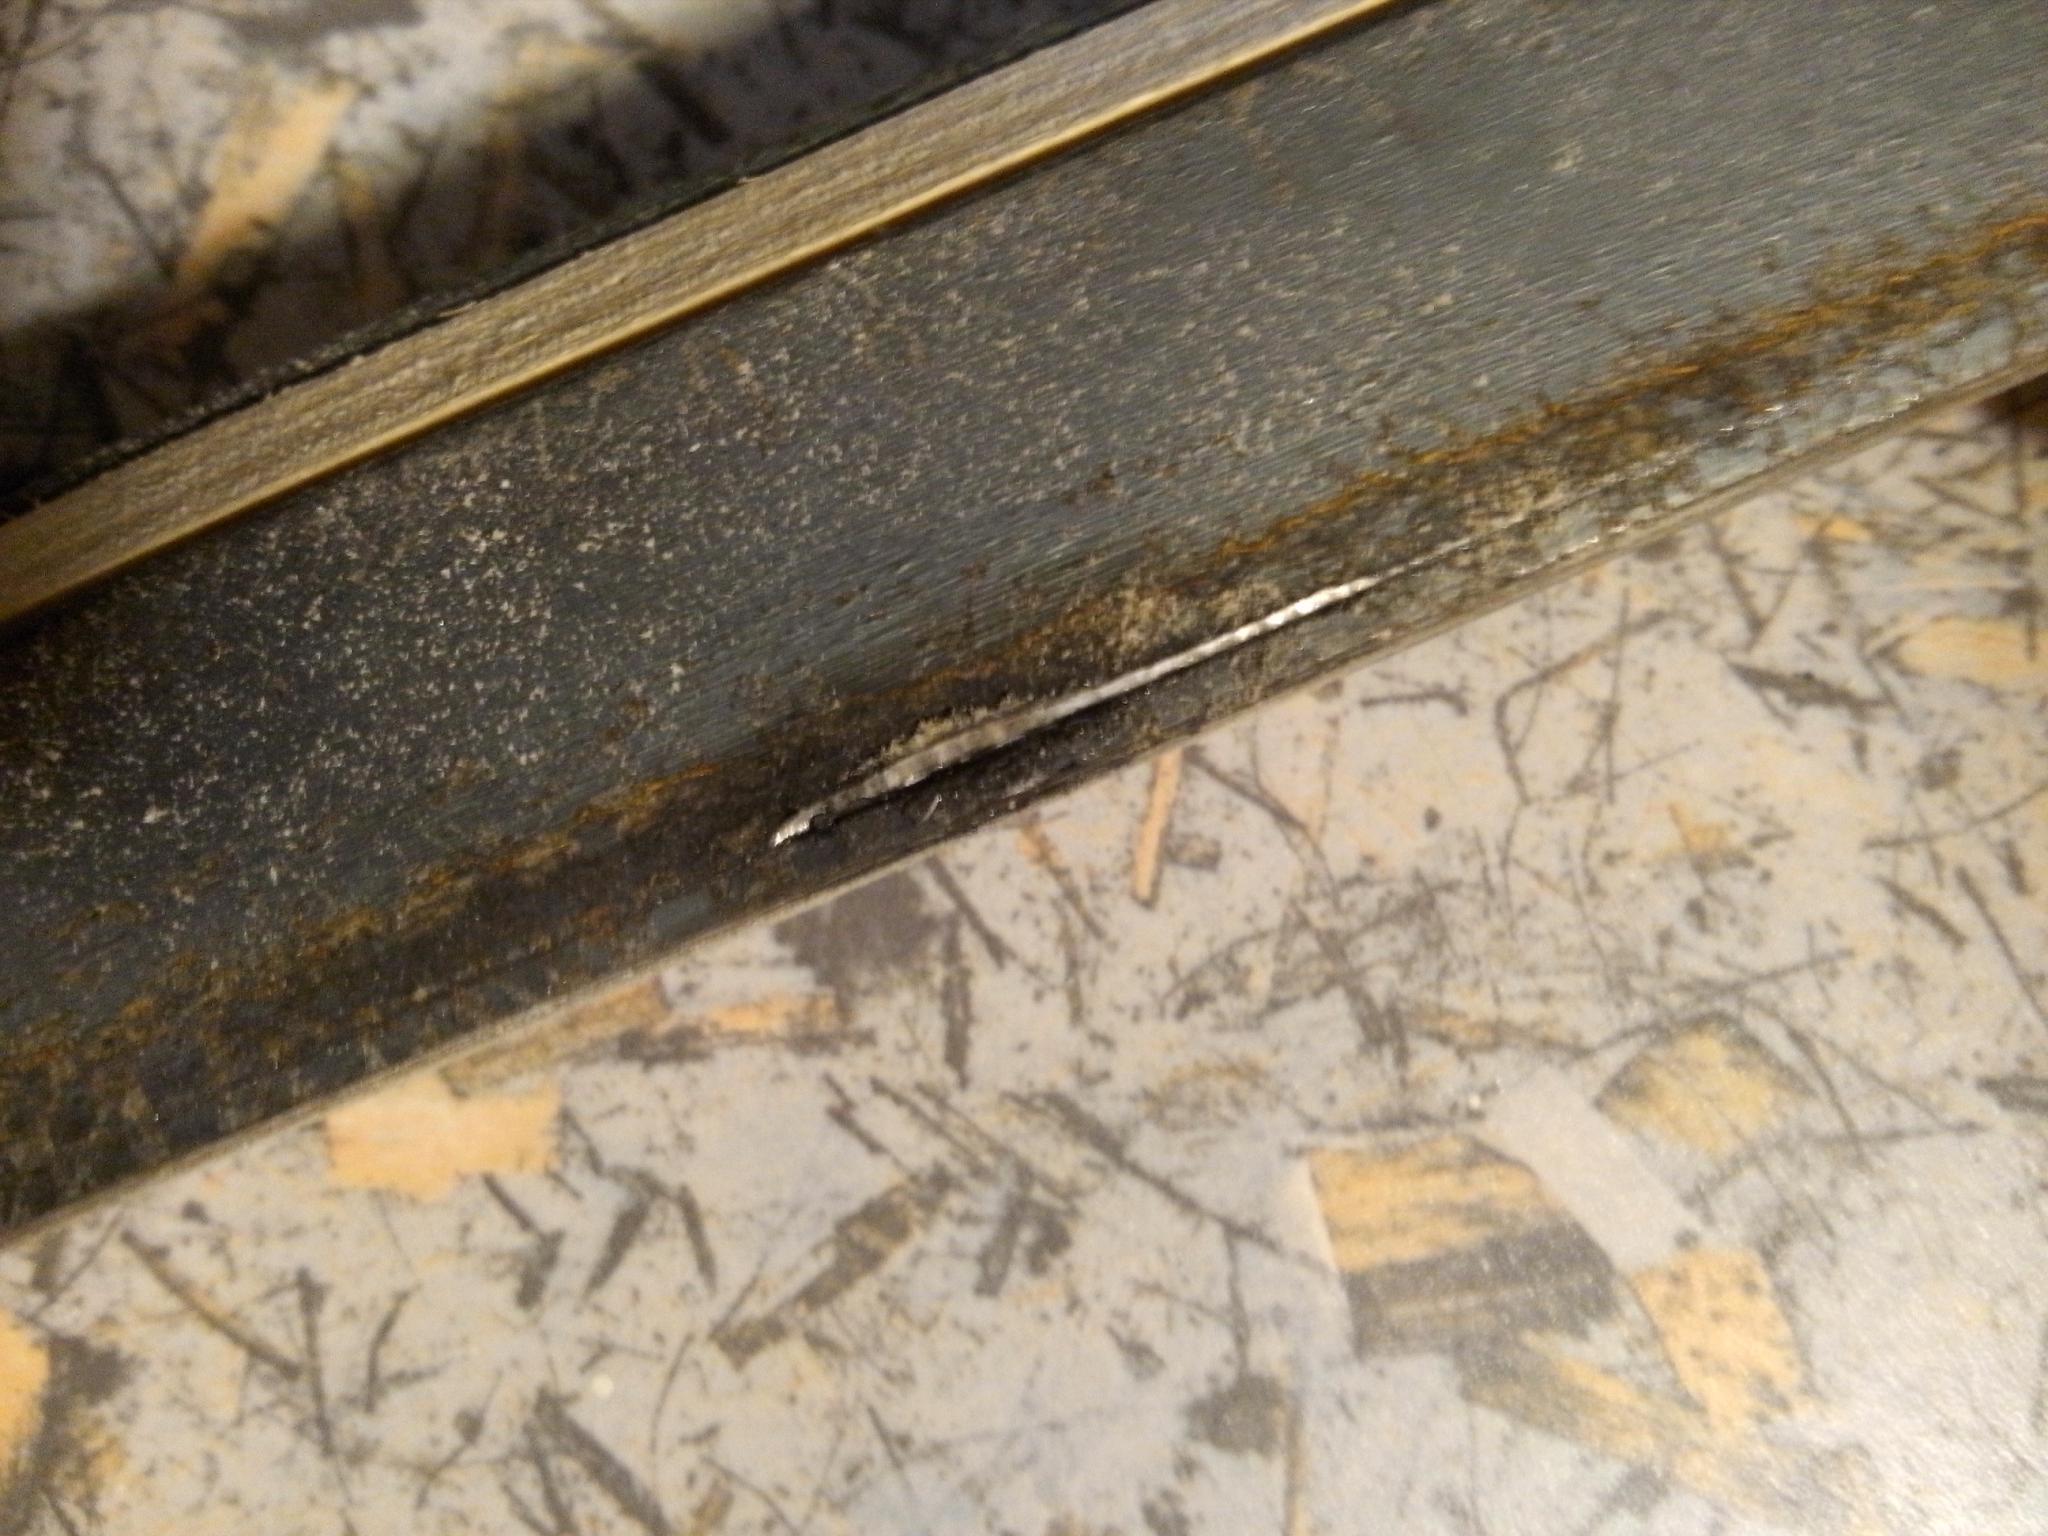
Native bearings at the motor quickly blabbed, because they are not designed for lateral load, but it's serious. Therefore, from above and from below on the axis, I installed two large bearings with a diameter of 8 mm, this should have been done immediately, now because of this there is vibration.
Here it is seen in the photo that the Z axis is already on the other linear guides, the description will be lower.
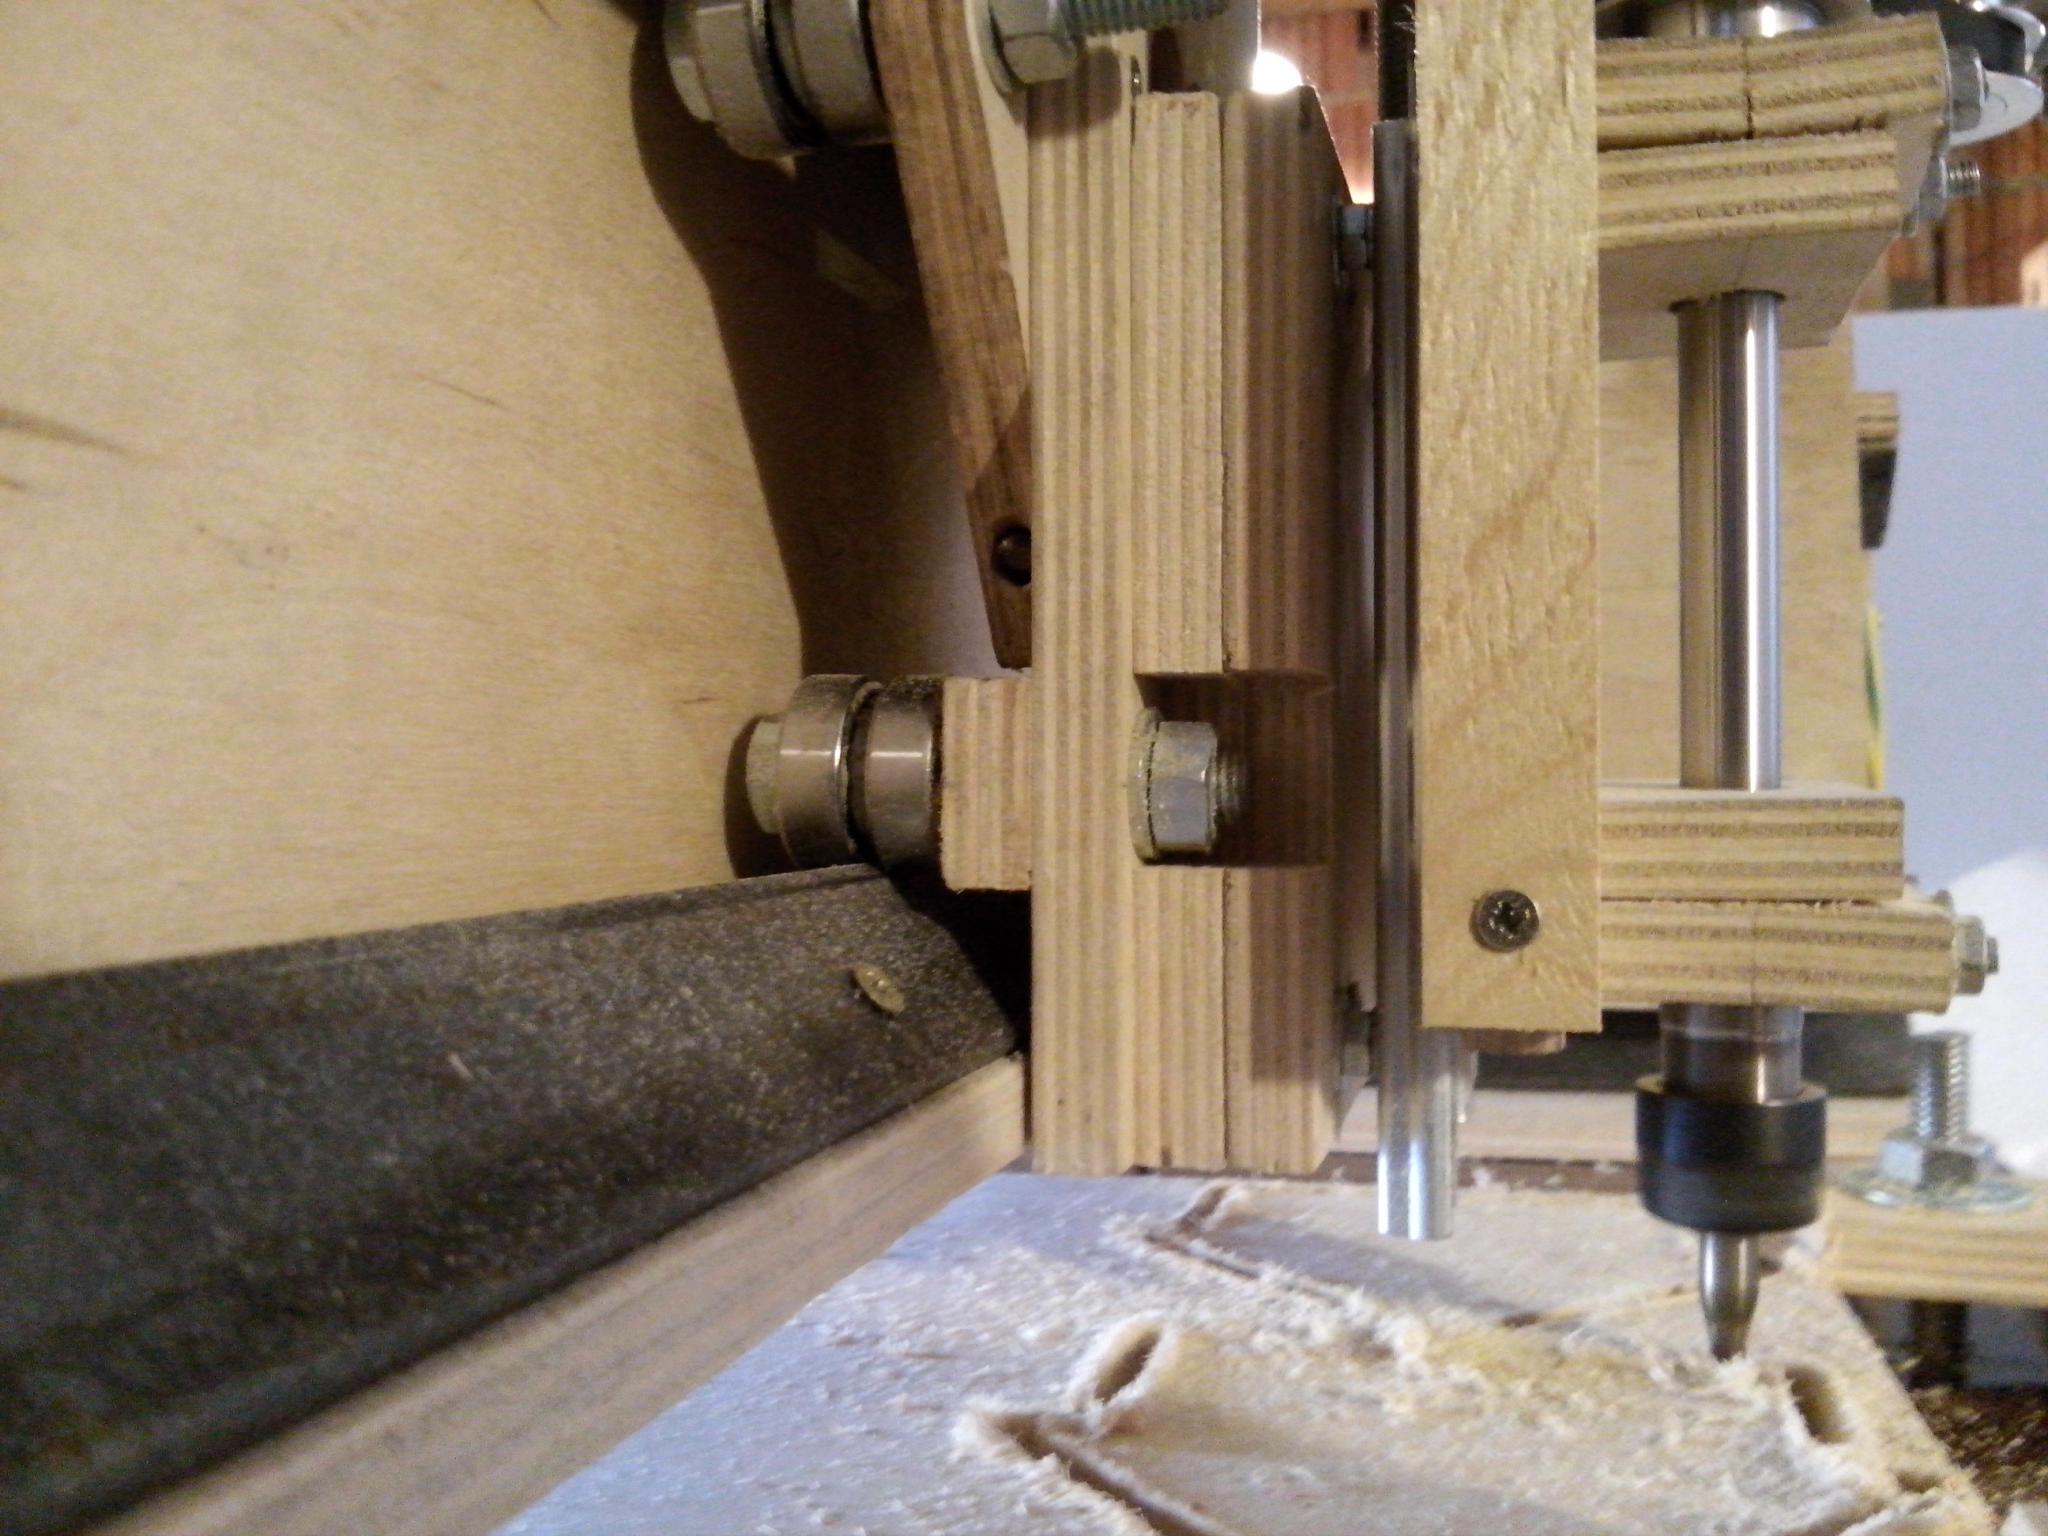
The guides themselves have a very simple construction, I somehow accidentally found it on Youtube. Then this design seemed to me ideal from all sides, minimum of effort, minimum details, simple assembly. But as practice has shown, these guides do not work long. The photo shows which groove formed on the Z axis after a week of my test runs of the CNC machine.
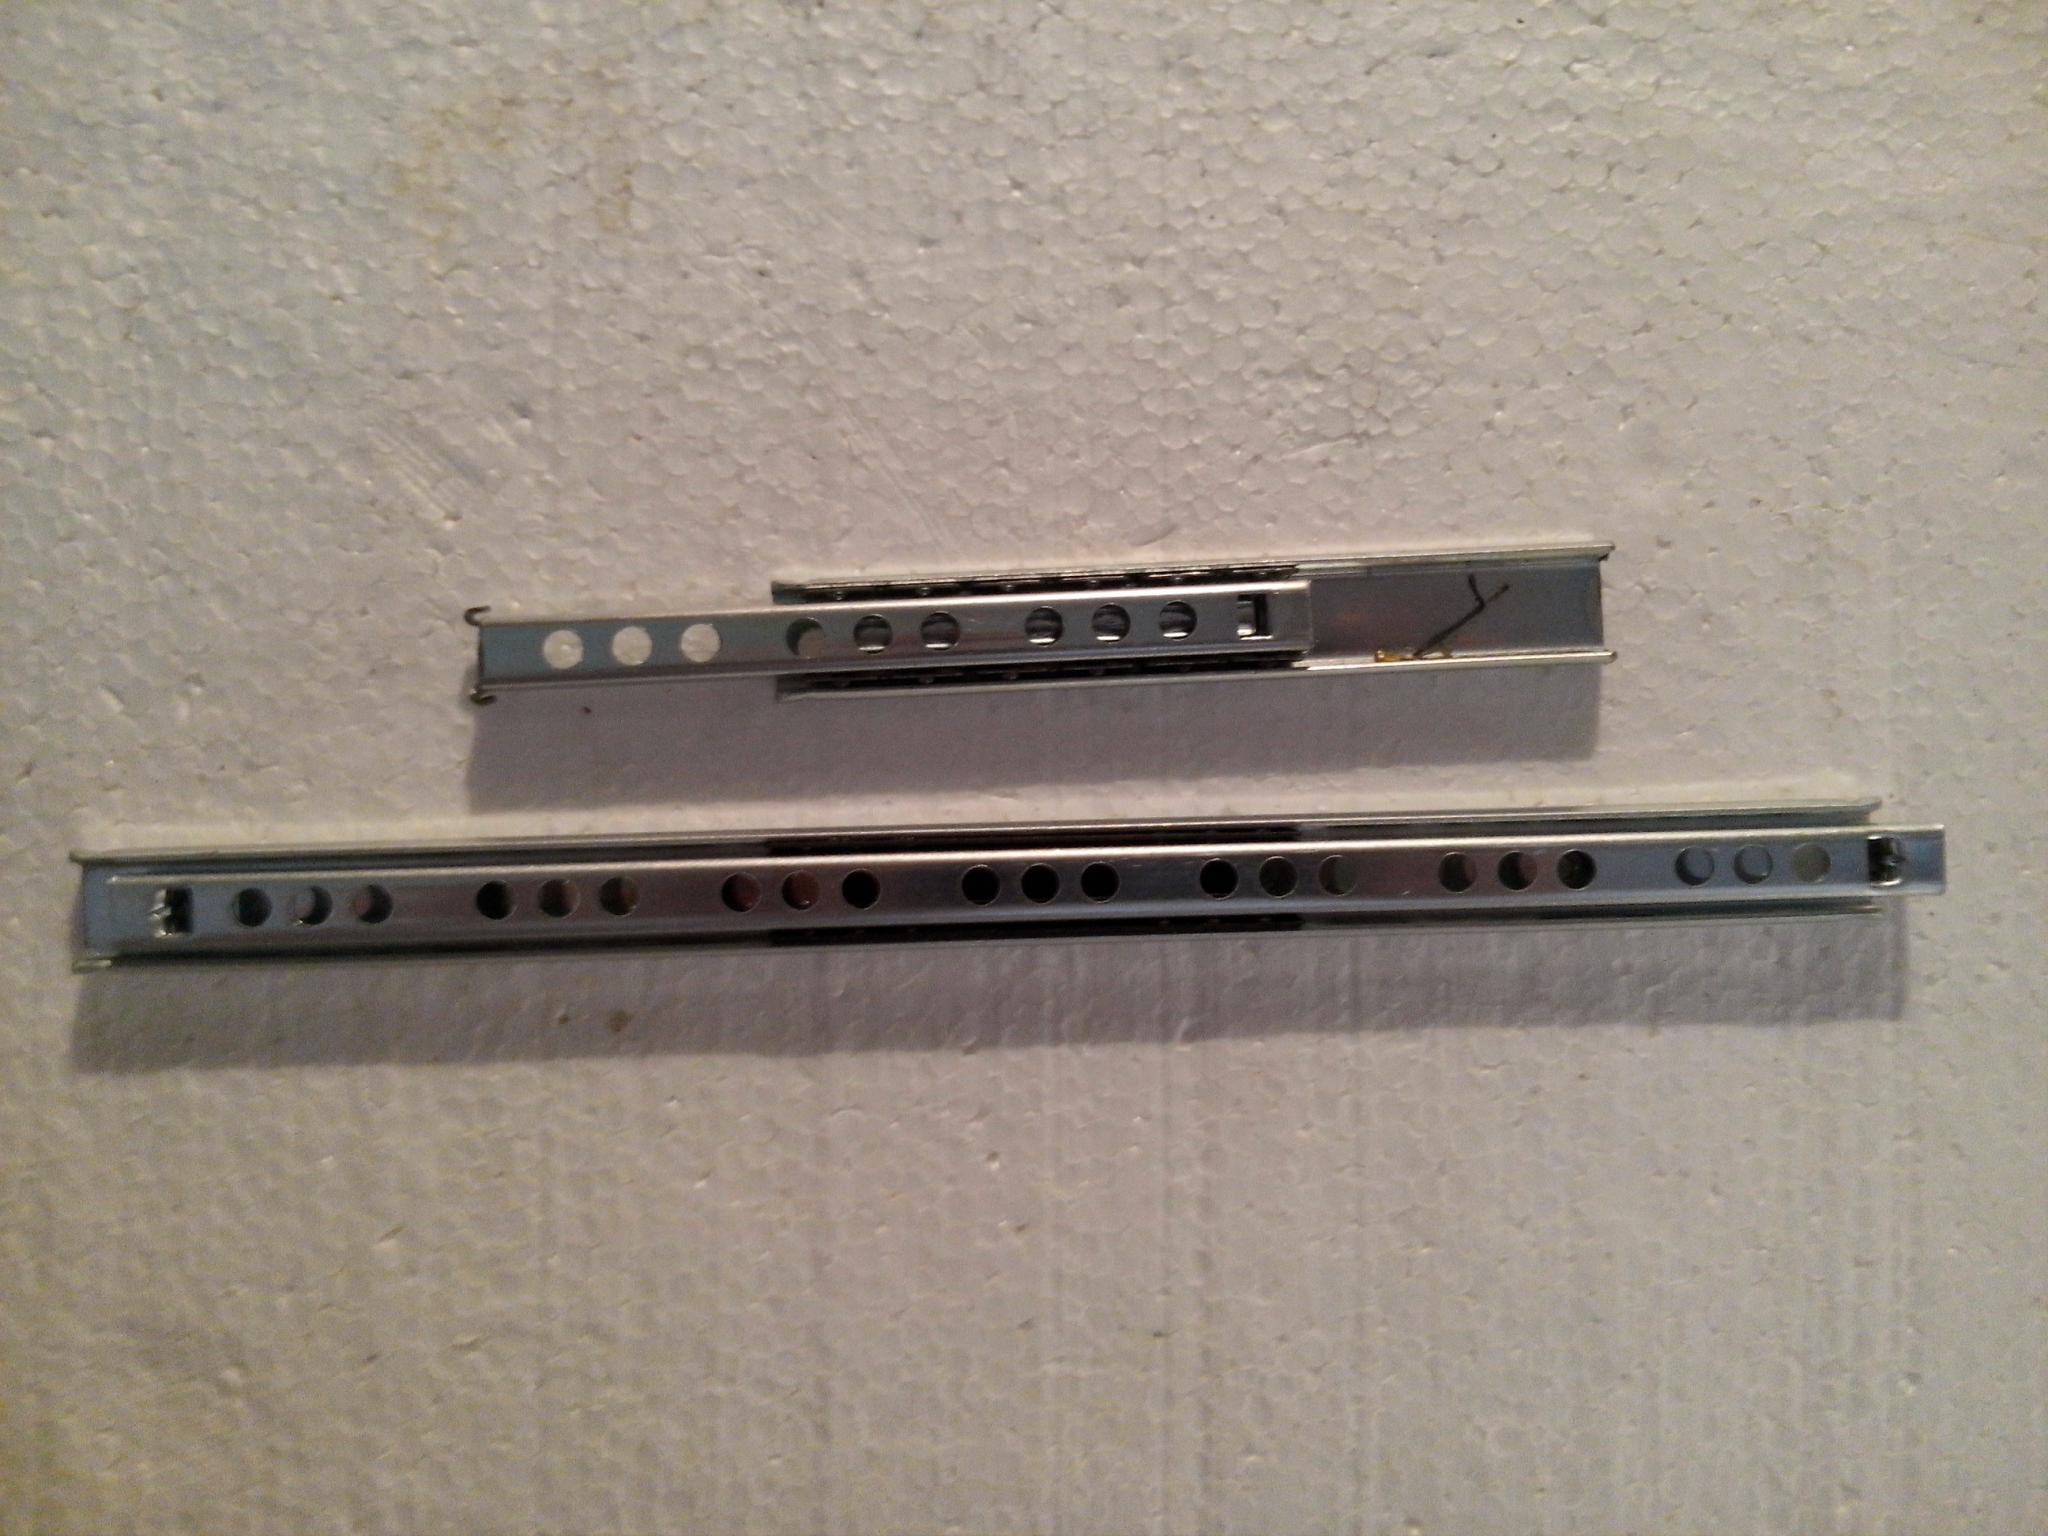
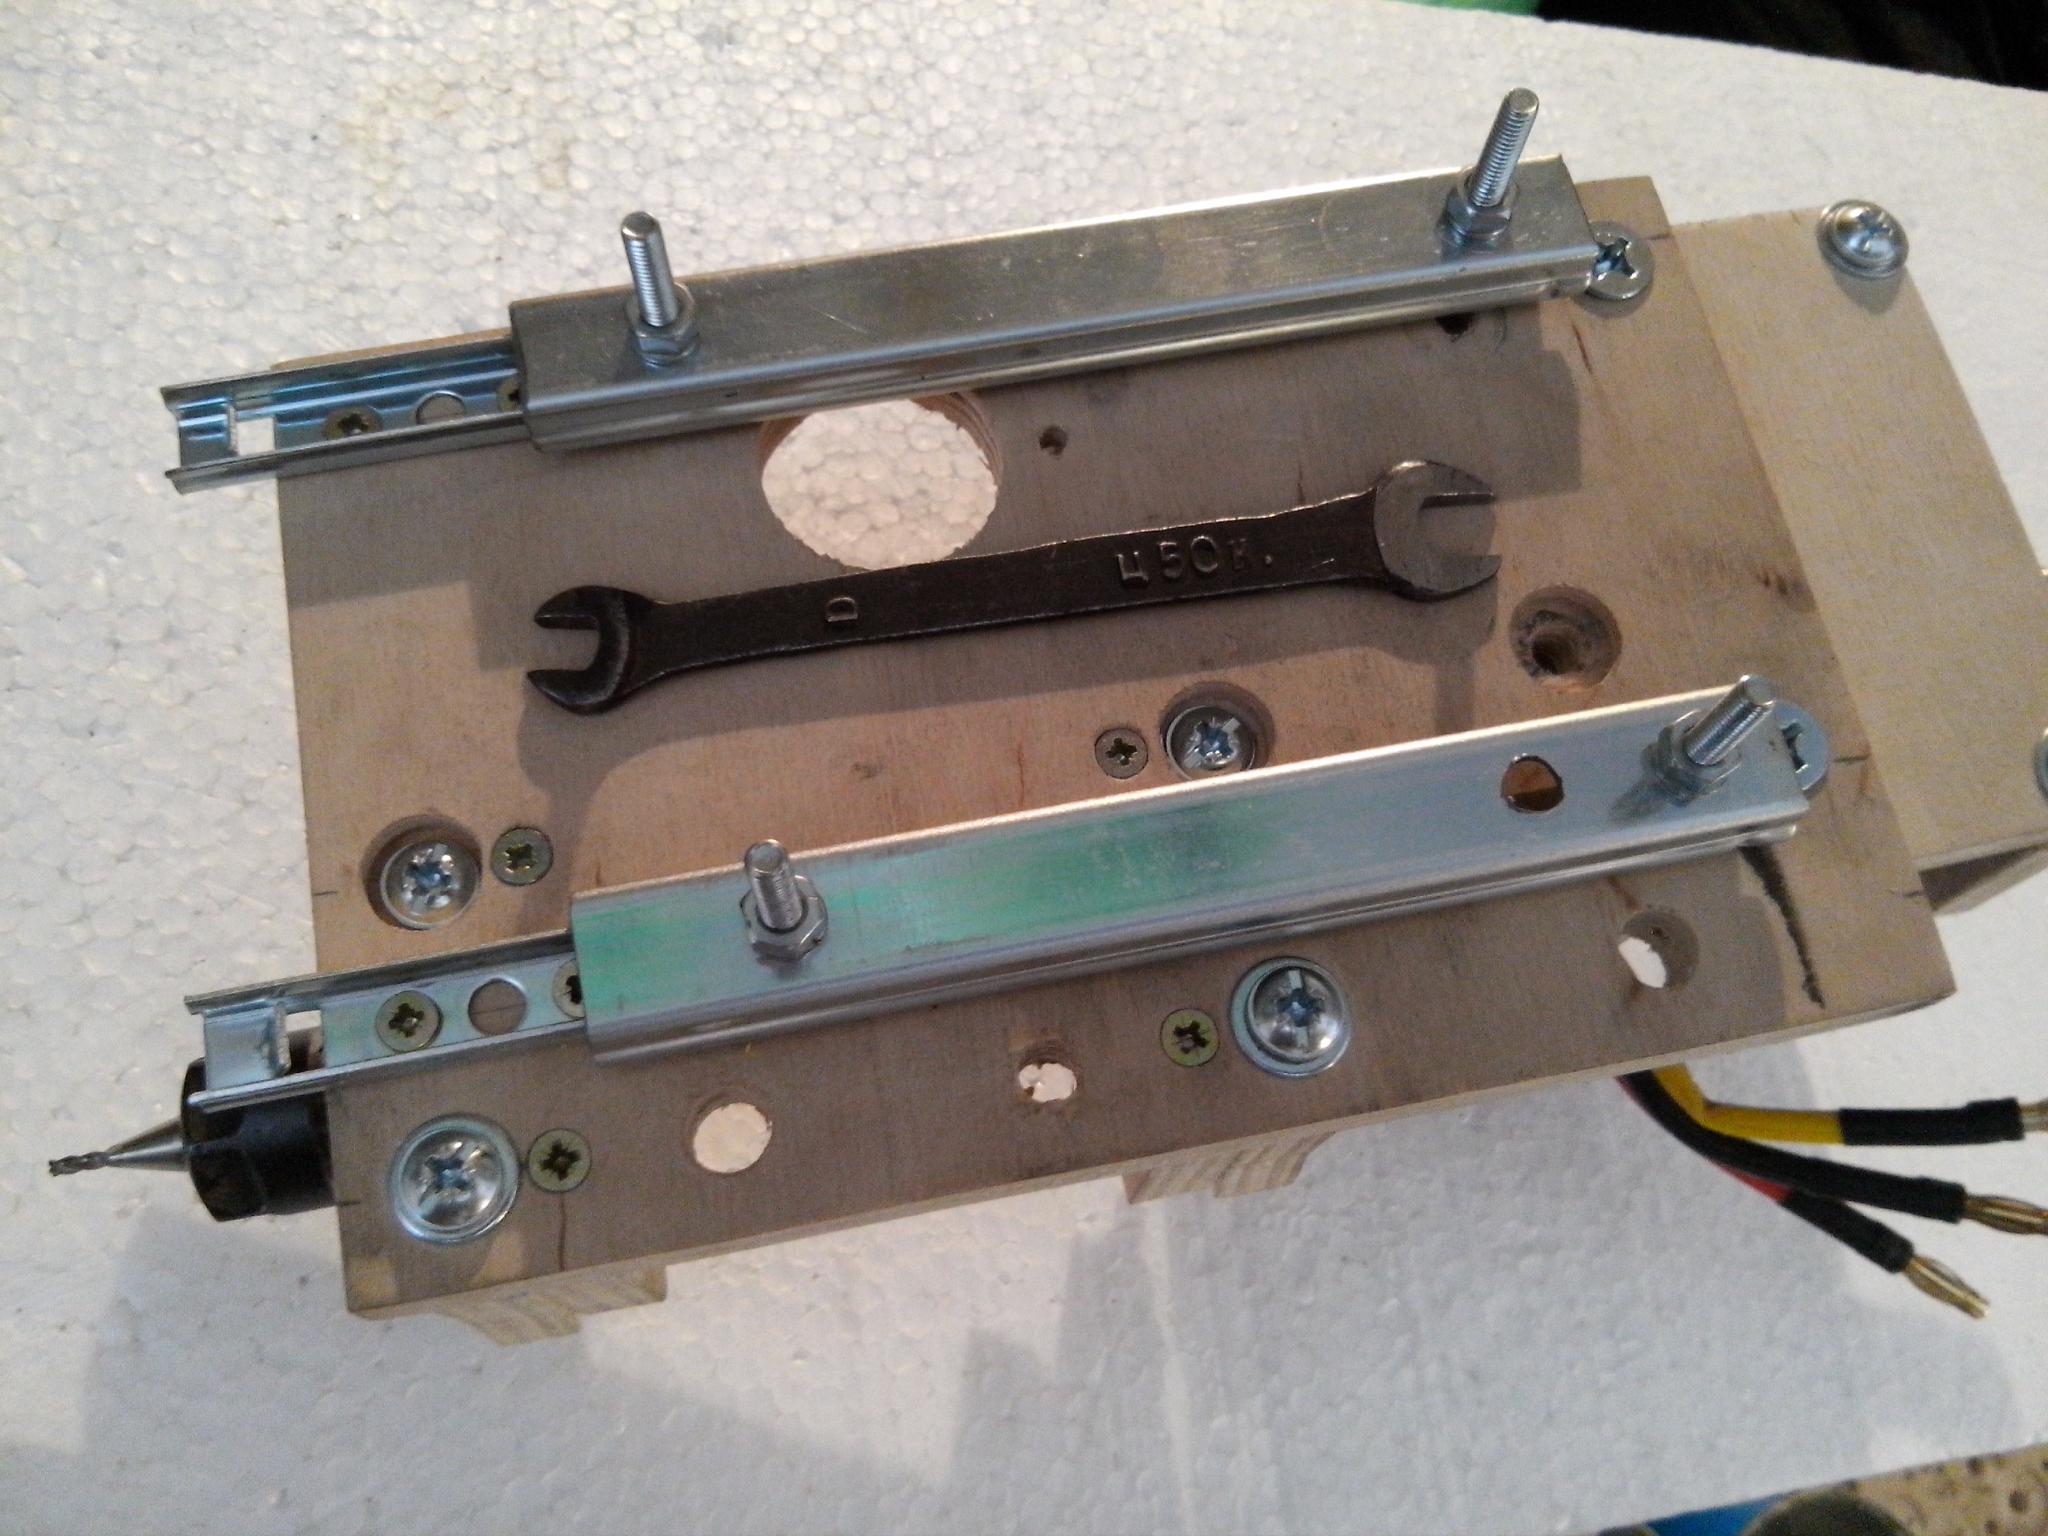
Homemade guides on the Z axis, I replaced the furniture, cost less than a dollar for two pieces. I shortened them, left a course of 8 cm. On the axes X and Y there are still guides old, I will not change yet, I plan on this machine to cut out details for a new machine, then I'll just disassemble it.
A few words about the cutters. I have never worked with CNC and my milling experience is also very small. I bought several cutters in China, all 3 and 4 grooves, later I realized that these cutters are good for metal, for milling plywood, you need other cutters. While new cutters overcome the distance from China to Belarus, I try to work with what is.
In the photo it is visible as a 4 mm cutter burned on a birch plywood 10 mm, I still did not understand why, the plywood is clean, and on the milling cut the pitch is similar to that of pine.
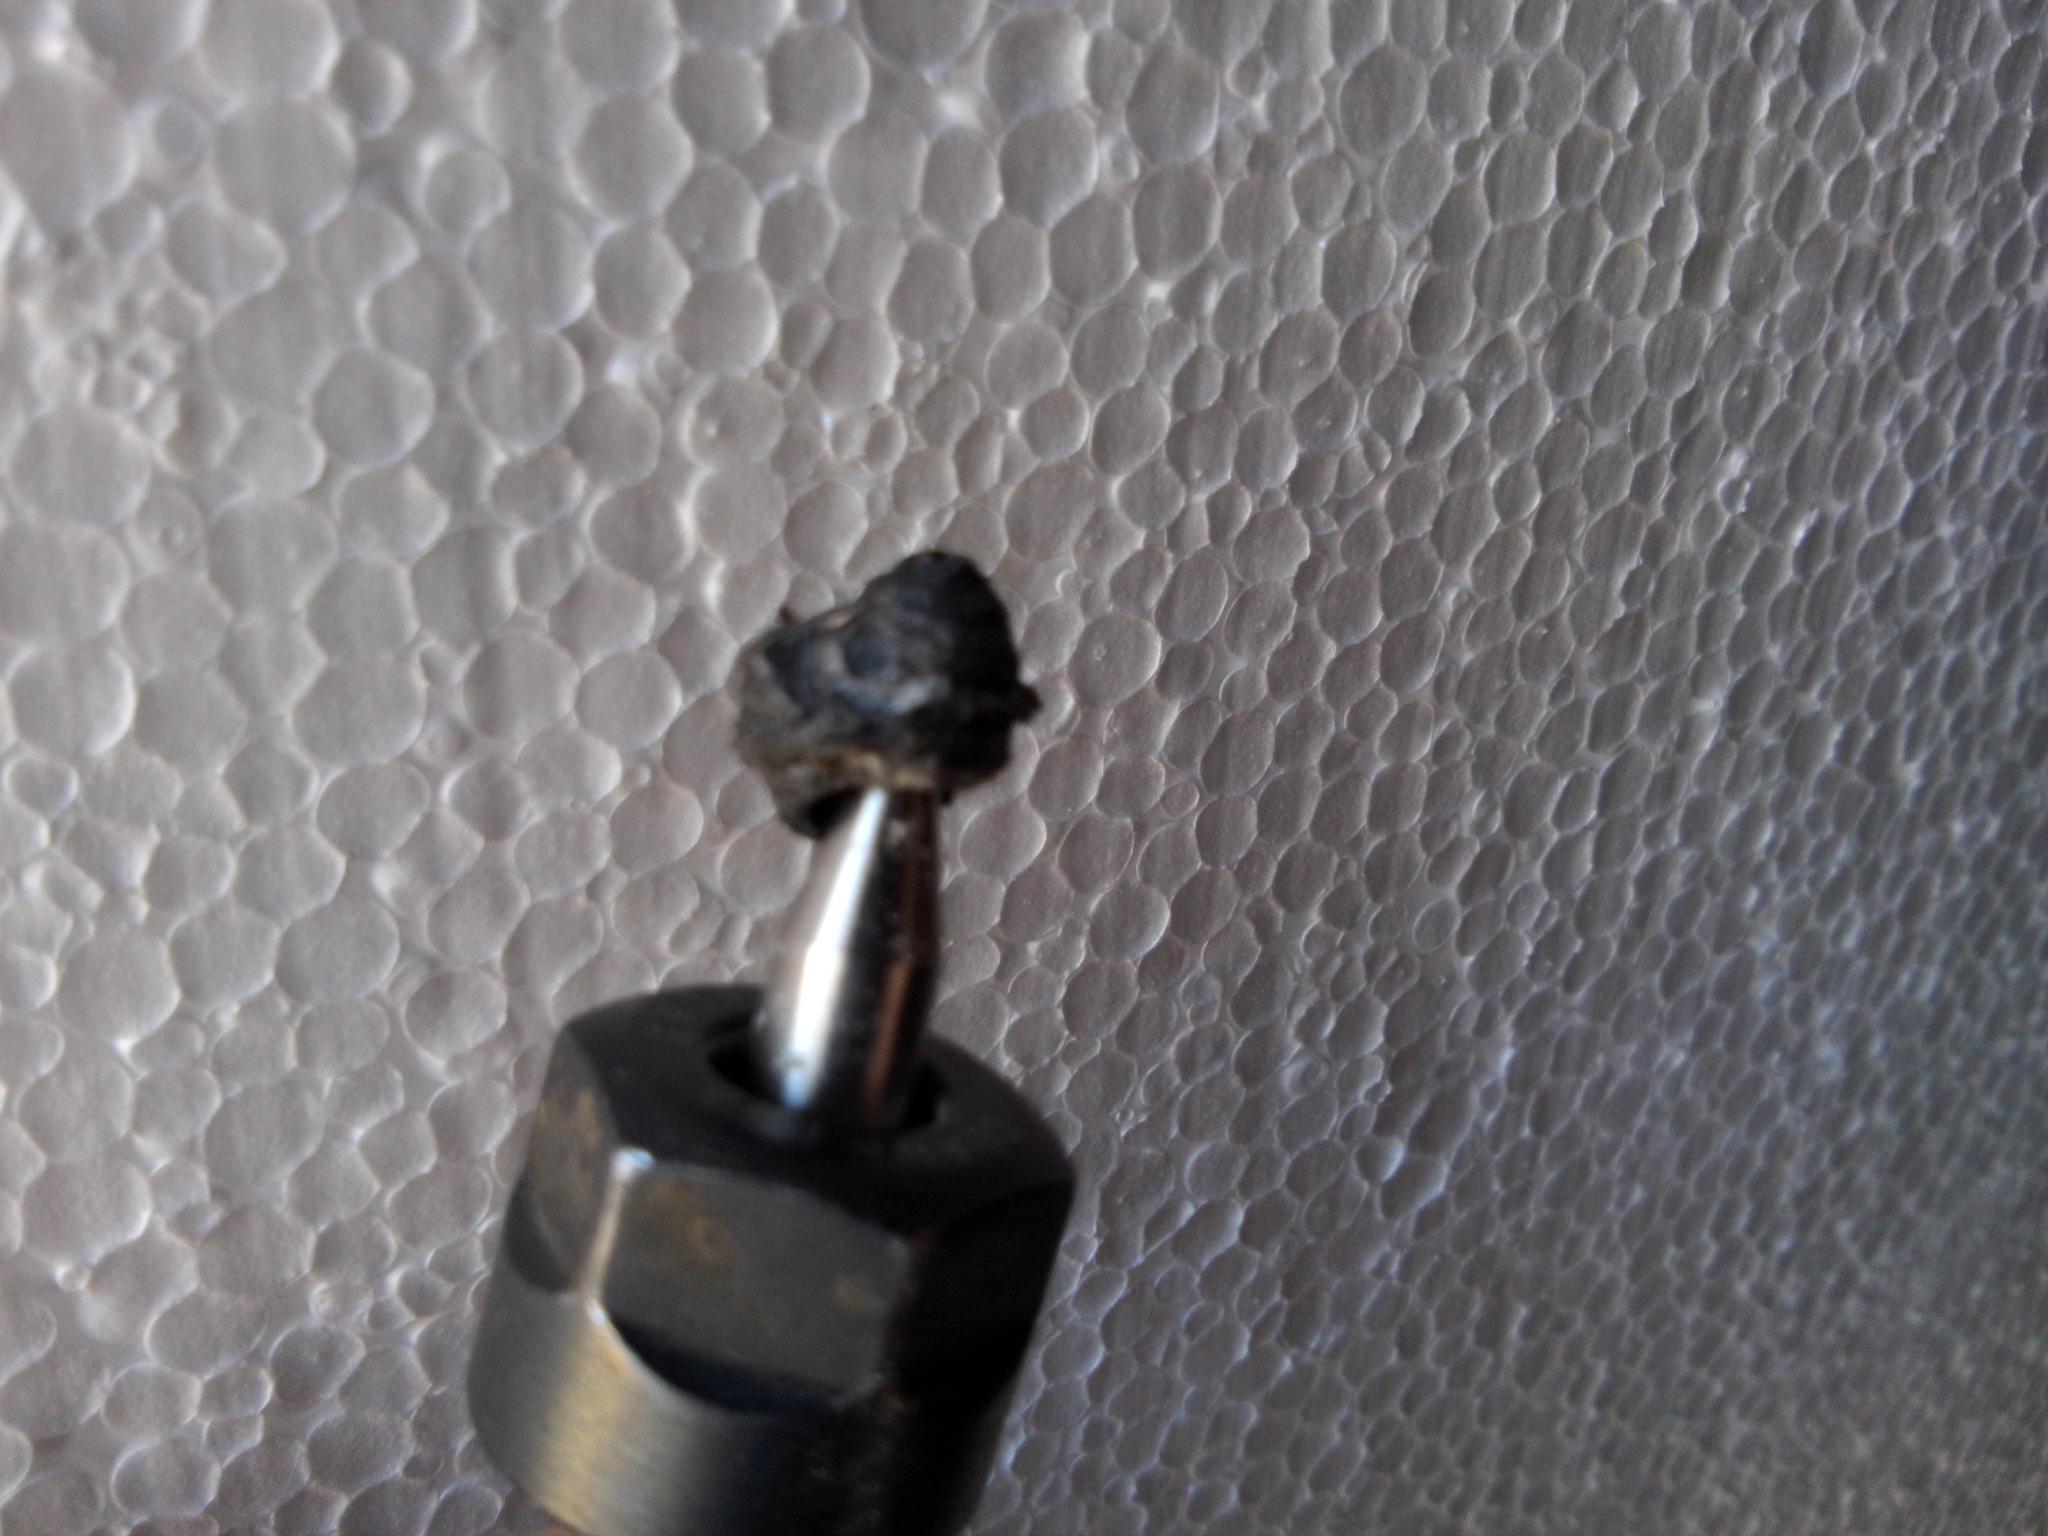
Next, on the photo, the 2 mm milling cutter is a four-blade after milling the plastic. This piece of melted plastic was then very badly removed, biting off a bit of nippers. Even at low speeds, the milling cutter still gets stuck, 4 grooves clearly for the metal :)
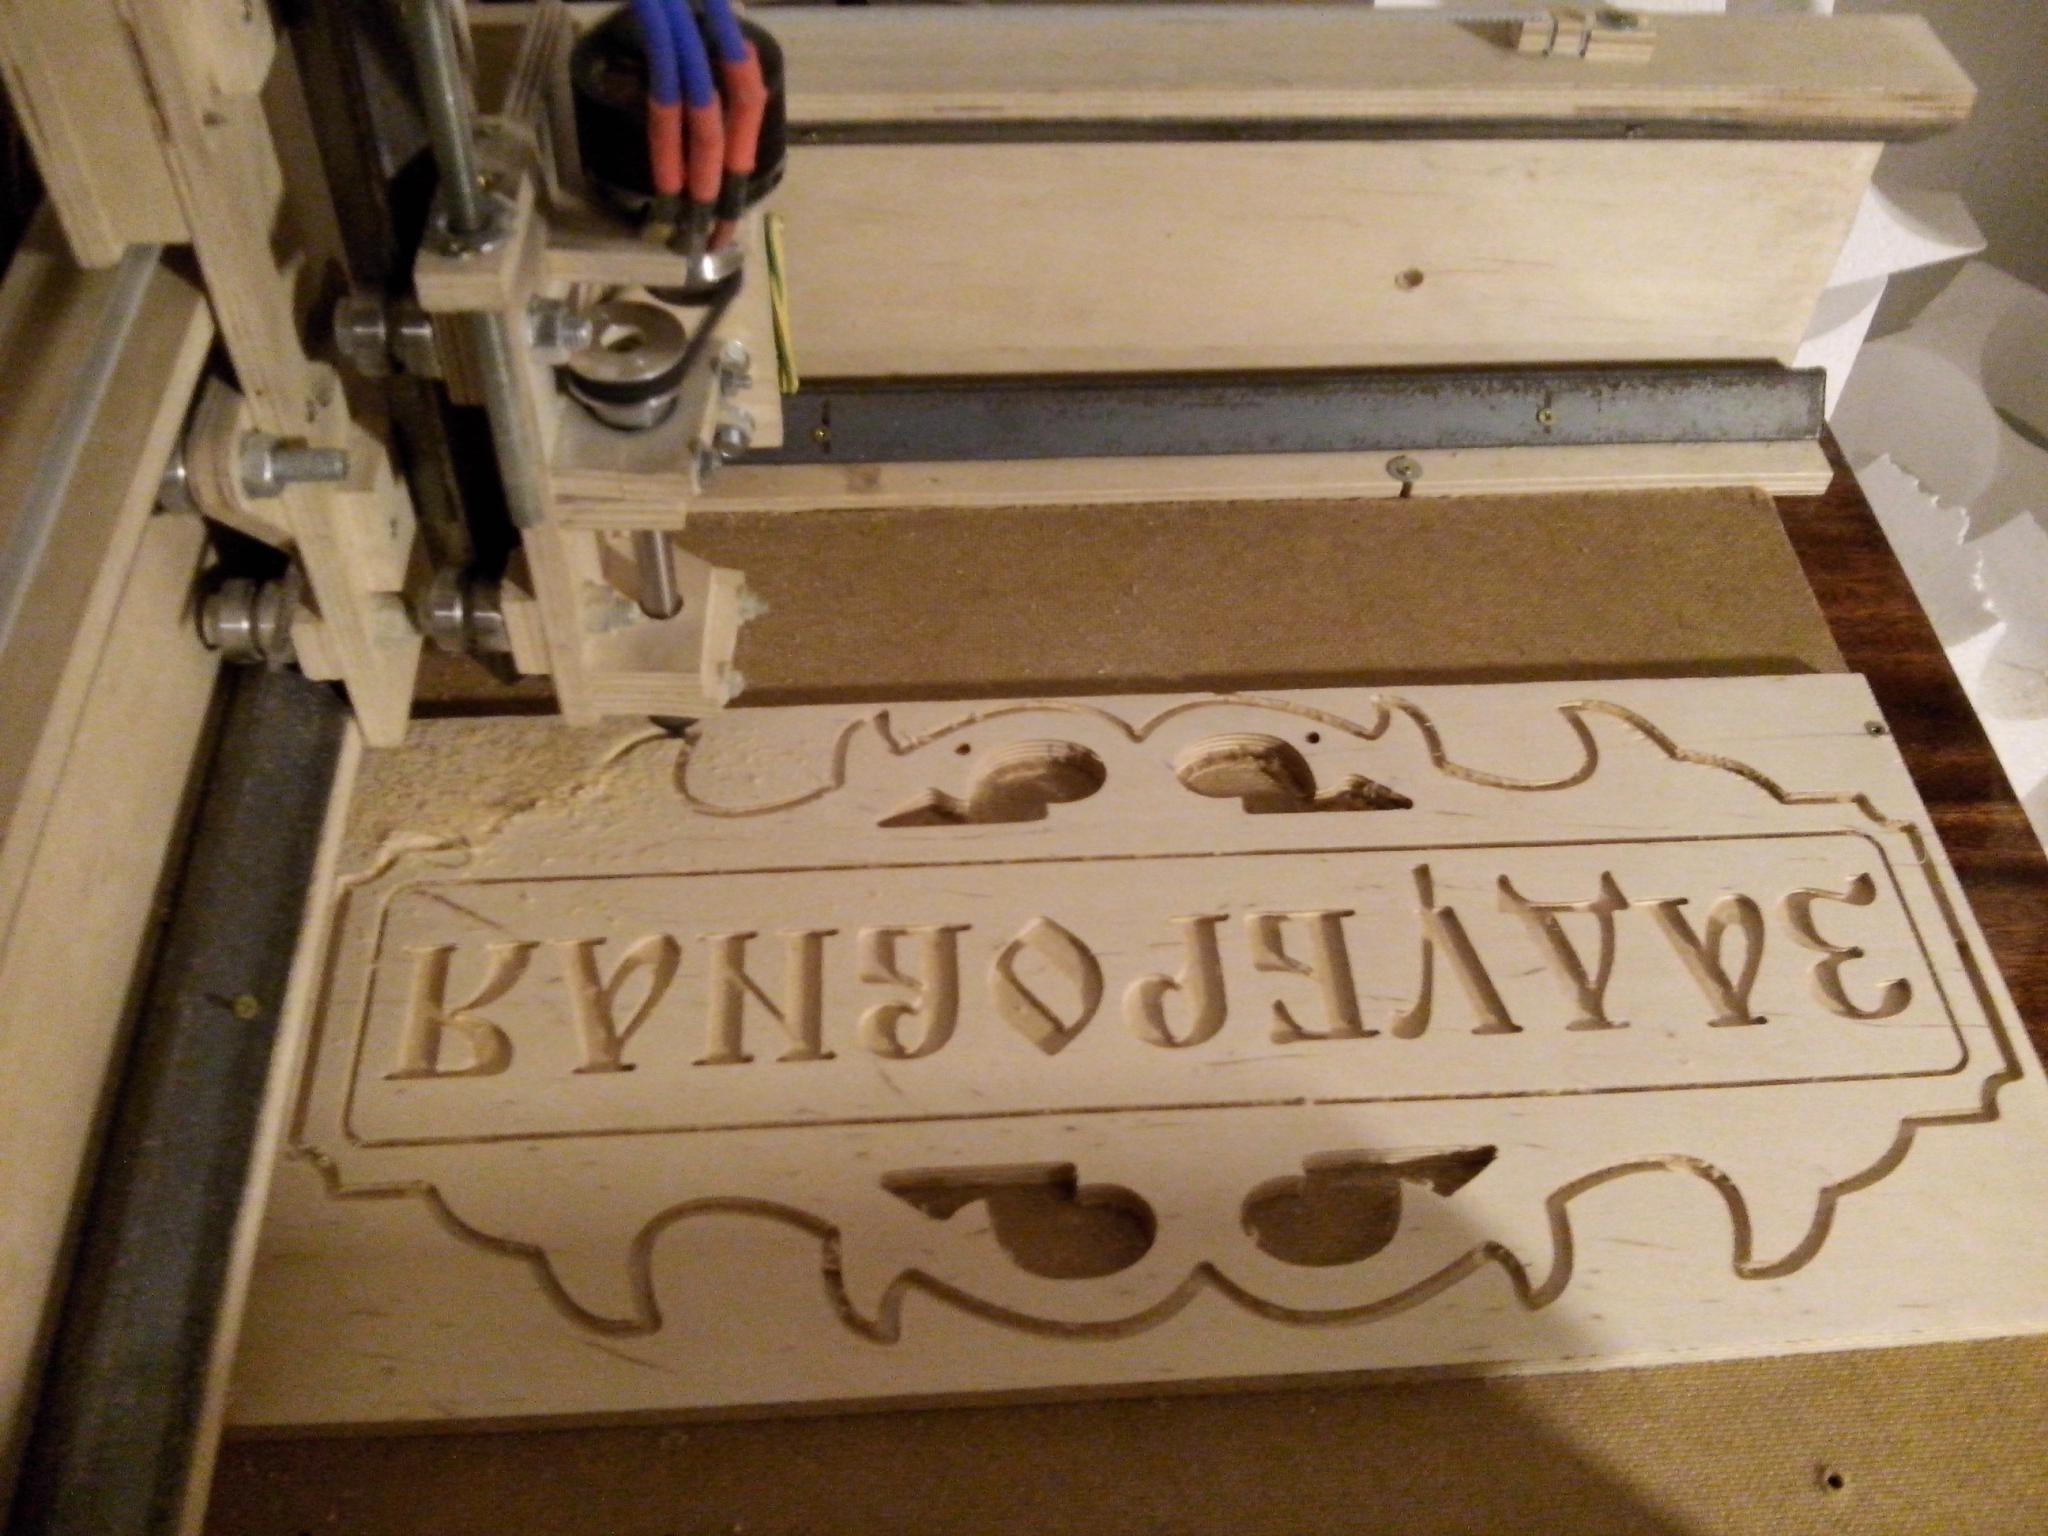
The other day my uncle had a birthday, on this occasion decided to make a gift on his toy :)
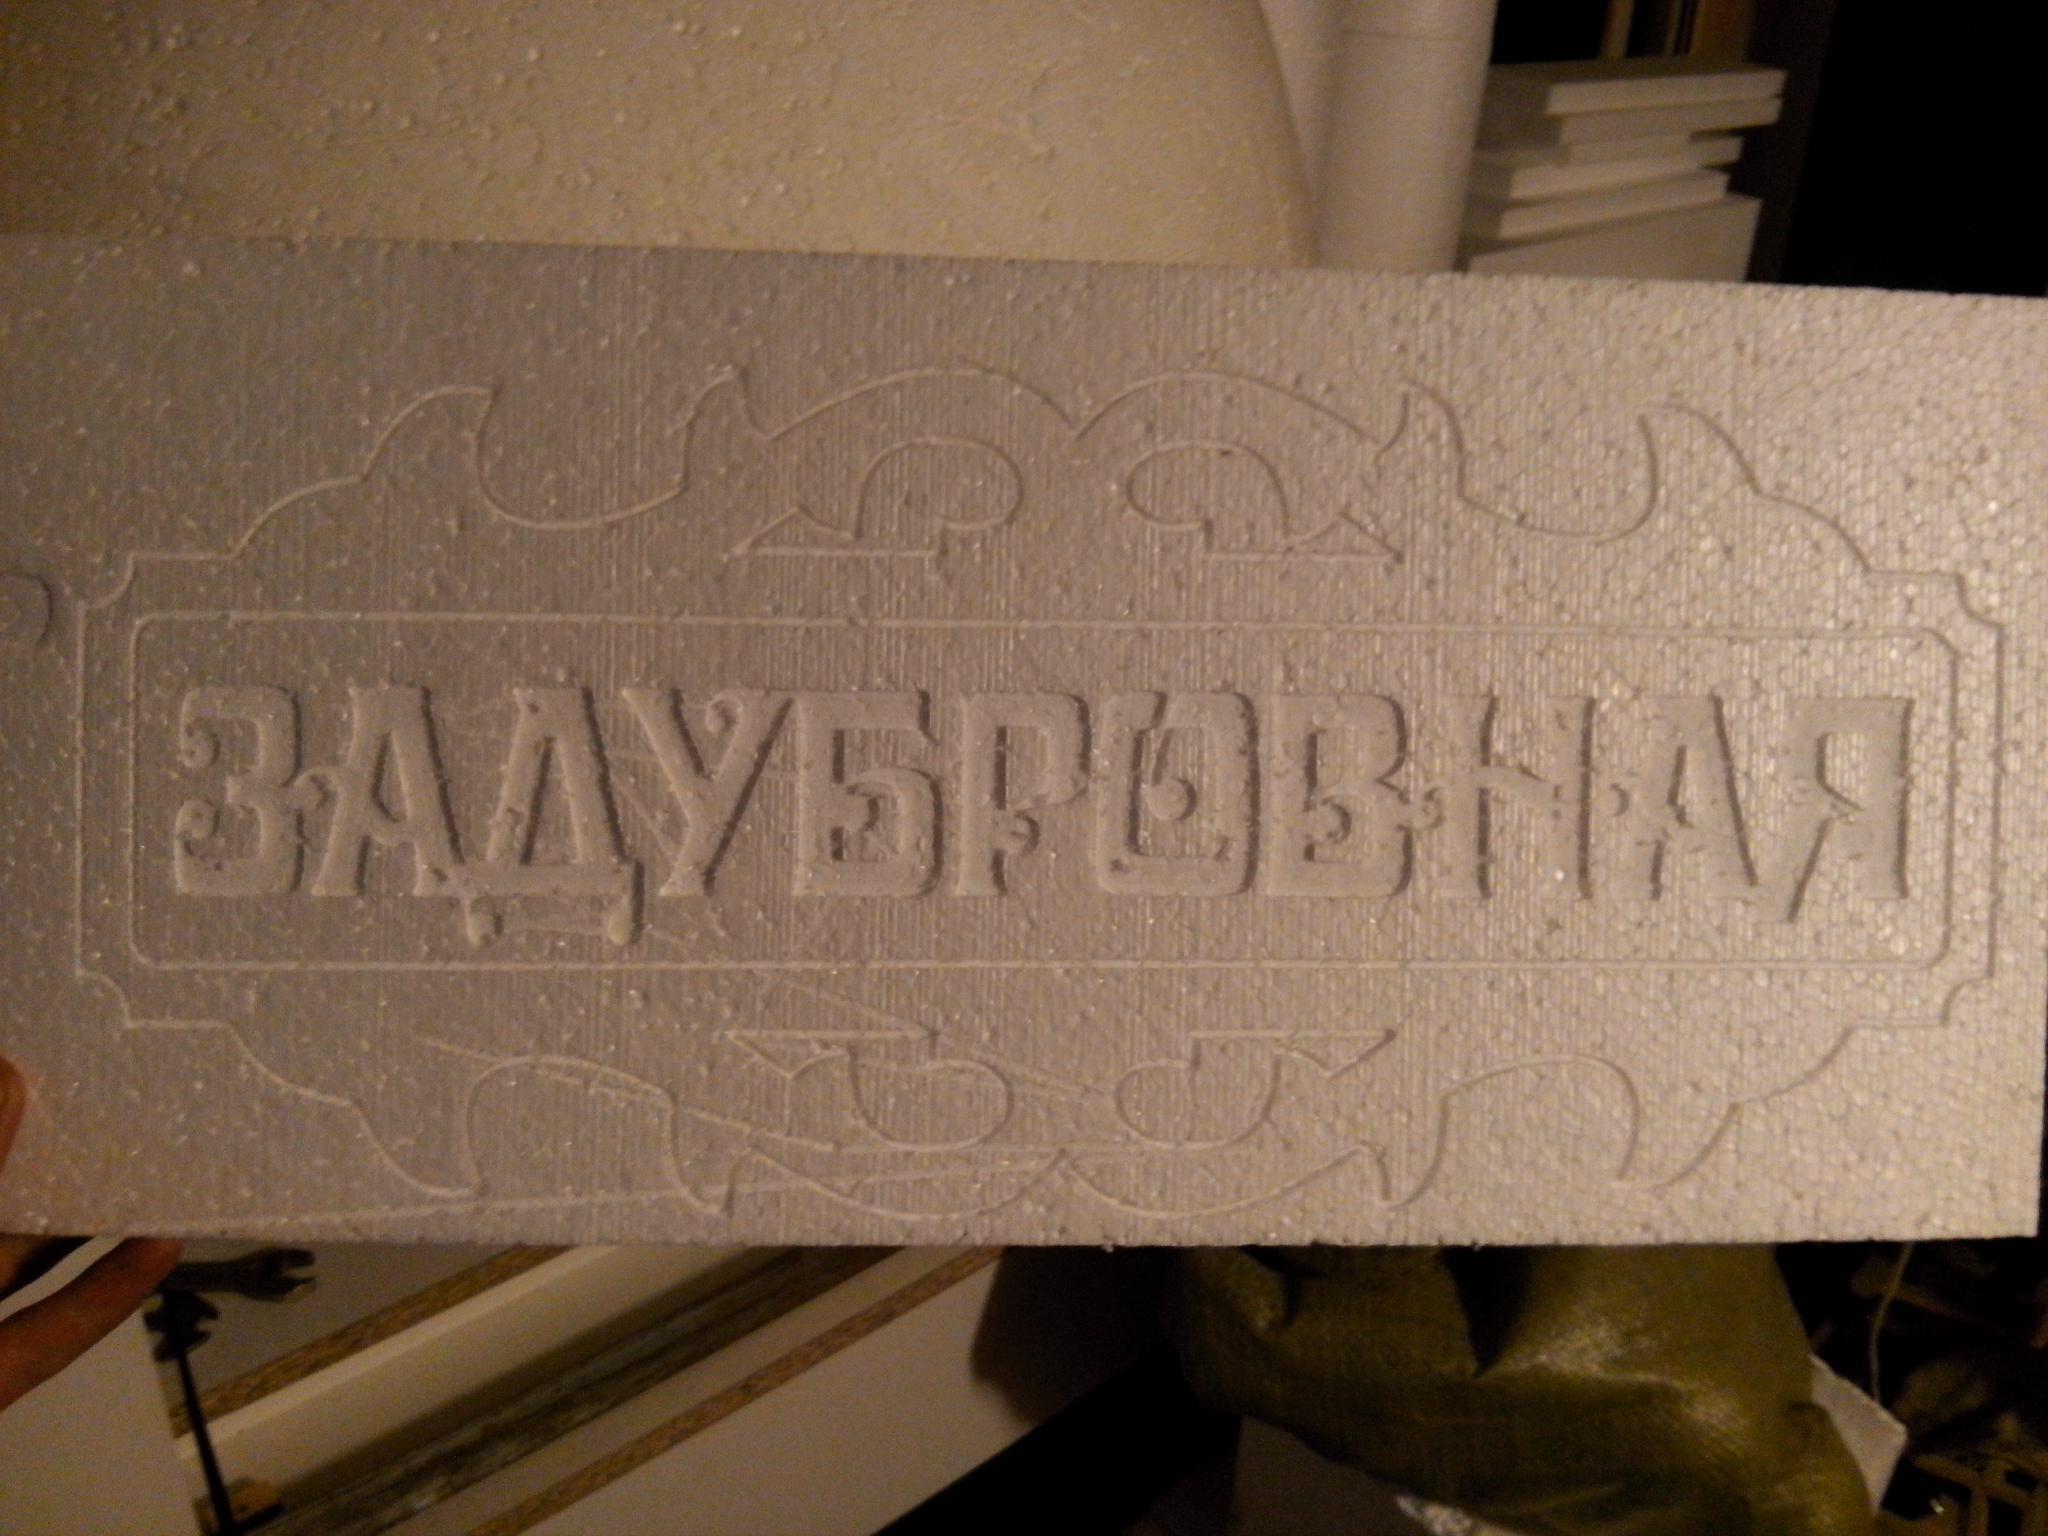
As a gift, I sold out a house from plywood. The first thing I tried was to milled the foam to check the program and not to spoil the plywood.
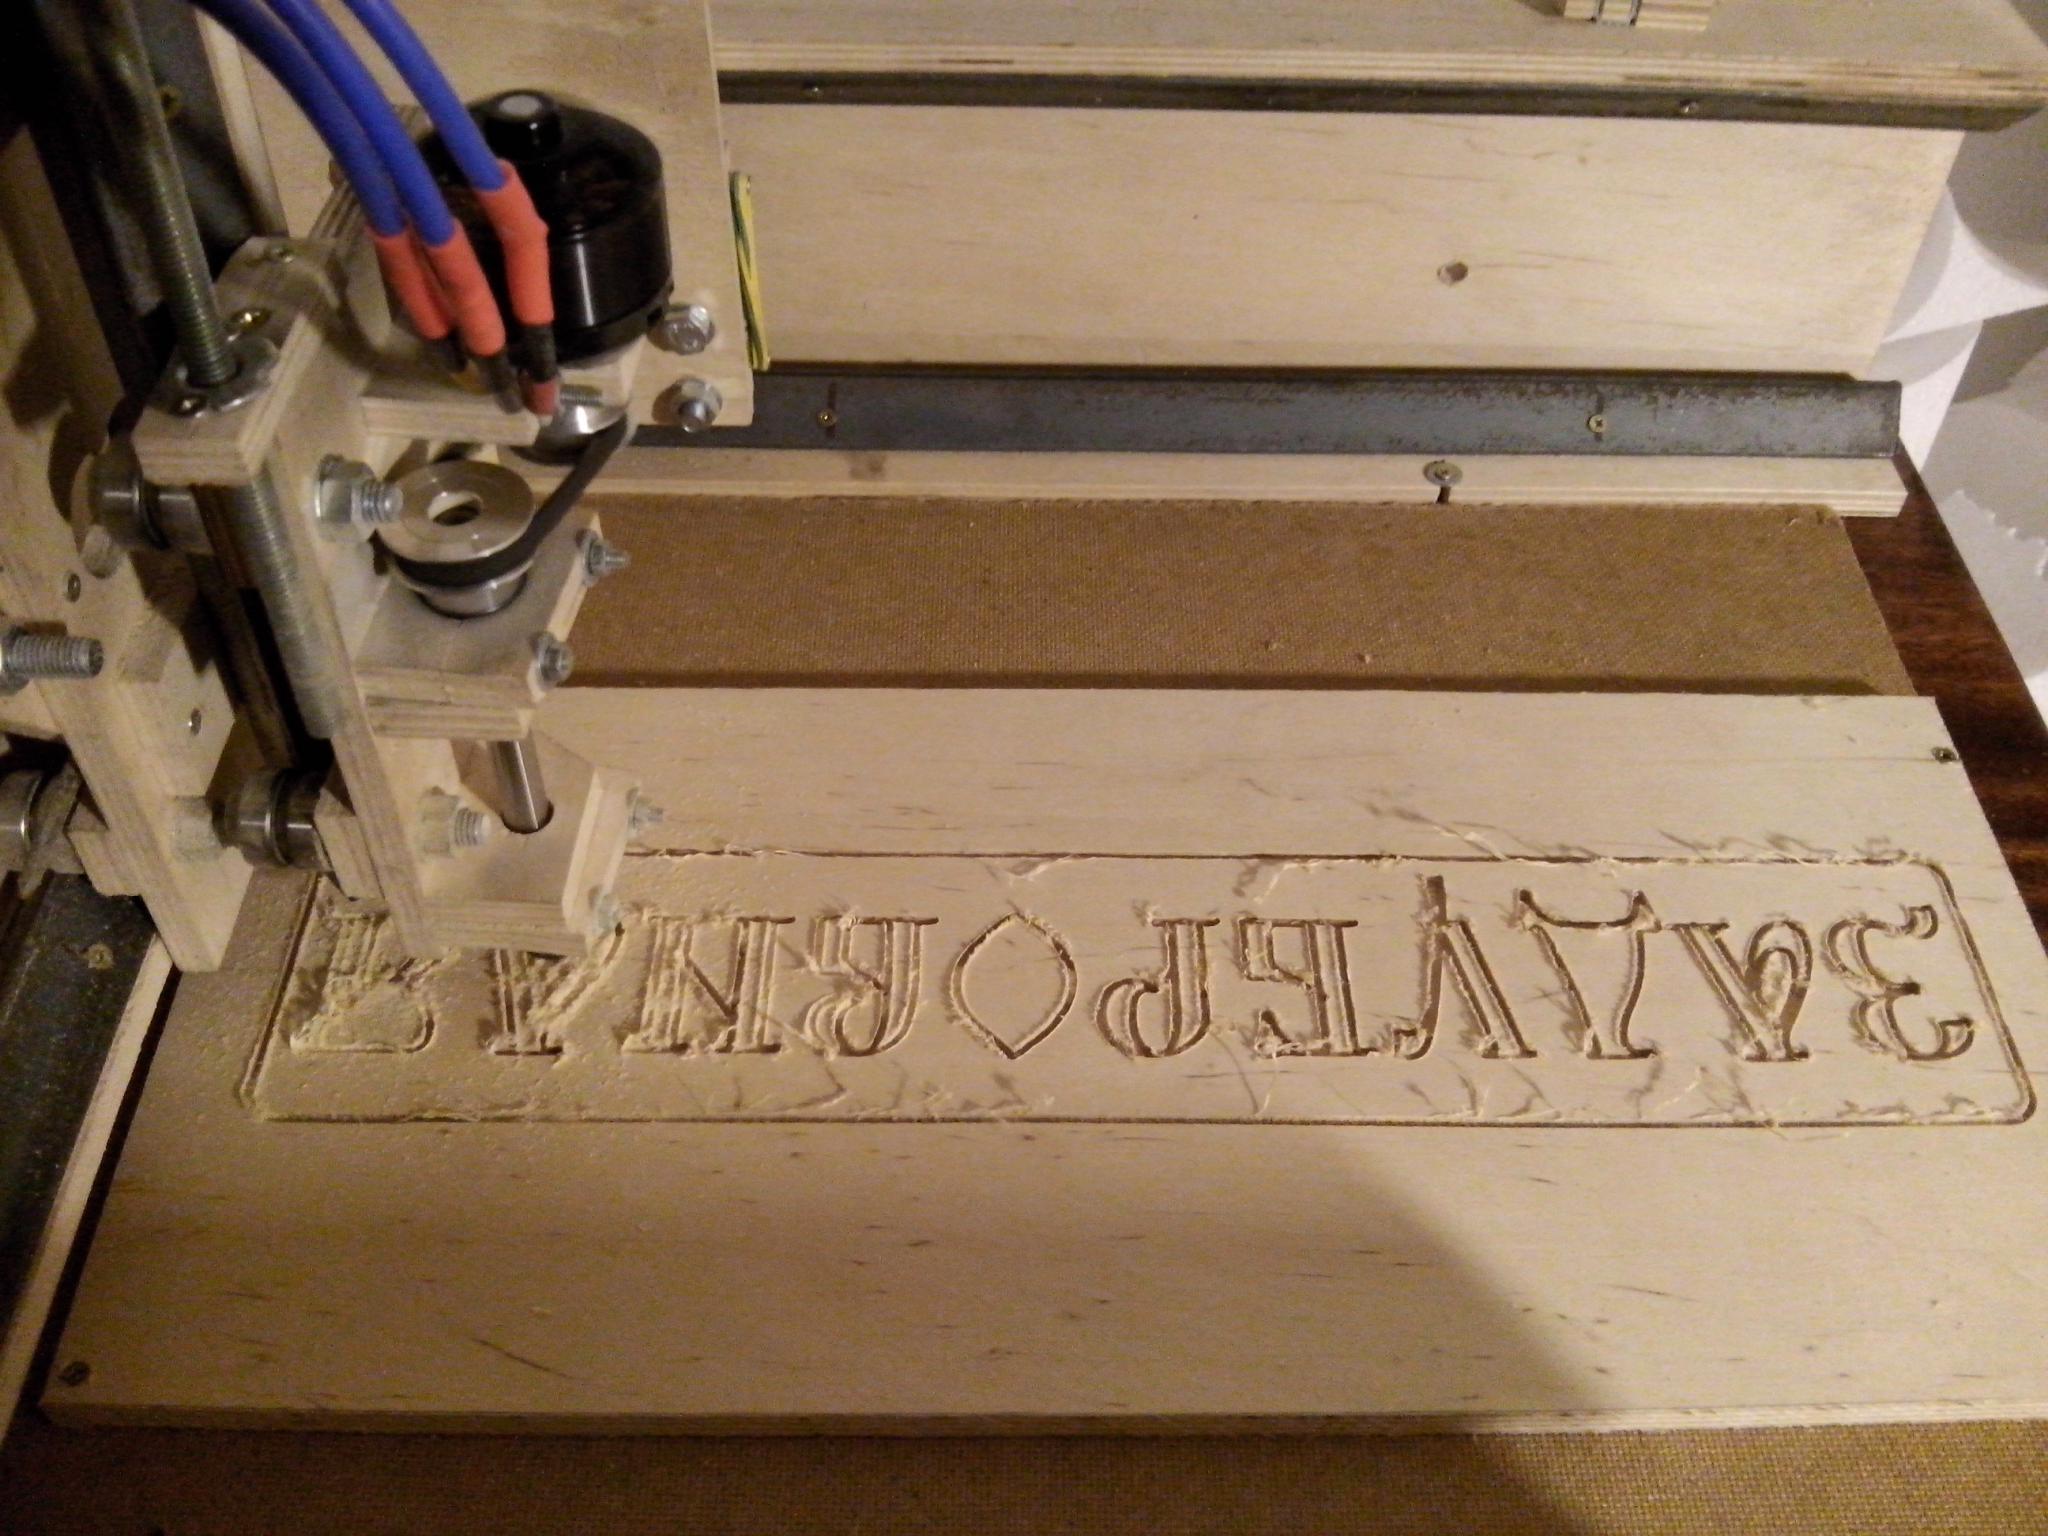

Because of backlashes and bends, the horseshoe was cut only from the seventh time.
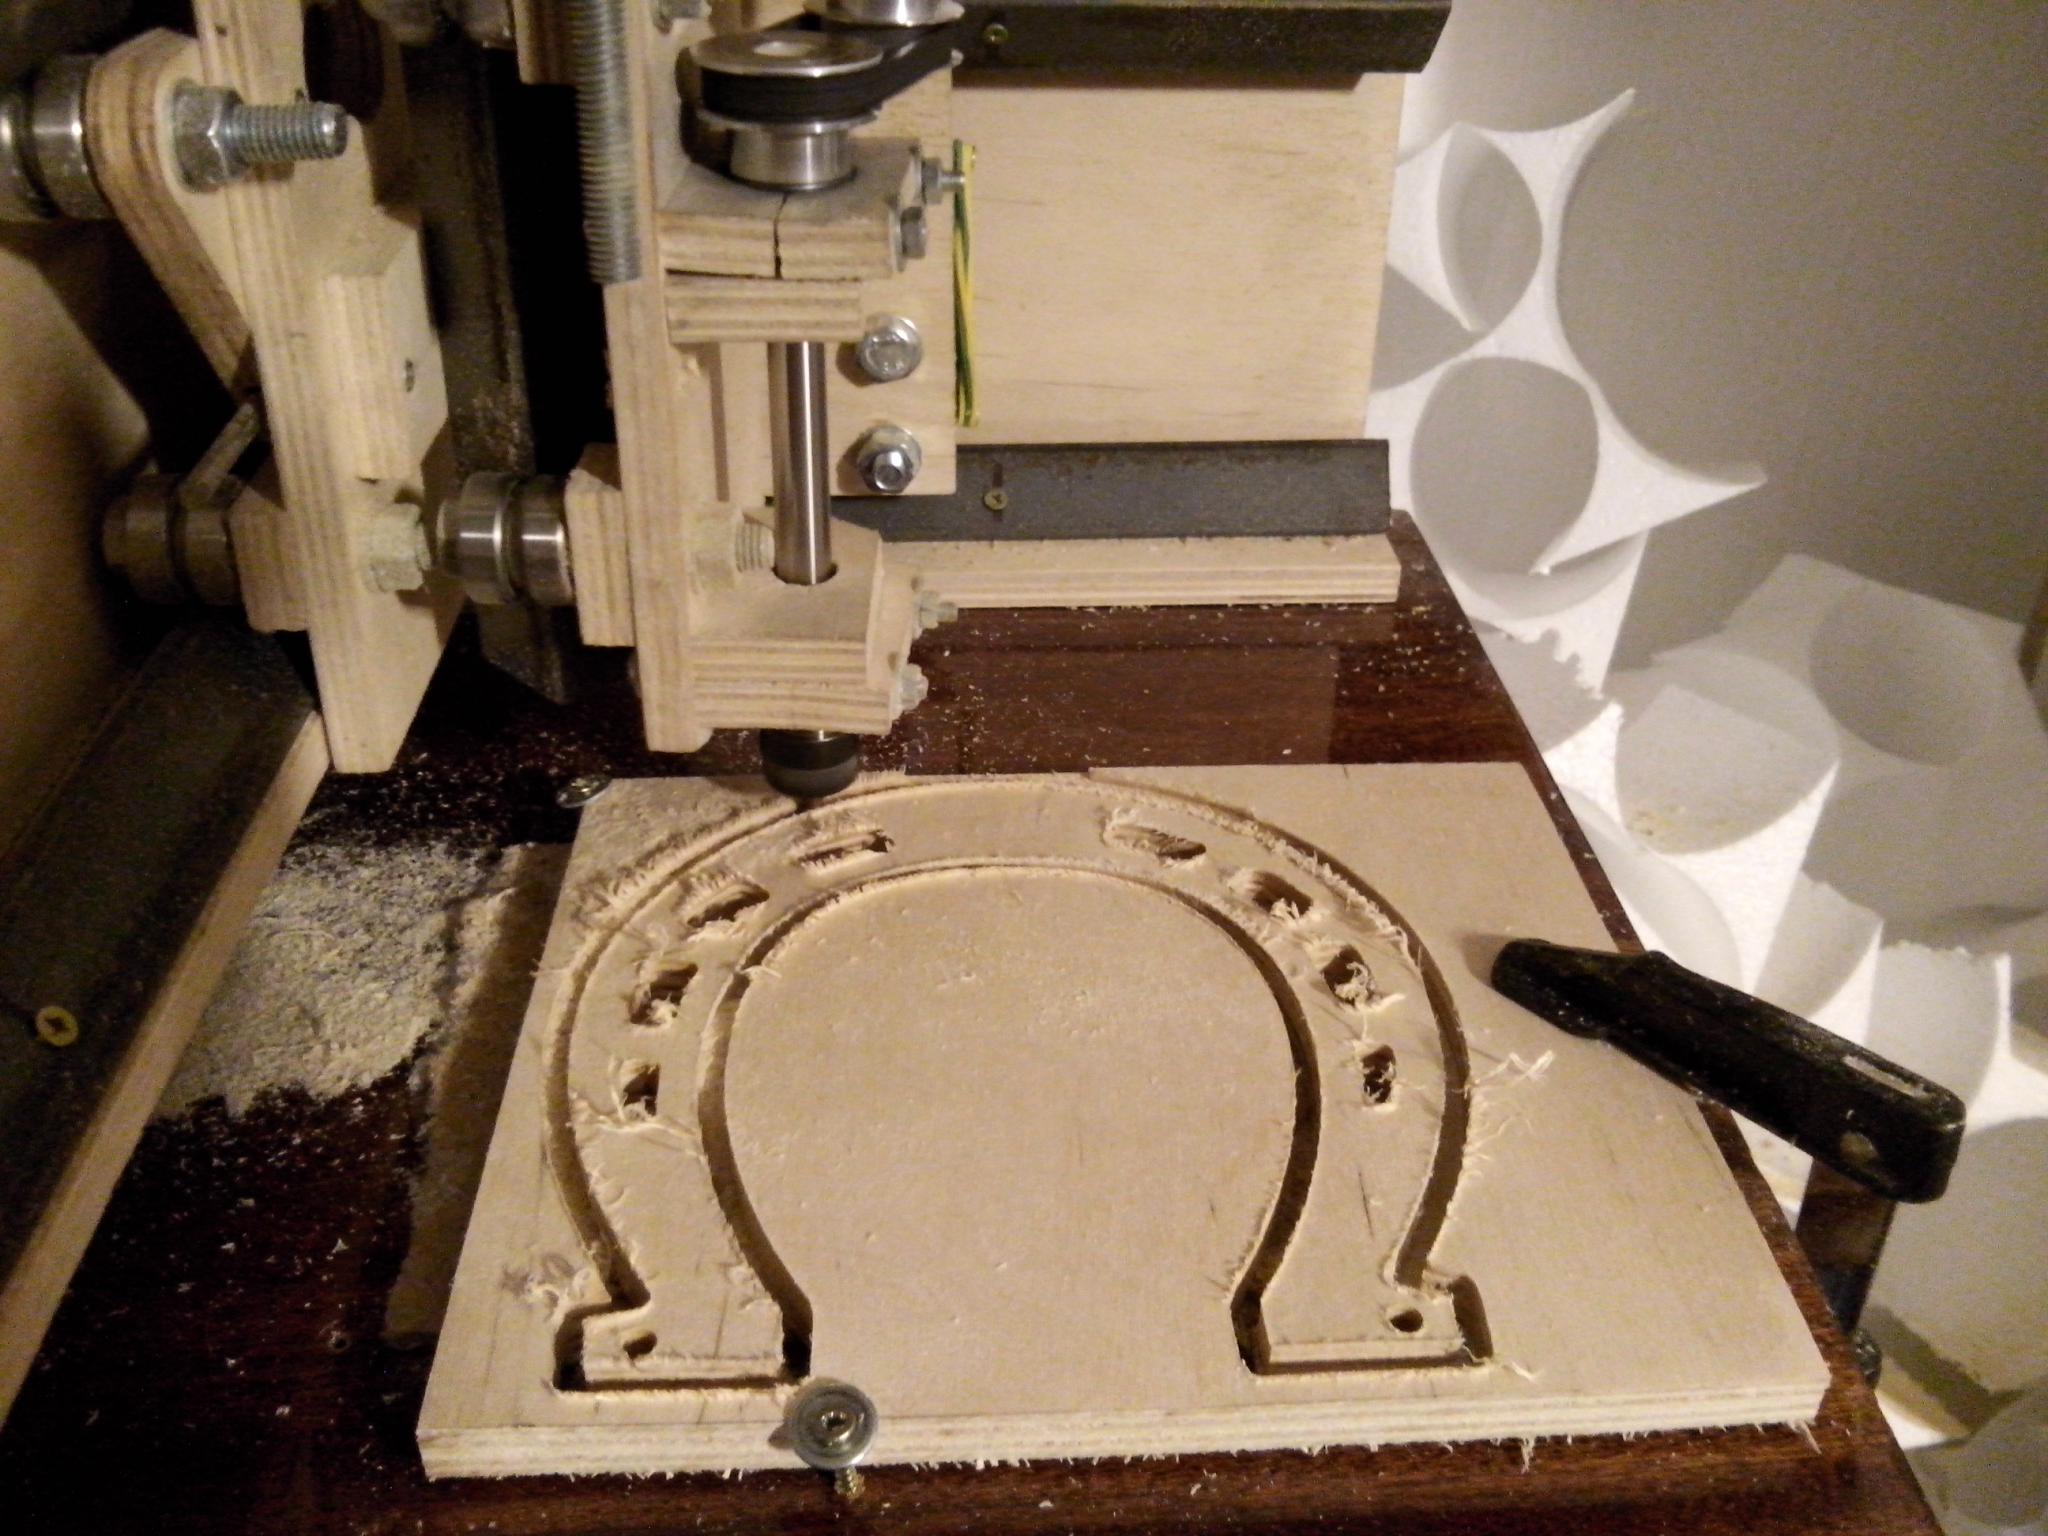
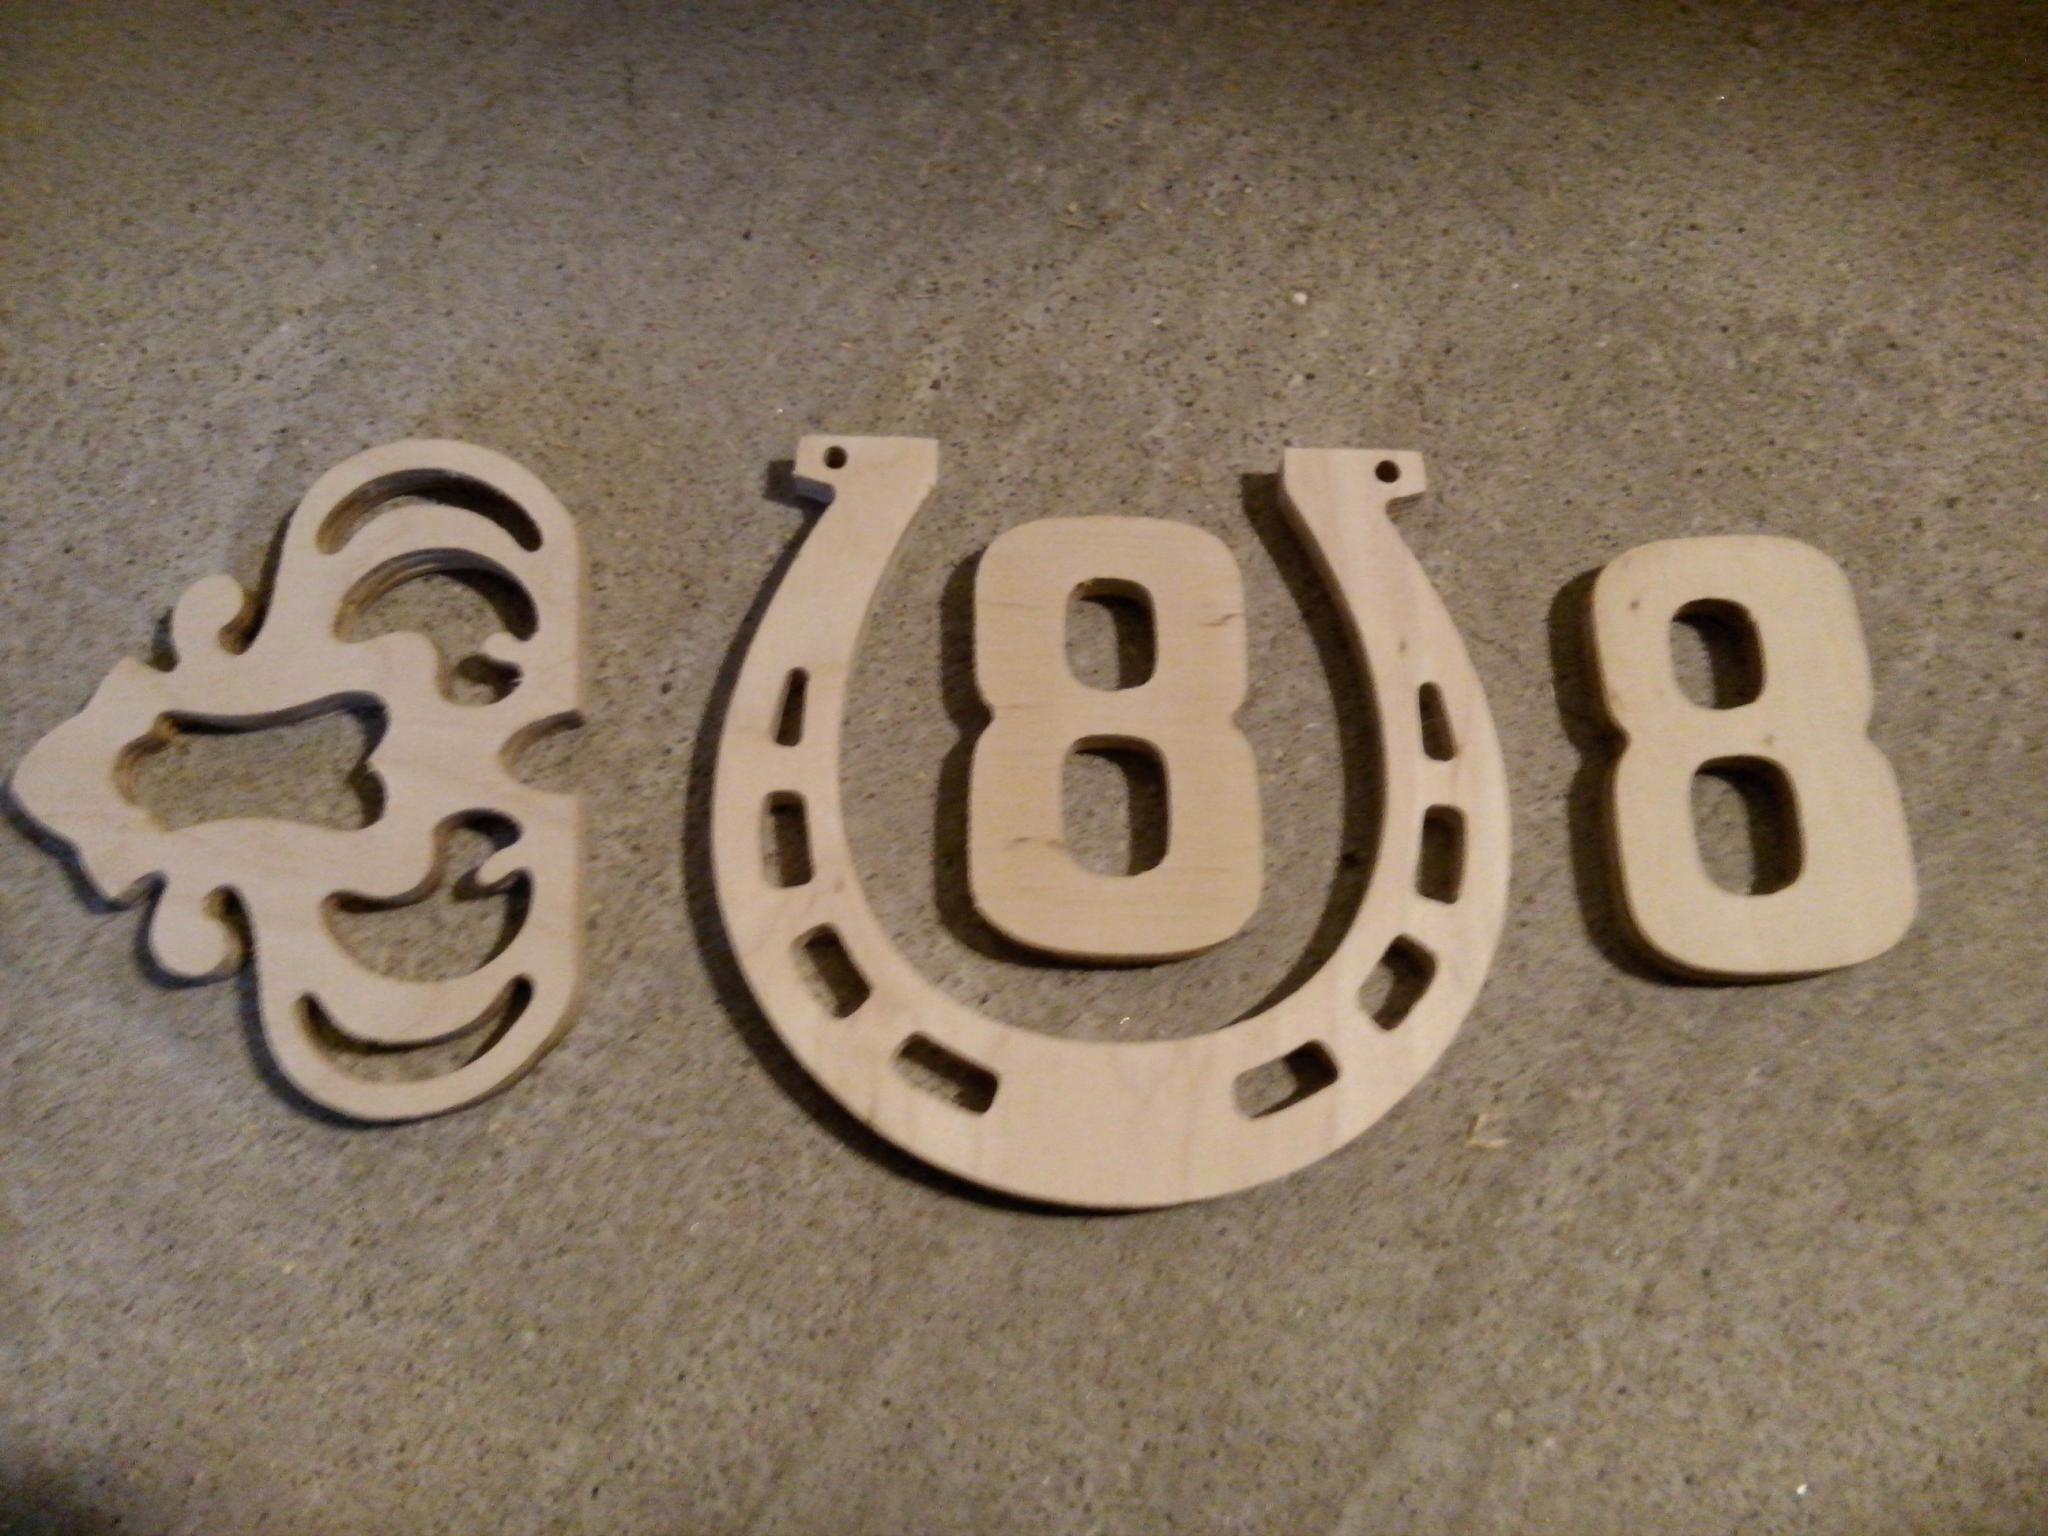
In total, this sold-out (in its pure form) was milled about 5 hours + a lot of time for what was spoiled.

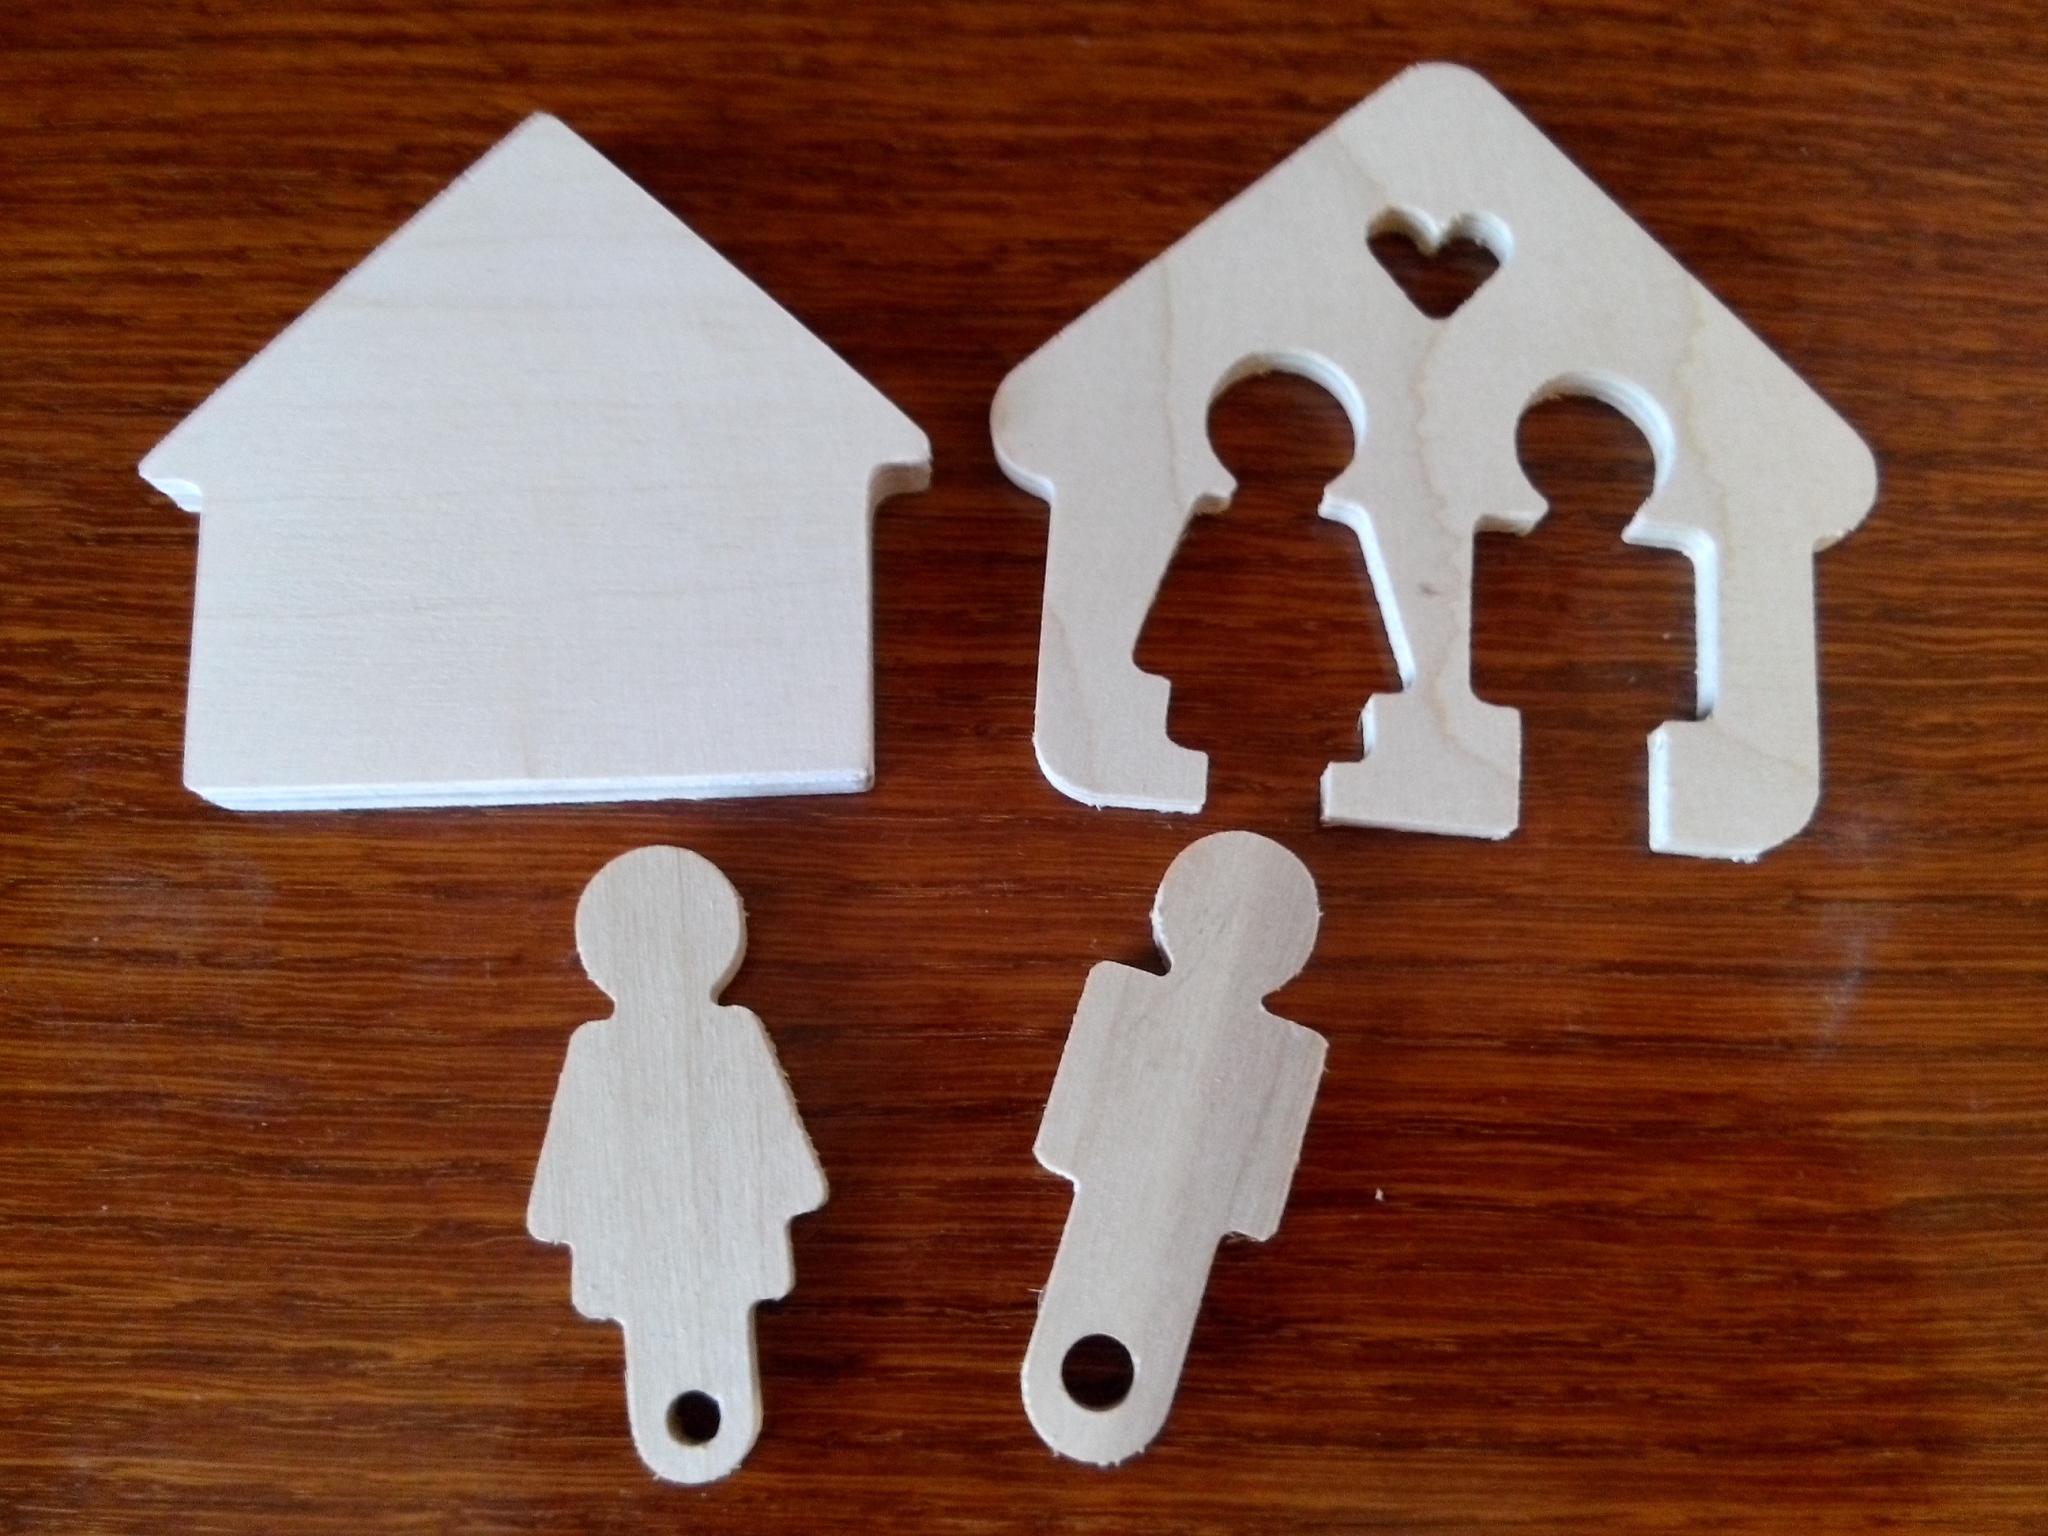
Once I published an article about housekeeper, below in the photo this same housekeeper, but already cut out on the machine with the CNC. Minimum effort, maximum accuracy. Because of the loopholes, the accuracy is certainly not the maximum, but I'll make the second machine more rigid.

And on the CNC machine I cut gears from plywood, it's much more convenient and faster than cutting with my own hands a jig saw.
Later cut and square gears from plywood, they actually spin :)
The results are positive. Now I will work on the development of a new machine, I will cut out the details already on this machine, manual work is almost reduced to assembling.
We need to master the cutting of plastic, because the work on a self-made robot vacuum cleaner has come up. Actually the robot also pushed me to create my own CNC. For the robot I'll cut the gears and other parts from the plastic.
Update: Now I buy cutters straight with two edges (3.175 * 2.0 * 12 mm), cut without strong scoring on both sides of plywood.
Add comment
Random DIY
-
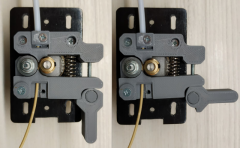 Bowden extruder for a 3D printer with minimal gaps and no extra parts. An eccentric is provided for compressing the spring and releasing the filament rod.
 -
 I need a tachometer to calculate some mechanisms. For example, to calculate the speed of a robot vacuum cleaner, you need to know the rotation speed of the electric motor and, based on this, calculate the gear ratio of the gearbox.
 -
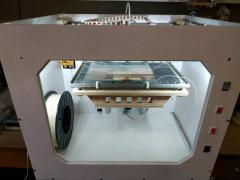 I present to your attention a homemade 3d printer. Assembled from plywood, aluminum, plastic and Arduino. This printer is unique in that its kinematics is peeped from Ultimaker, but done with quality modifications.
 -
 There was a mountain of packages that occupied a whole drawer in the kitchen. And now there is a small box with packages. The whole secret is to roll packages with a simple device.
 -
 This article is about how I collect my robot vacuum cleaner. There are a lot of photos and videos for those who also have such an idea.