Robot vacuum cleaner homemade
This article is about how I collect my robot vacuum cleaner. There are a lot of photos and videos for those who also have such an idea.
19 December 2014. I started to take an interest in robotic vacuum cleaners five years ago in 2009, probably after I got to know the Roboborum. All these years there have been attempts to start something, but nothing has been done. A couple of months ago I was actively reading articles about a robot vacuum cleaner and decided finally that I would buy Karcher RC 4.000. Time passed, my wife often began to clean up in the kitchen and in the corridor, it started to annoy me, the thought of the robot was getting stronger. I spent a couple of evenings in pictures and forums about robotic vacuums. Finally I decided that I would do the robot myself!
The goal is to create a robotic vacuum cleaner no worse than an industrial-made vacuum cleaner and get rid of a layer of dust and small debris in the house. In the process of studying the robot device, it turned out that they are very noisy, about 60 dB, while a stationary home washing vacuum cleaner makes about 80 DB. My self-made robot should work as quietly as possible, its dimensions should not exceed the dimensions of factory robots and it must be cleaned quickly and efficiently.
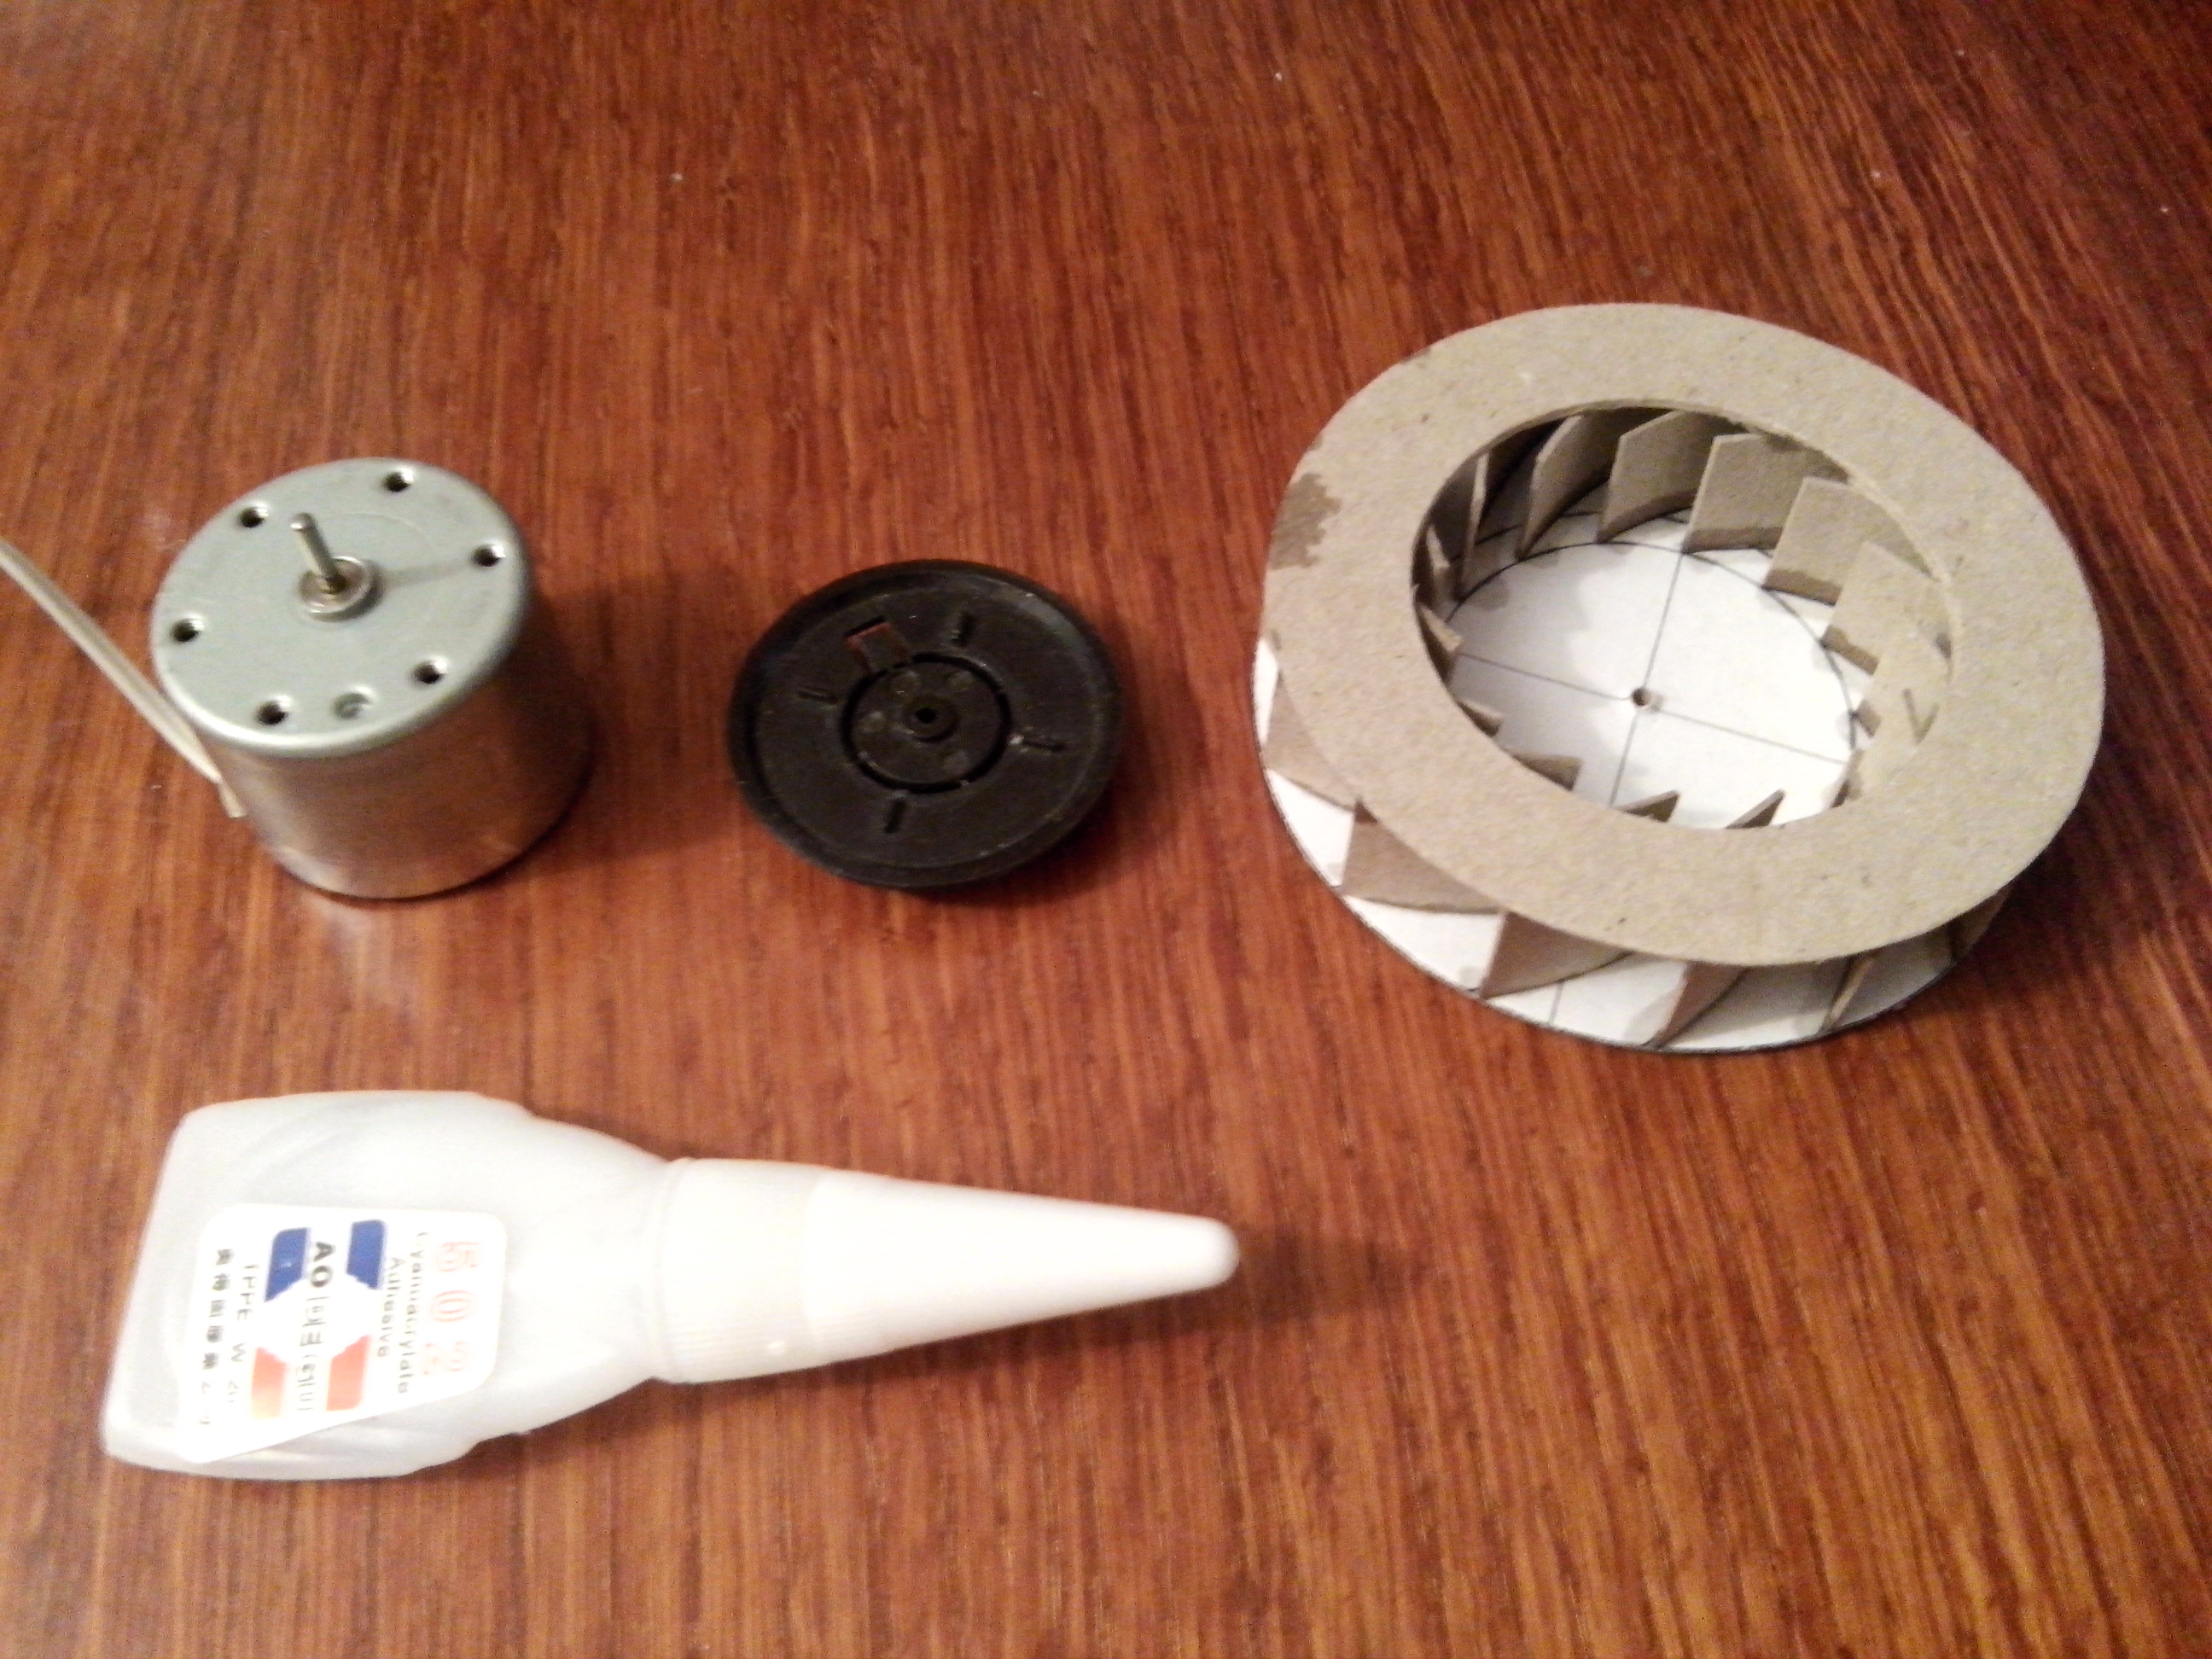
The first step was to solve the problem with the suction turbine. I already had experience building turbines, but they all worked poorly. For the garage, I made a self-made vacuum cleaner from the turbine from the old vacuum cleaner "Rocket." The robot needs a small turbine, so I started searching first. Completely accidentally found on Roboforum messages from the user Vovan, he shared a drawing its impeller. Not for a long time I thought over the drawing and glued my turbine.
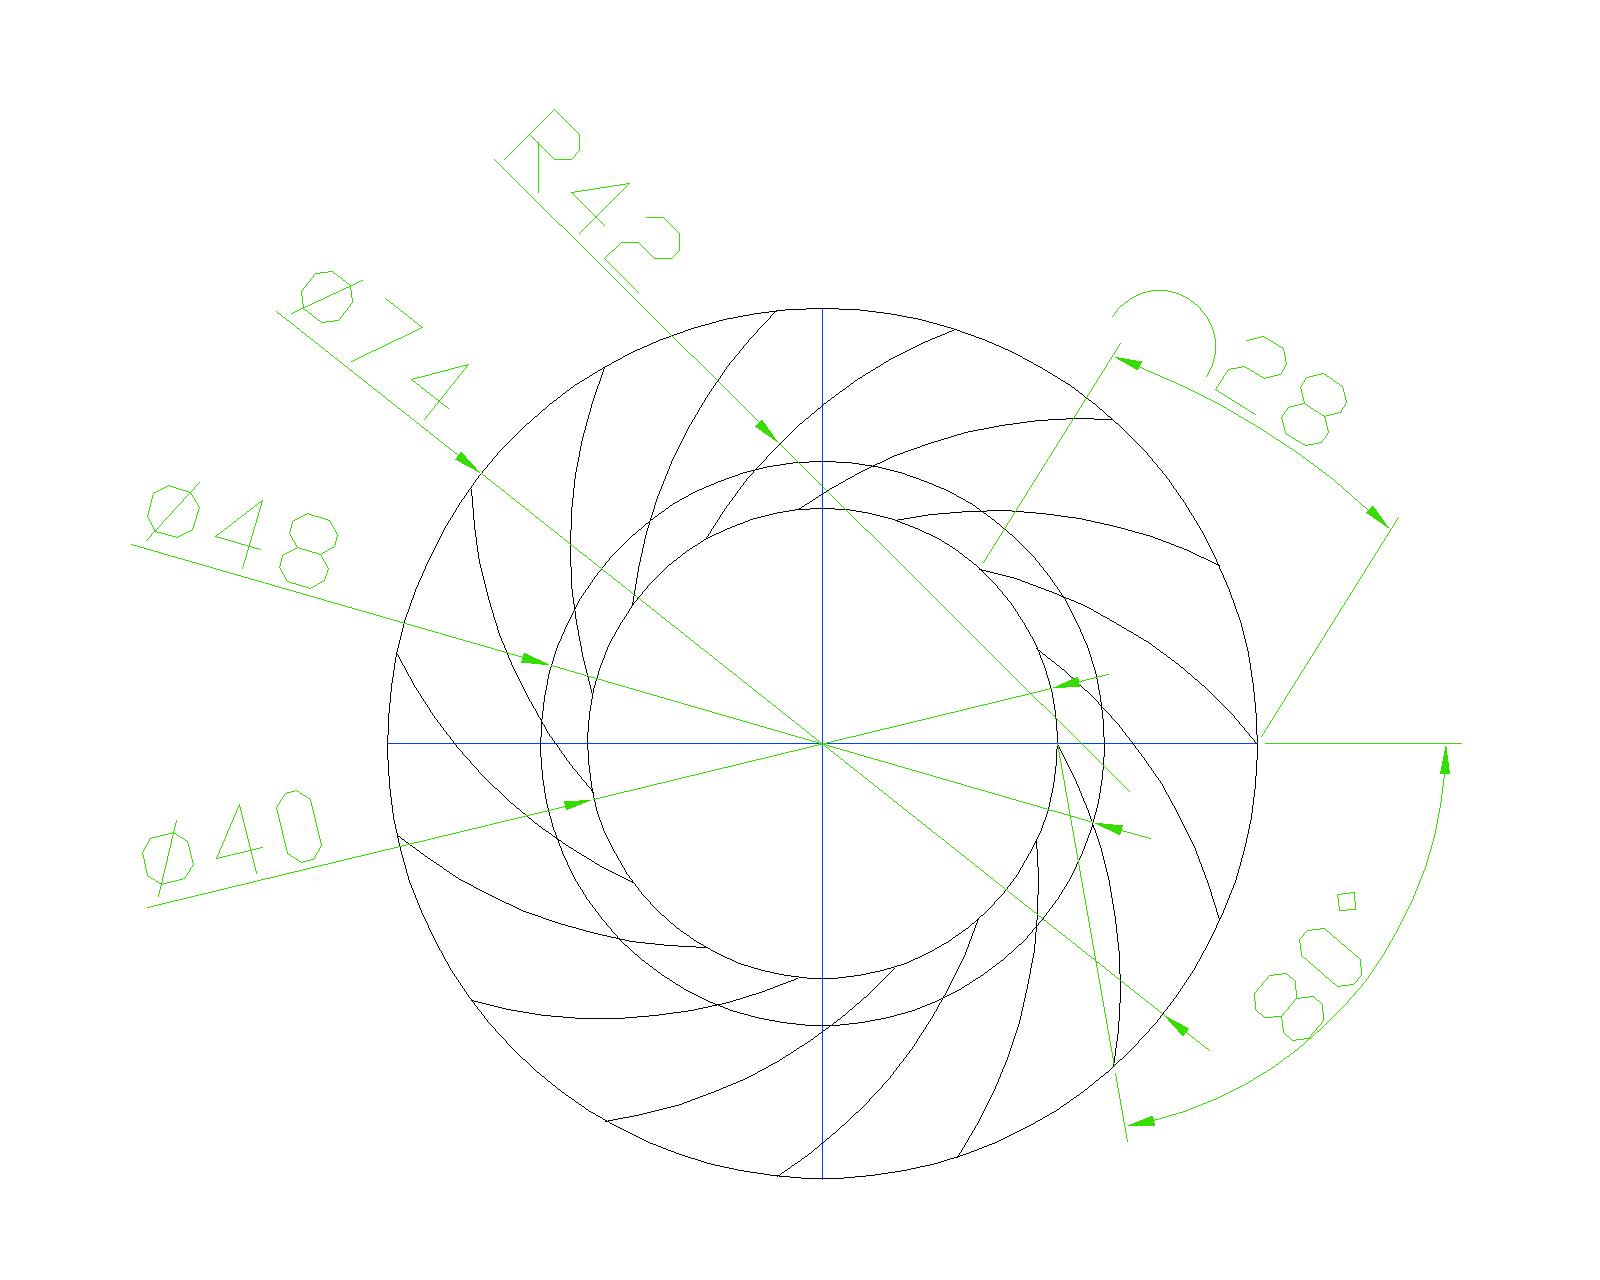
Download turbine drawing for vacuum cleaner (dwg)
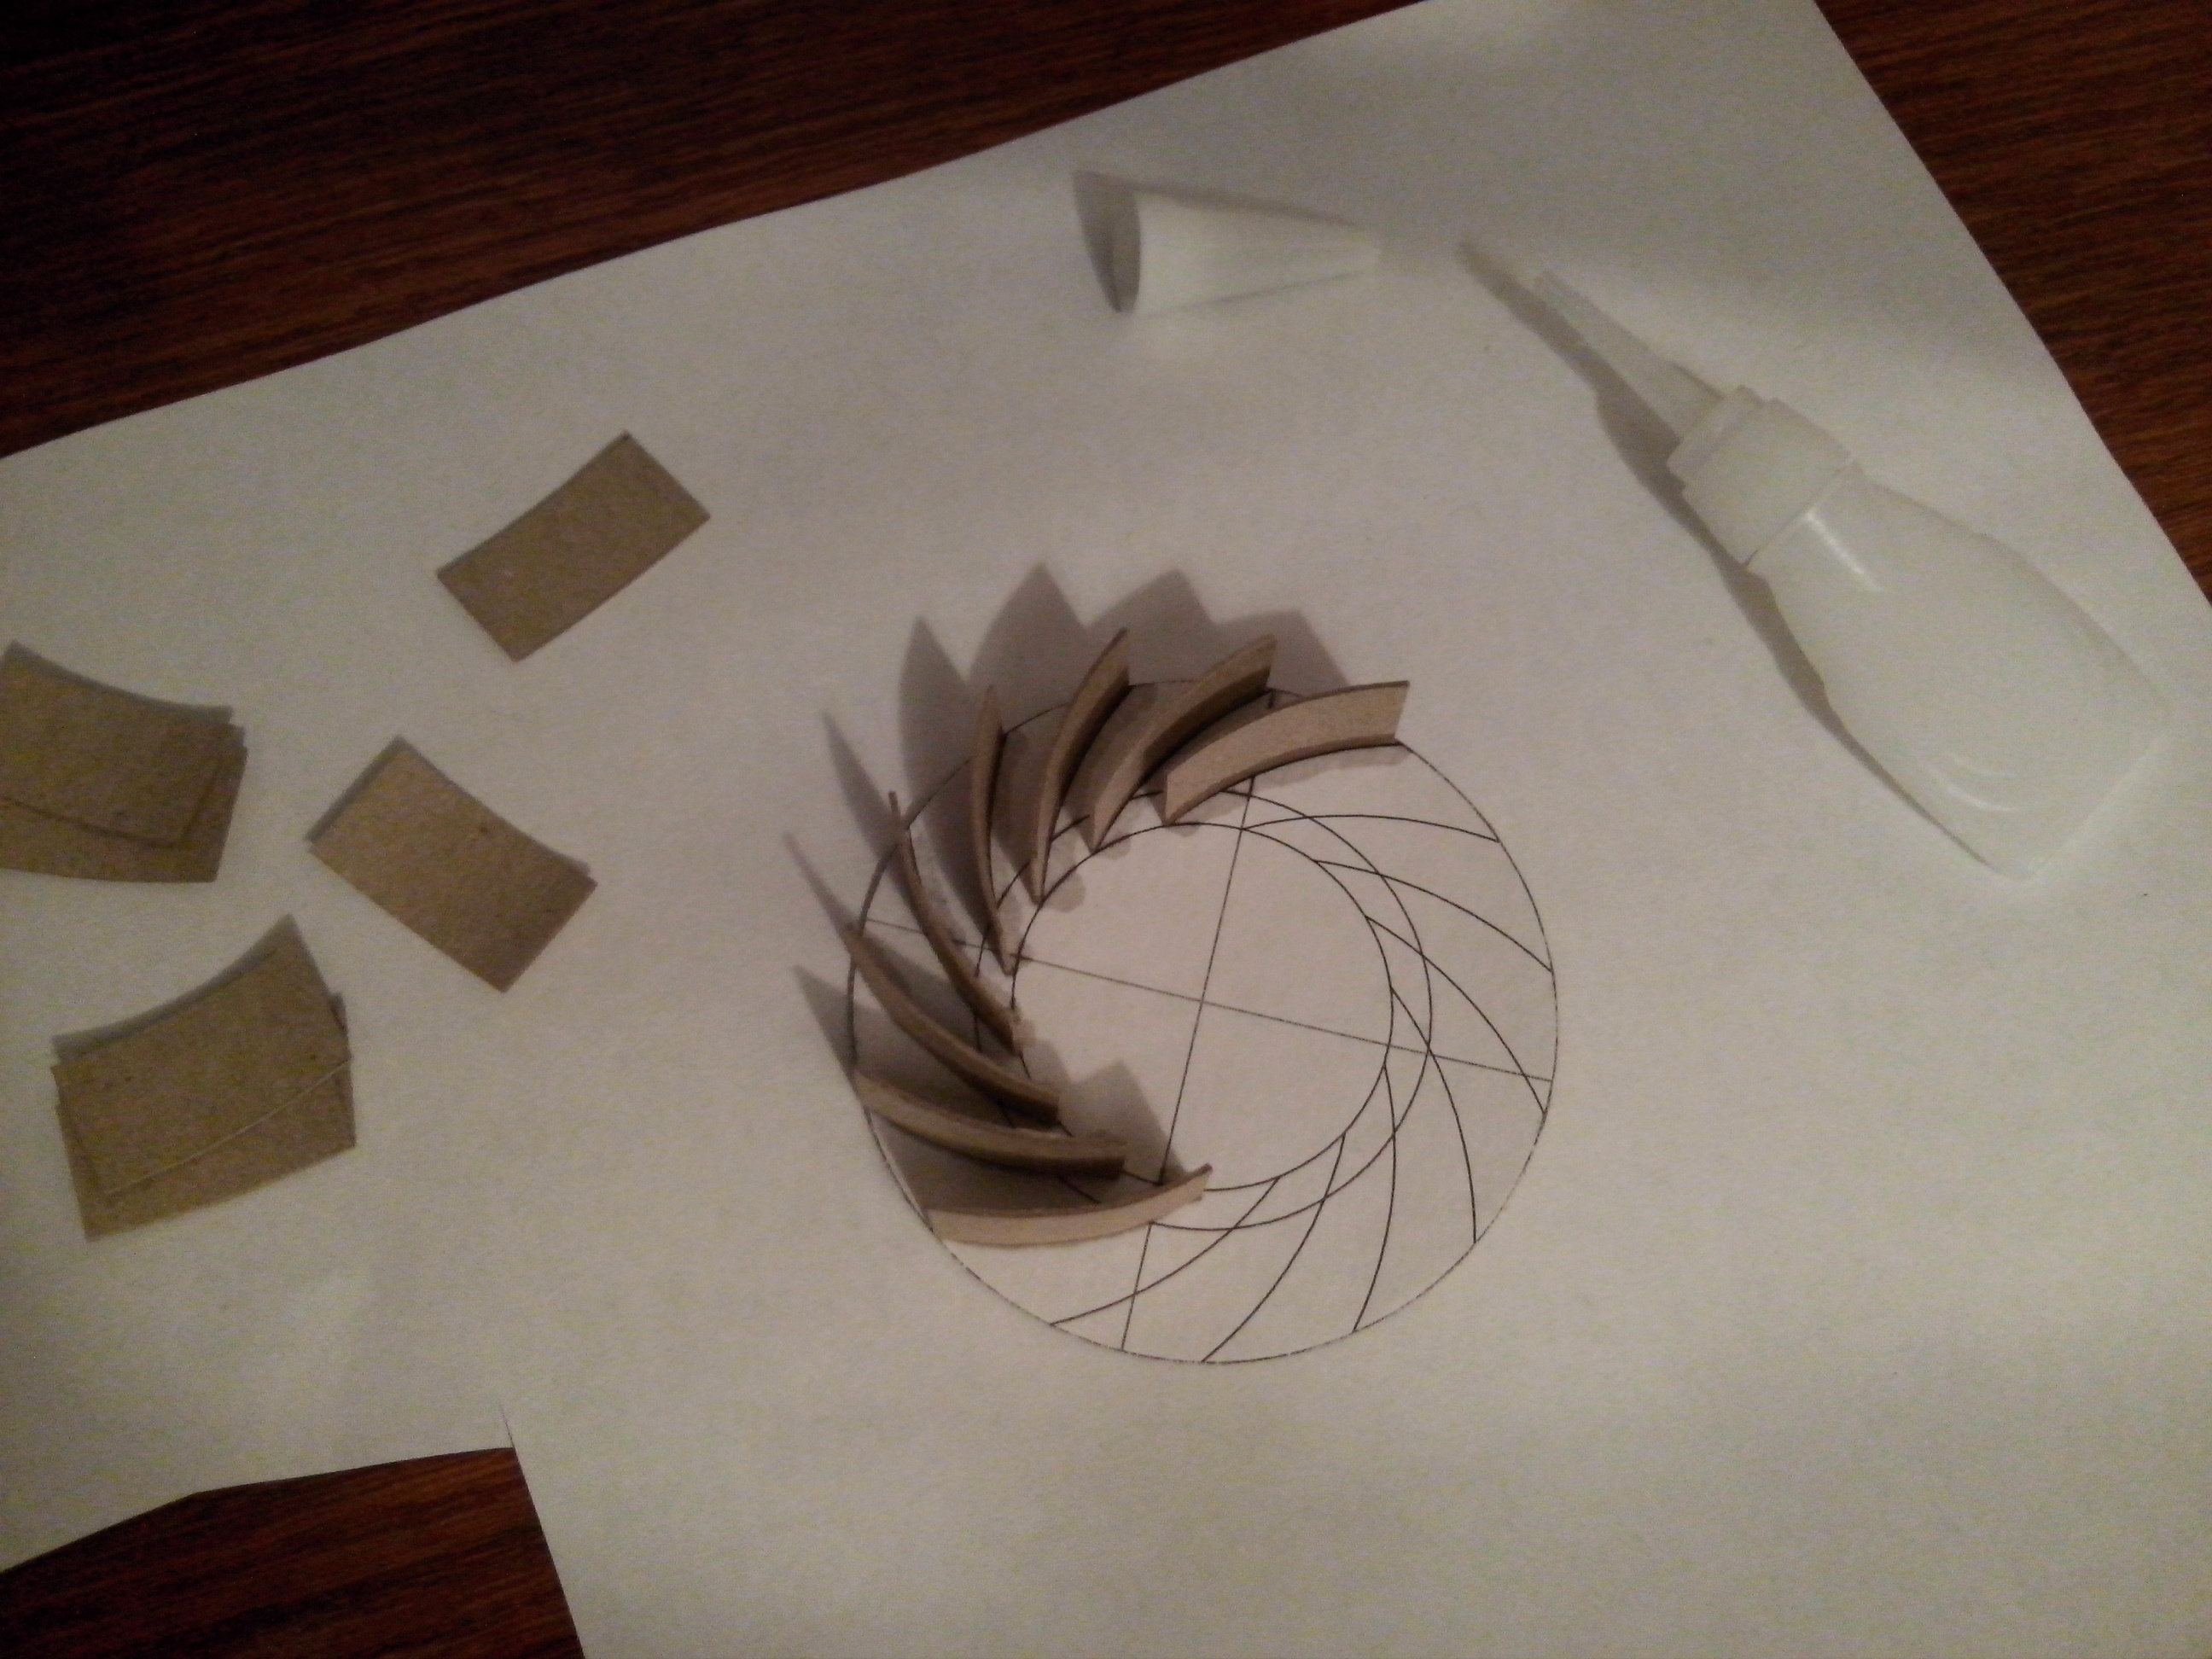
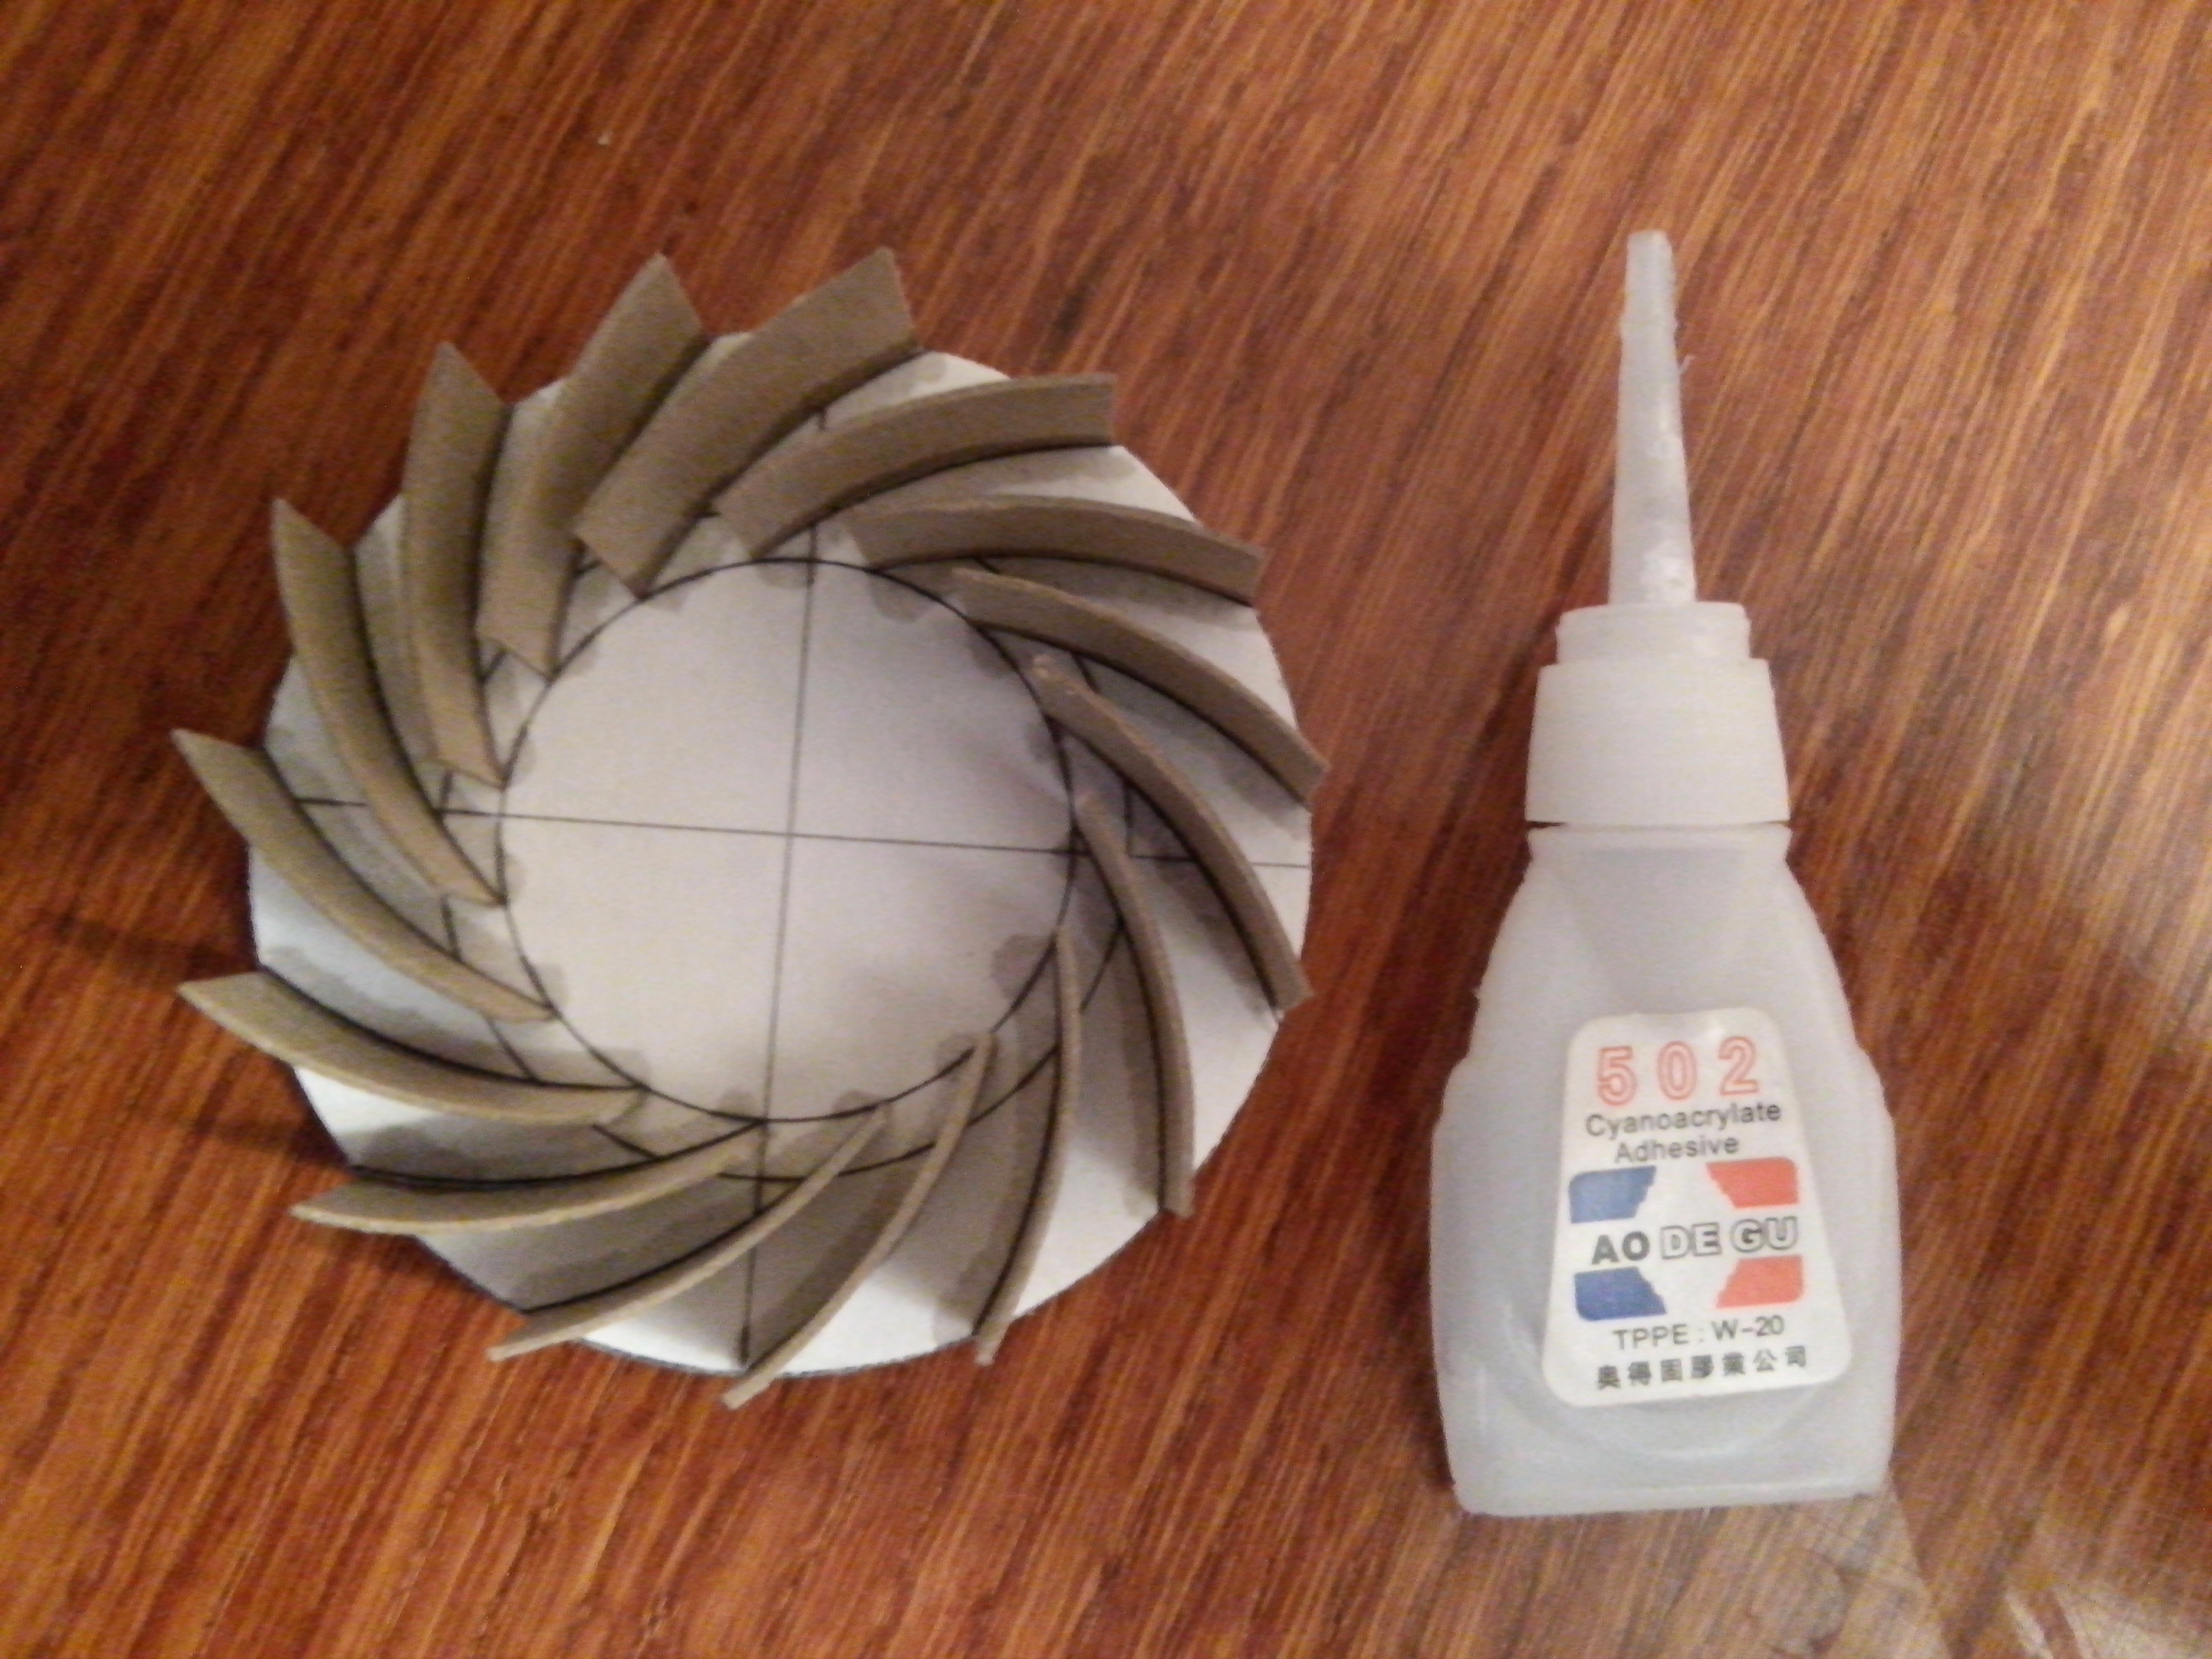
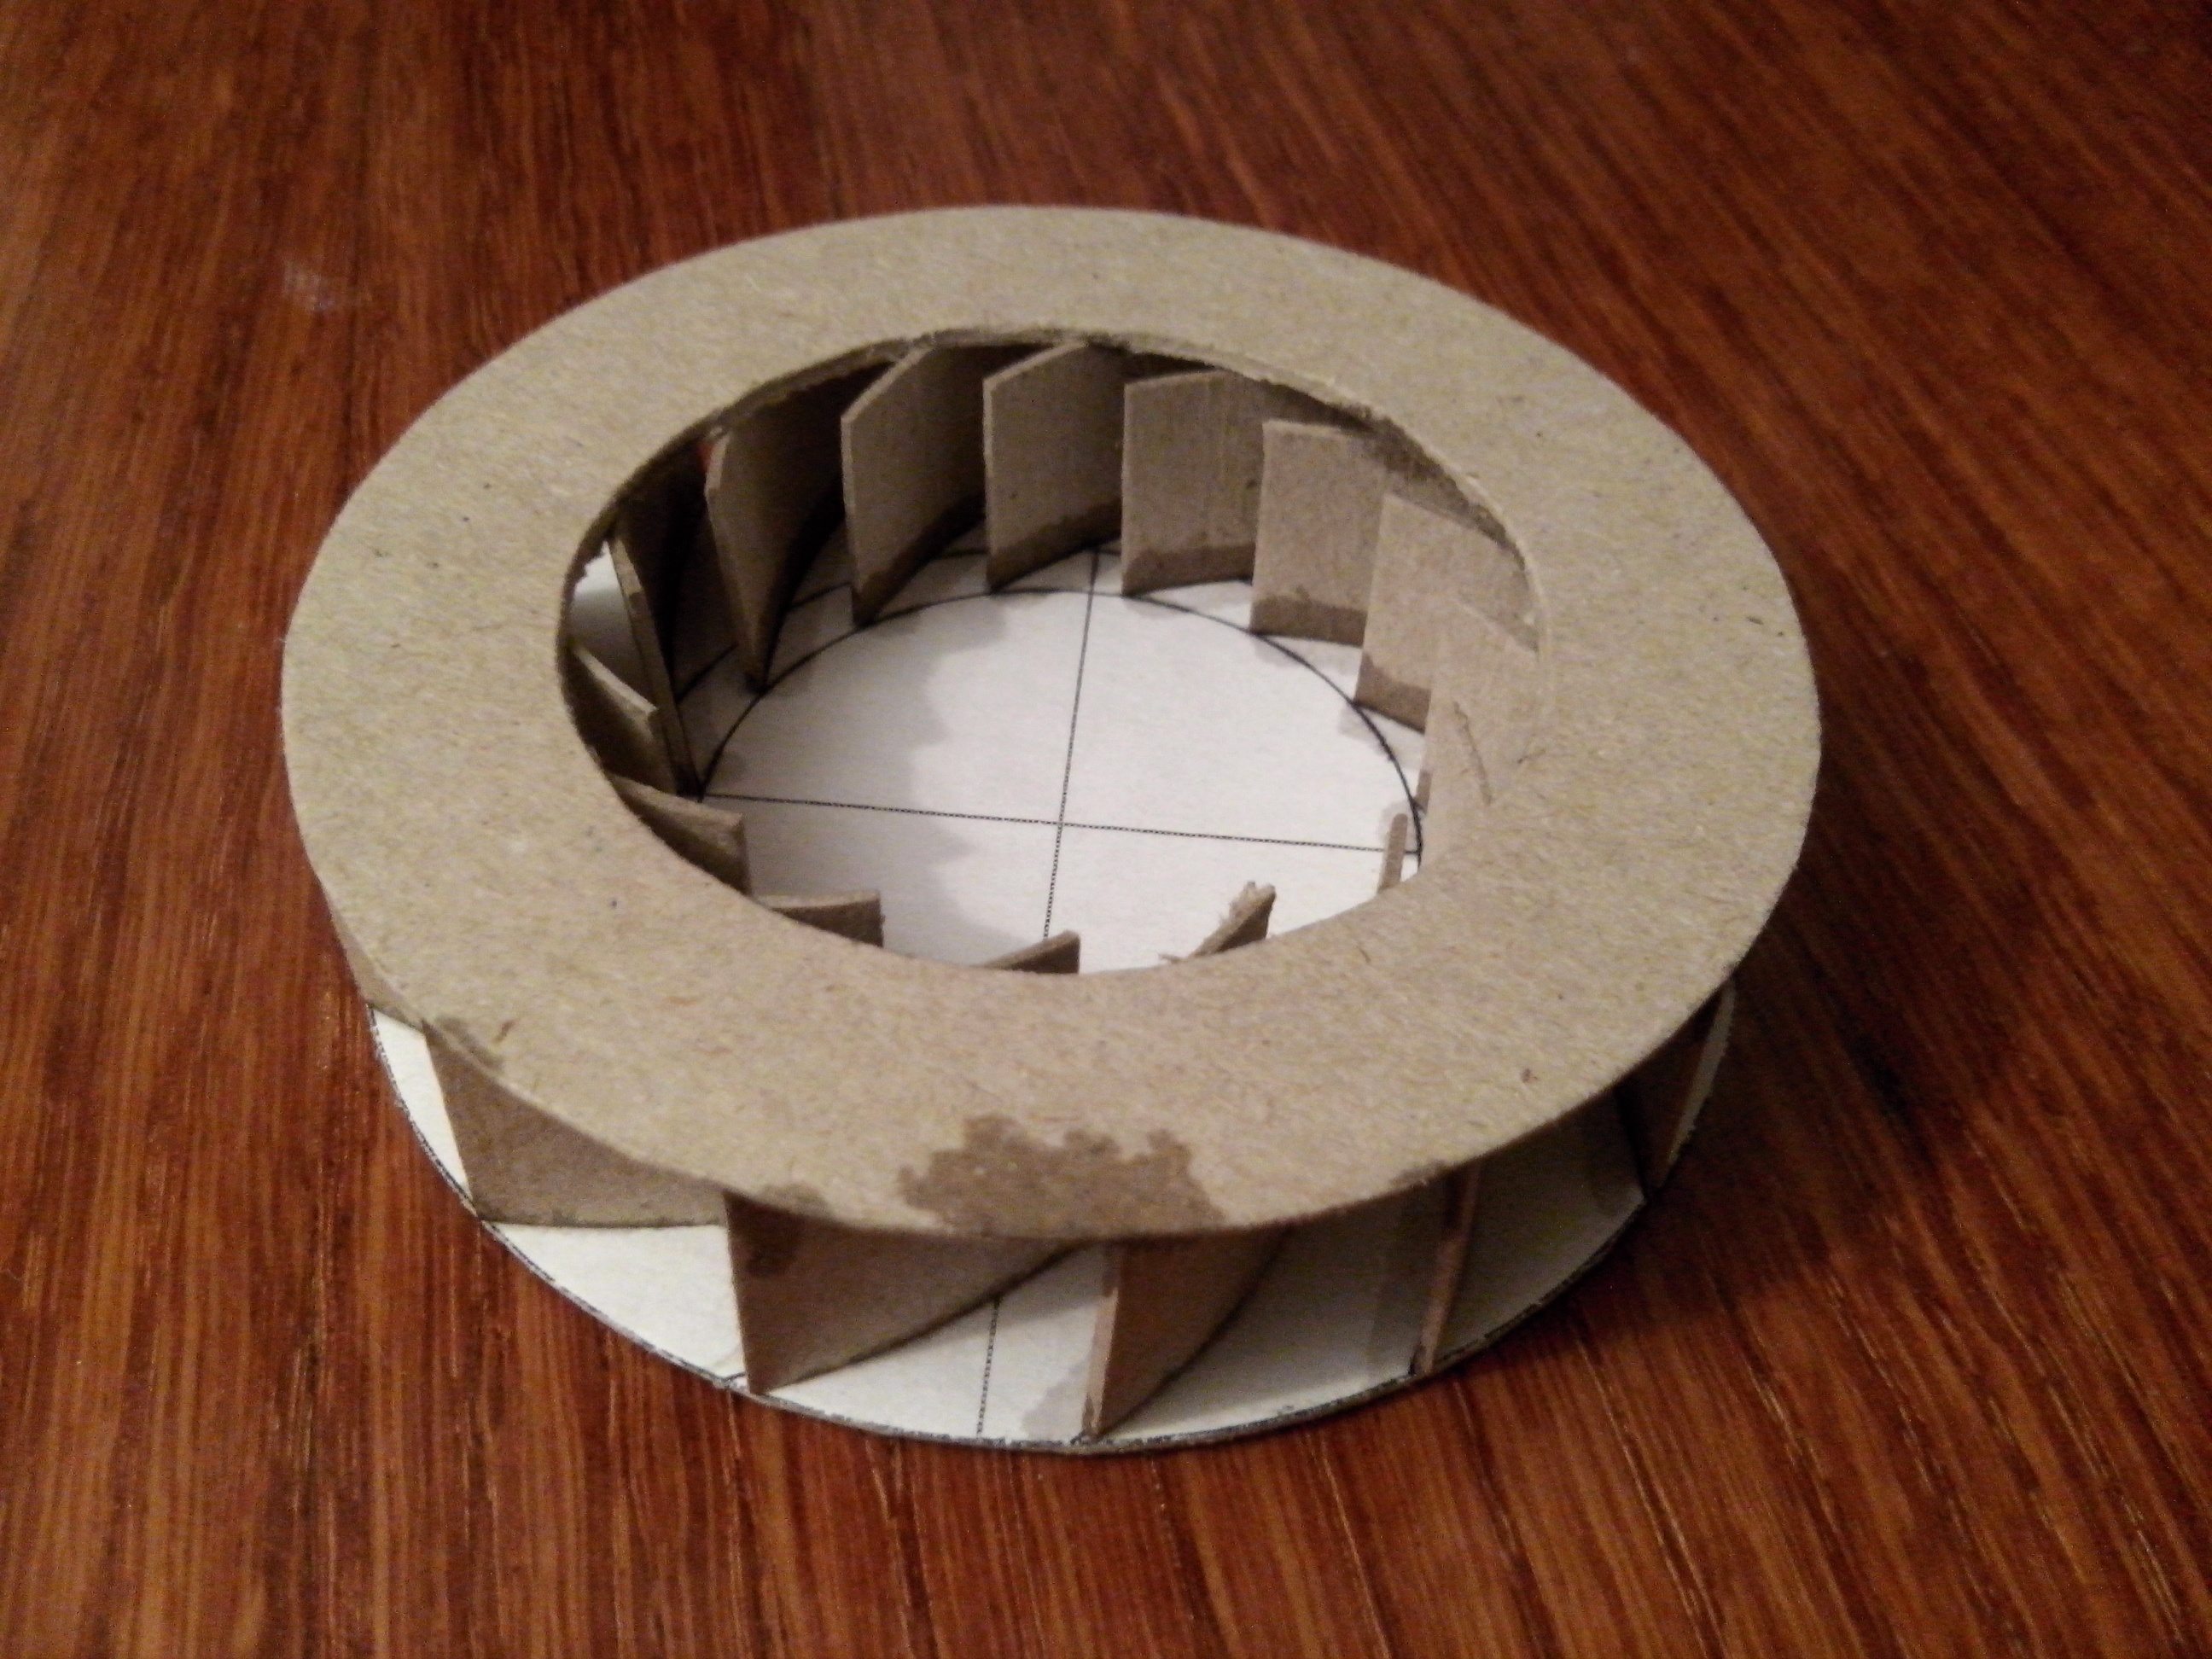
I cut out the turbine and glued it out of dense cardboard with super glue in 20 minutes. The first tests were successful!
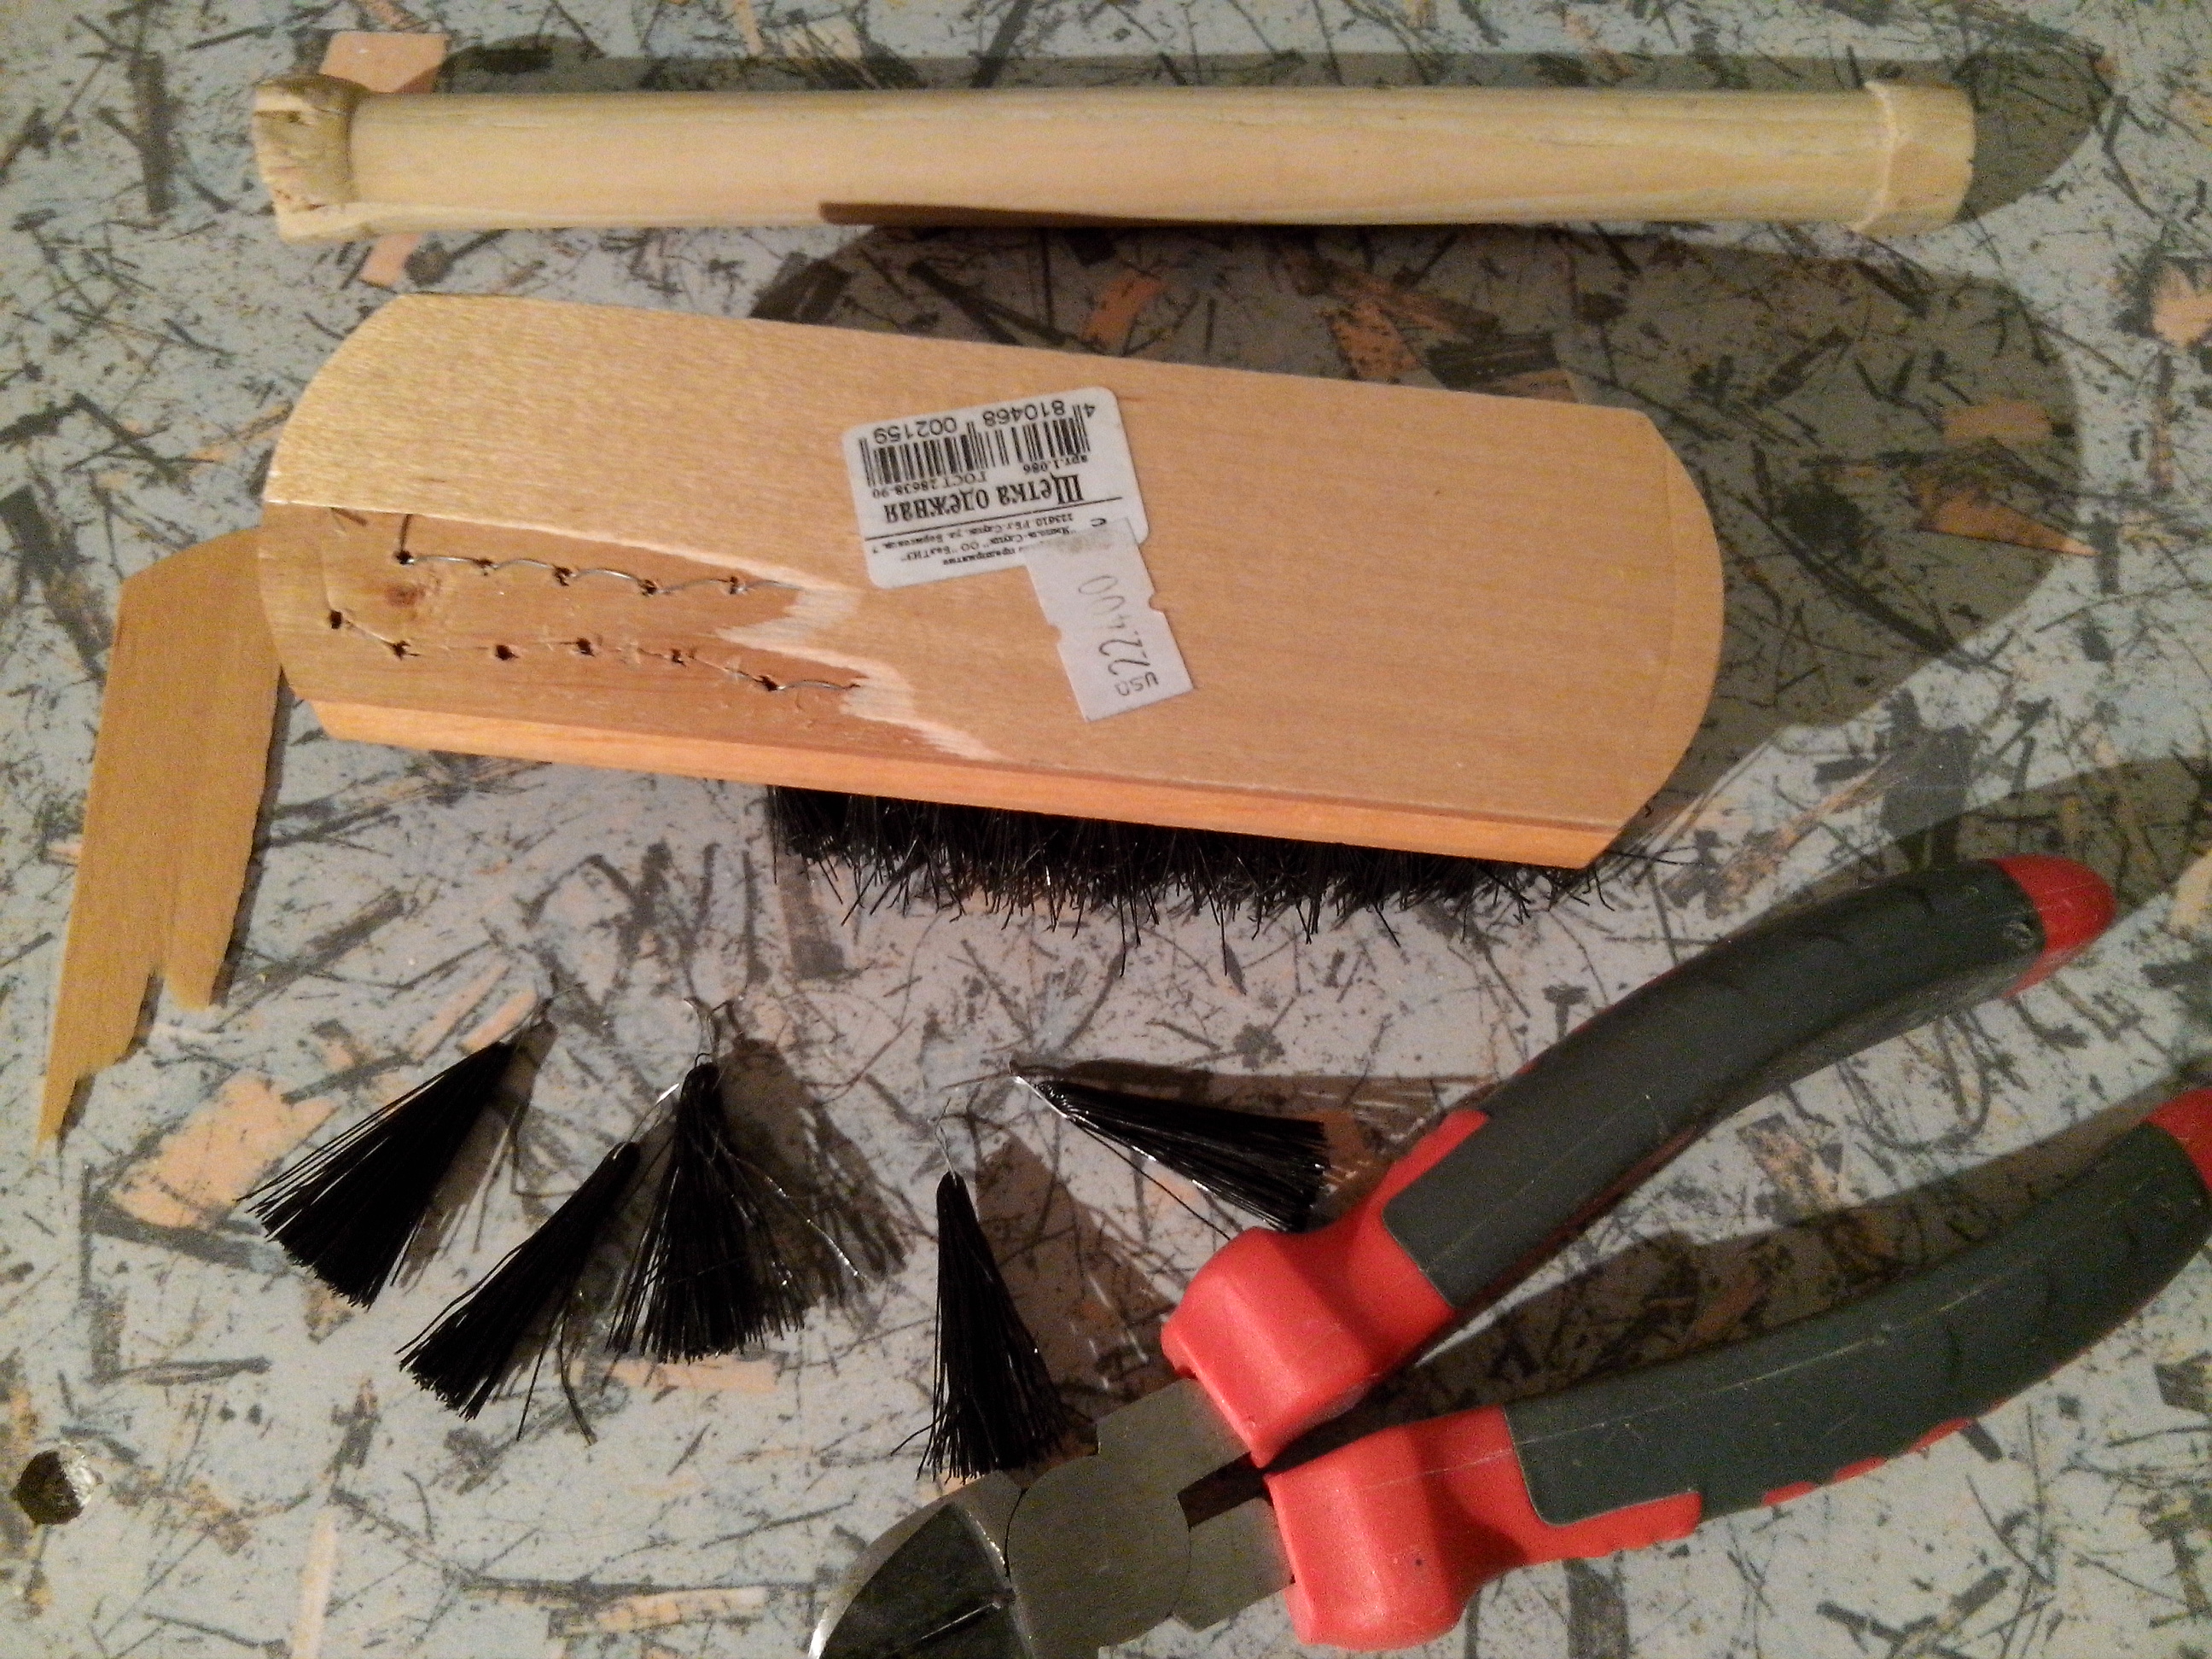
20 December 2014. Bought today pilling for the body :) vobschem something I need only a transparent jar with a screwed lid, the contents were given to his wife. I also bought a clothes brush with a hard pile, disassembled it, tomorrow I'll make a brush out of it for my robot.
In AutoCAD made sketches of the arrangement of elements in the body. He stopped at the size of a basin with a diameter of 25 cm and a height of about 9 cm. It is not clear yet whether all the elements will fit in, there are really few places, but you do not want to do the body any more. Put myself for a framework :)
Yesterday, on the Internet, I wrote out the sizes of factory robots-vacuum cleaners:
Diameter * height (cm)
36 * 9
32 * 8
32 * 10
30 * 5
22 * 8
I decided to make my vacuum cleaner with a cyclone filter, so you can not make a small height, it is determined by a jar for collecting garbage, but you can win in diameter. For the cyclone of course thanks to Dyson, a long time revising his inventions and even a garage vacuum cleaner made on the principle of cyclone. My filter will be simple, without any cones and frenzied suction power, for the first time will come down.
21 December 2014. From the floor brush in the garage sawed off a 15 cm round cuttings and made of it a round brush. The diameter was about 70 mm. Size unrealistically large and very tough bristles, I do not know how it will behave, but probably have to either remodel or weight the vacuum cleaner, because the bristles will throw it. The bristles simply inserted into the holes without glue, it turned out reliably. The entire structure is secured to the stud with a diameter of 6 mm and at the edges of the two bearings.
I found two wheels in the garage, do not believe it, from a vacuum cleaner! The same manual vacuum cleaner in which there was nothing electric, only 4 wheels and two brushes driven by these wheels. The wheels were waiting for their hour about 15 years :)
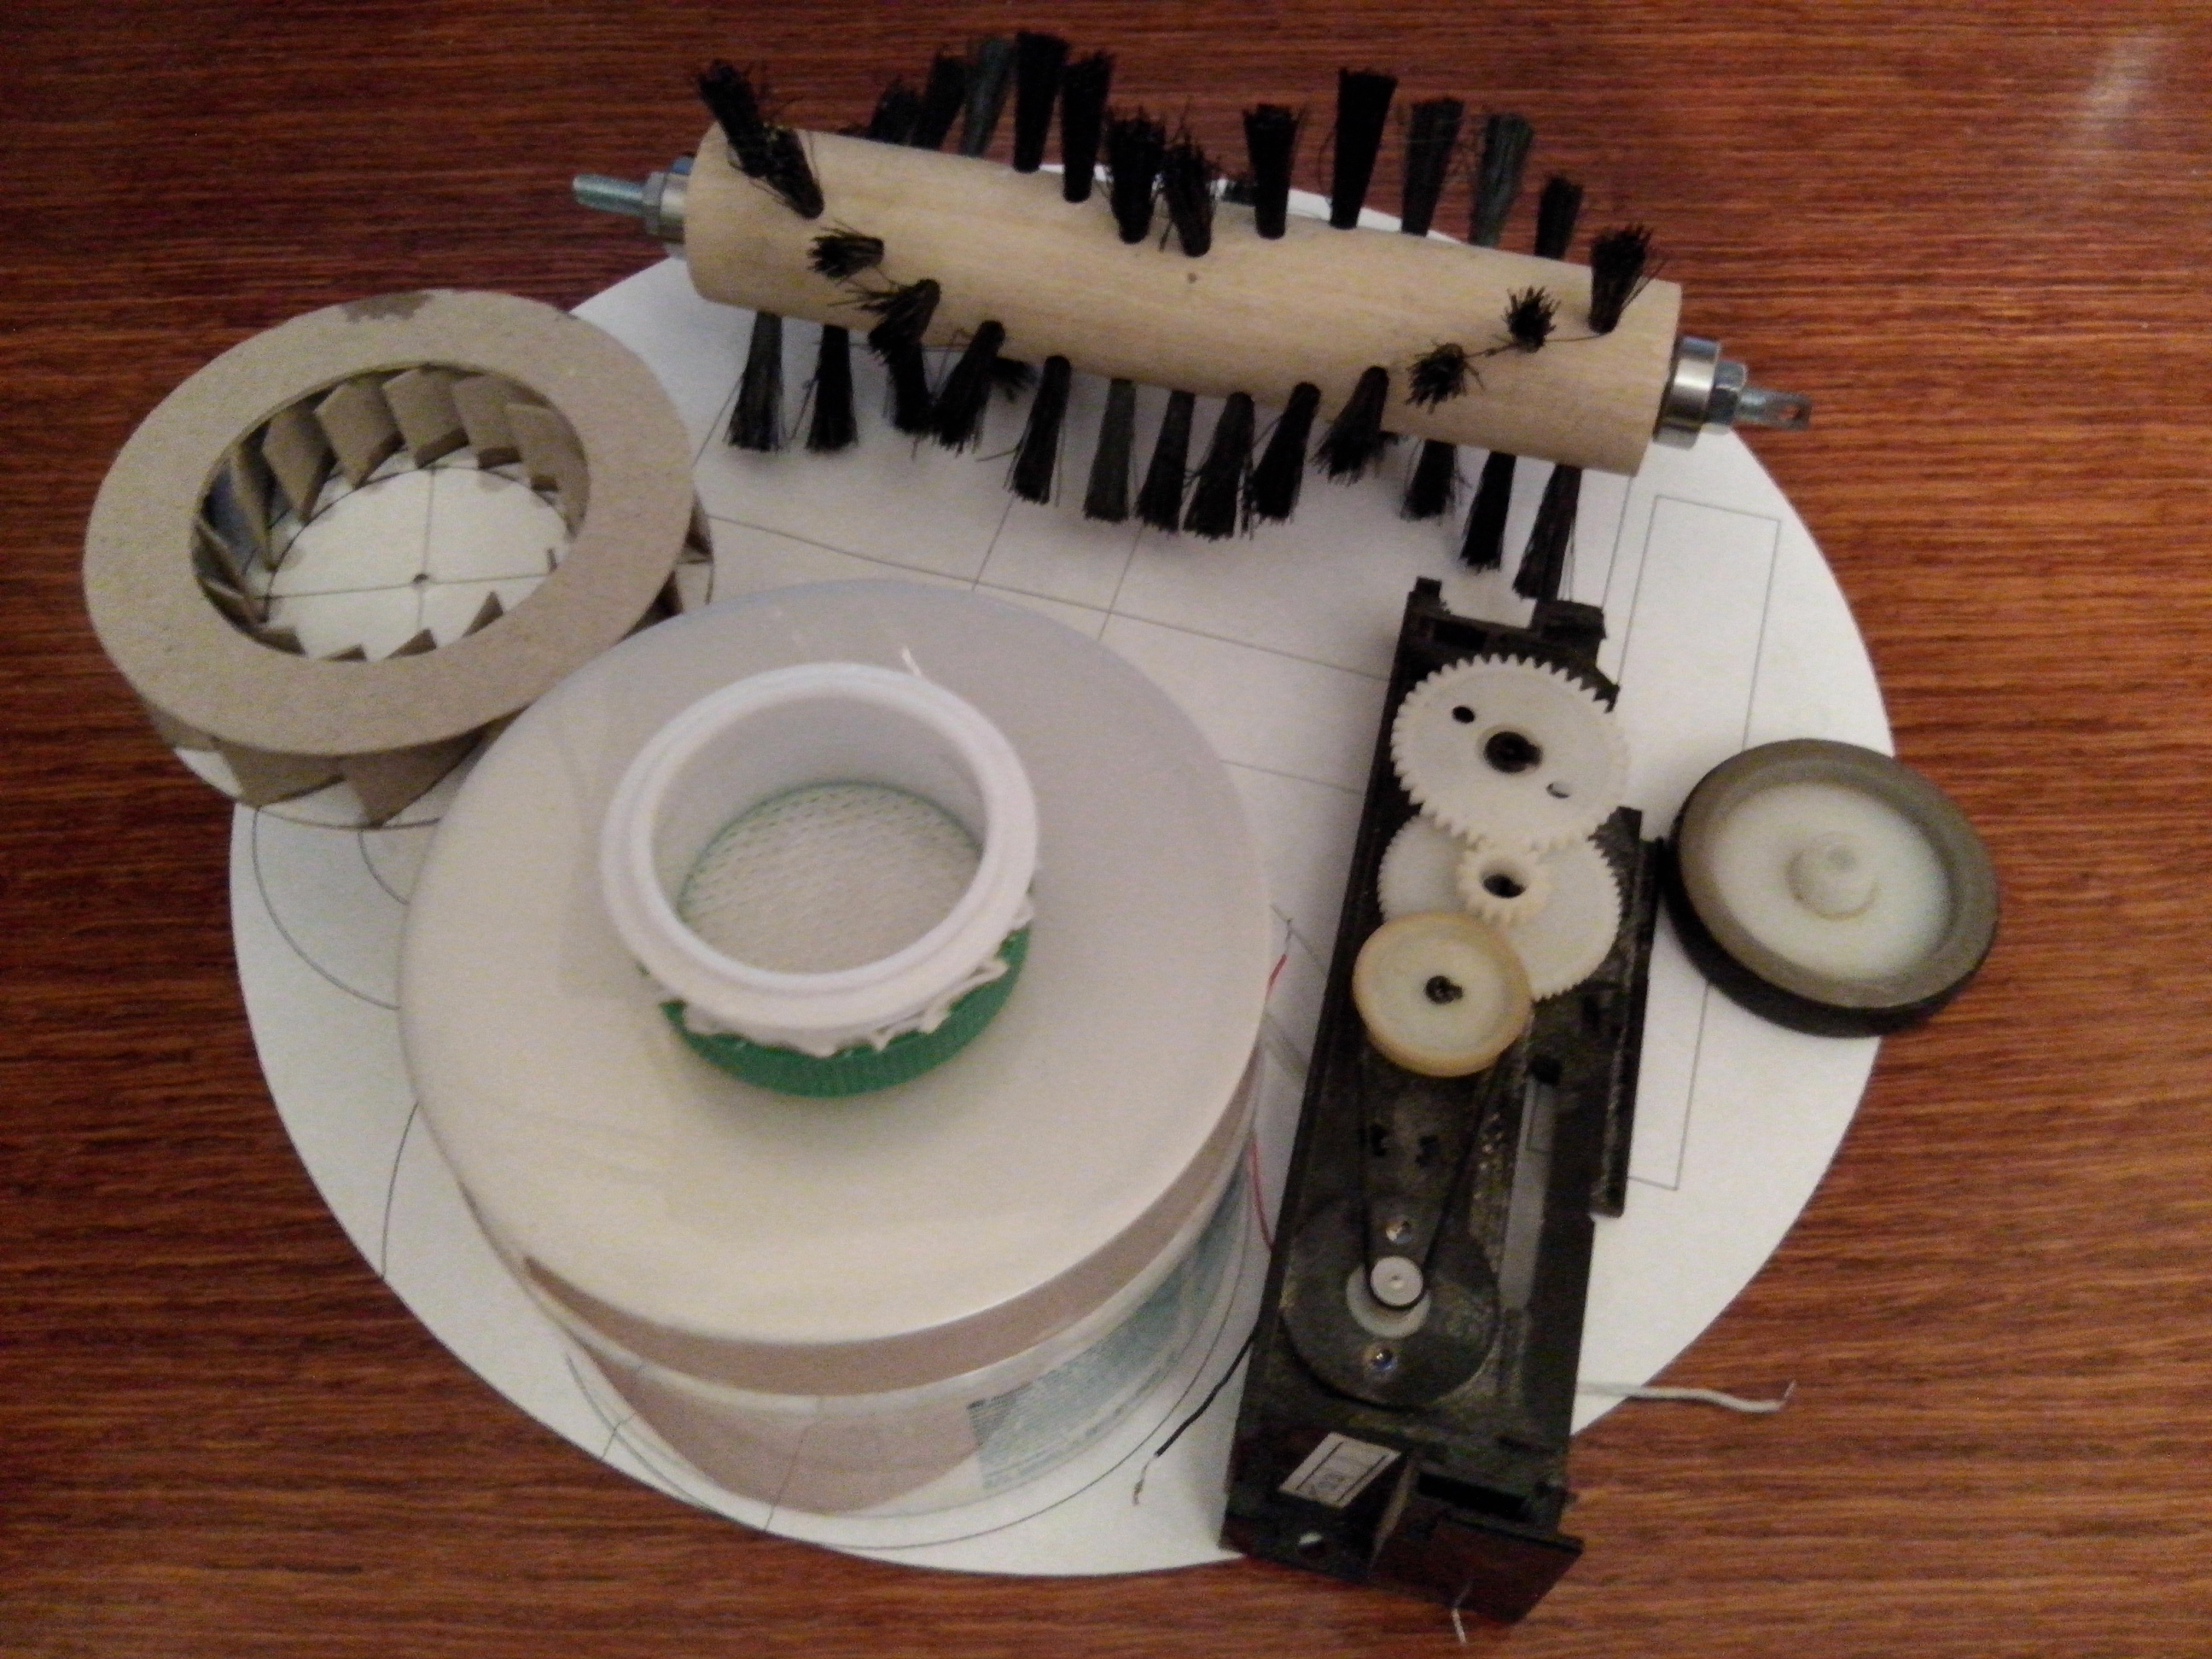
Now in AutoCAD I'll make another drawing for several details, tomorrow I'll cut it all out of plywood and try to collect something based on it already.
22 December 2014. I really would like to make a robot vacuum cleaner with my own hands and finish it before the new year 2015. Yesterday night on Youtube looked again several clips about robotic vacuum cleaners and in particular two videos about Dyson 360 Eye и Fluffy:
After the first video with Dyson's robot, I realized that by making my robot with a diameter of 25 cm and a brush 15 cm long, I would leave dirty places along the plinth at a width of 5 cm. After the second video, the brain rebooted at all and thought to make a brush in front of the robot ?! What will I do next I do not know yet, tests will be shown.
So, today I bought a new scoop and two brushes with softer bristles. Scoop bought because of the rubber band, which is glued along the edge, it is perfect for my design.

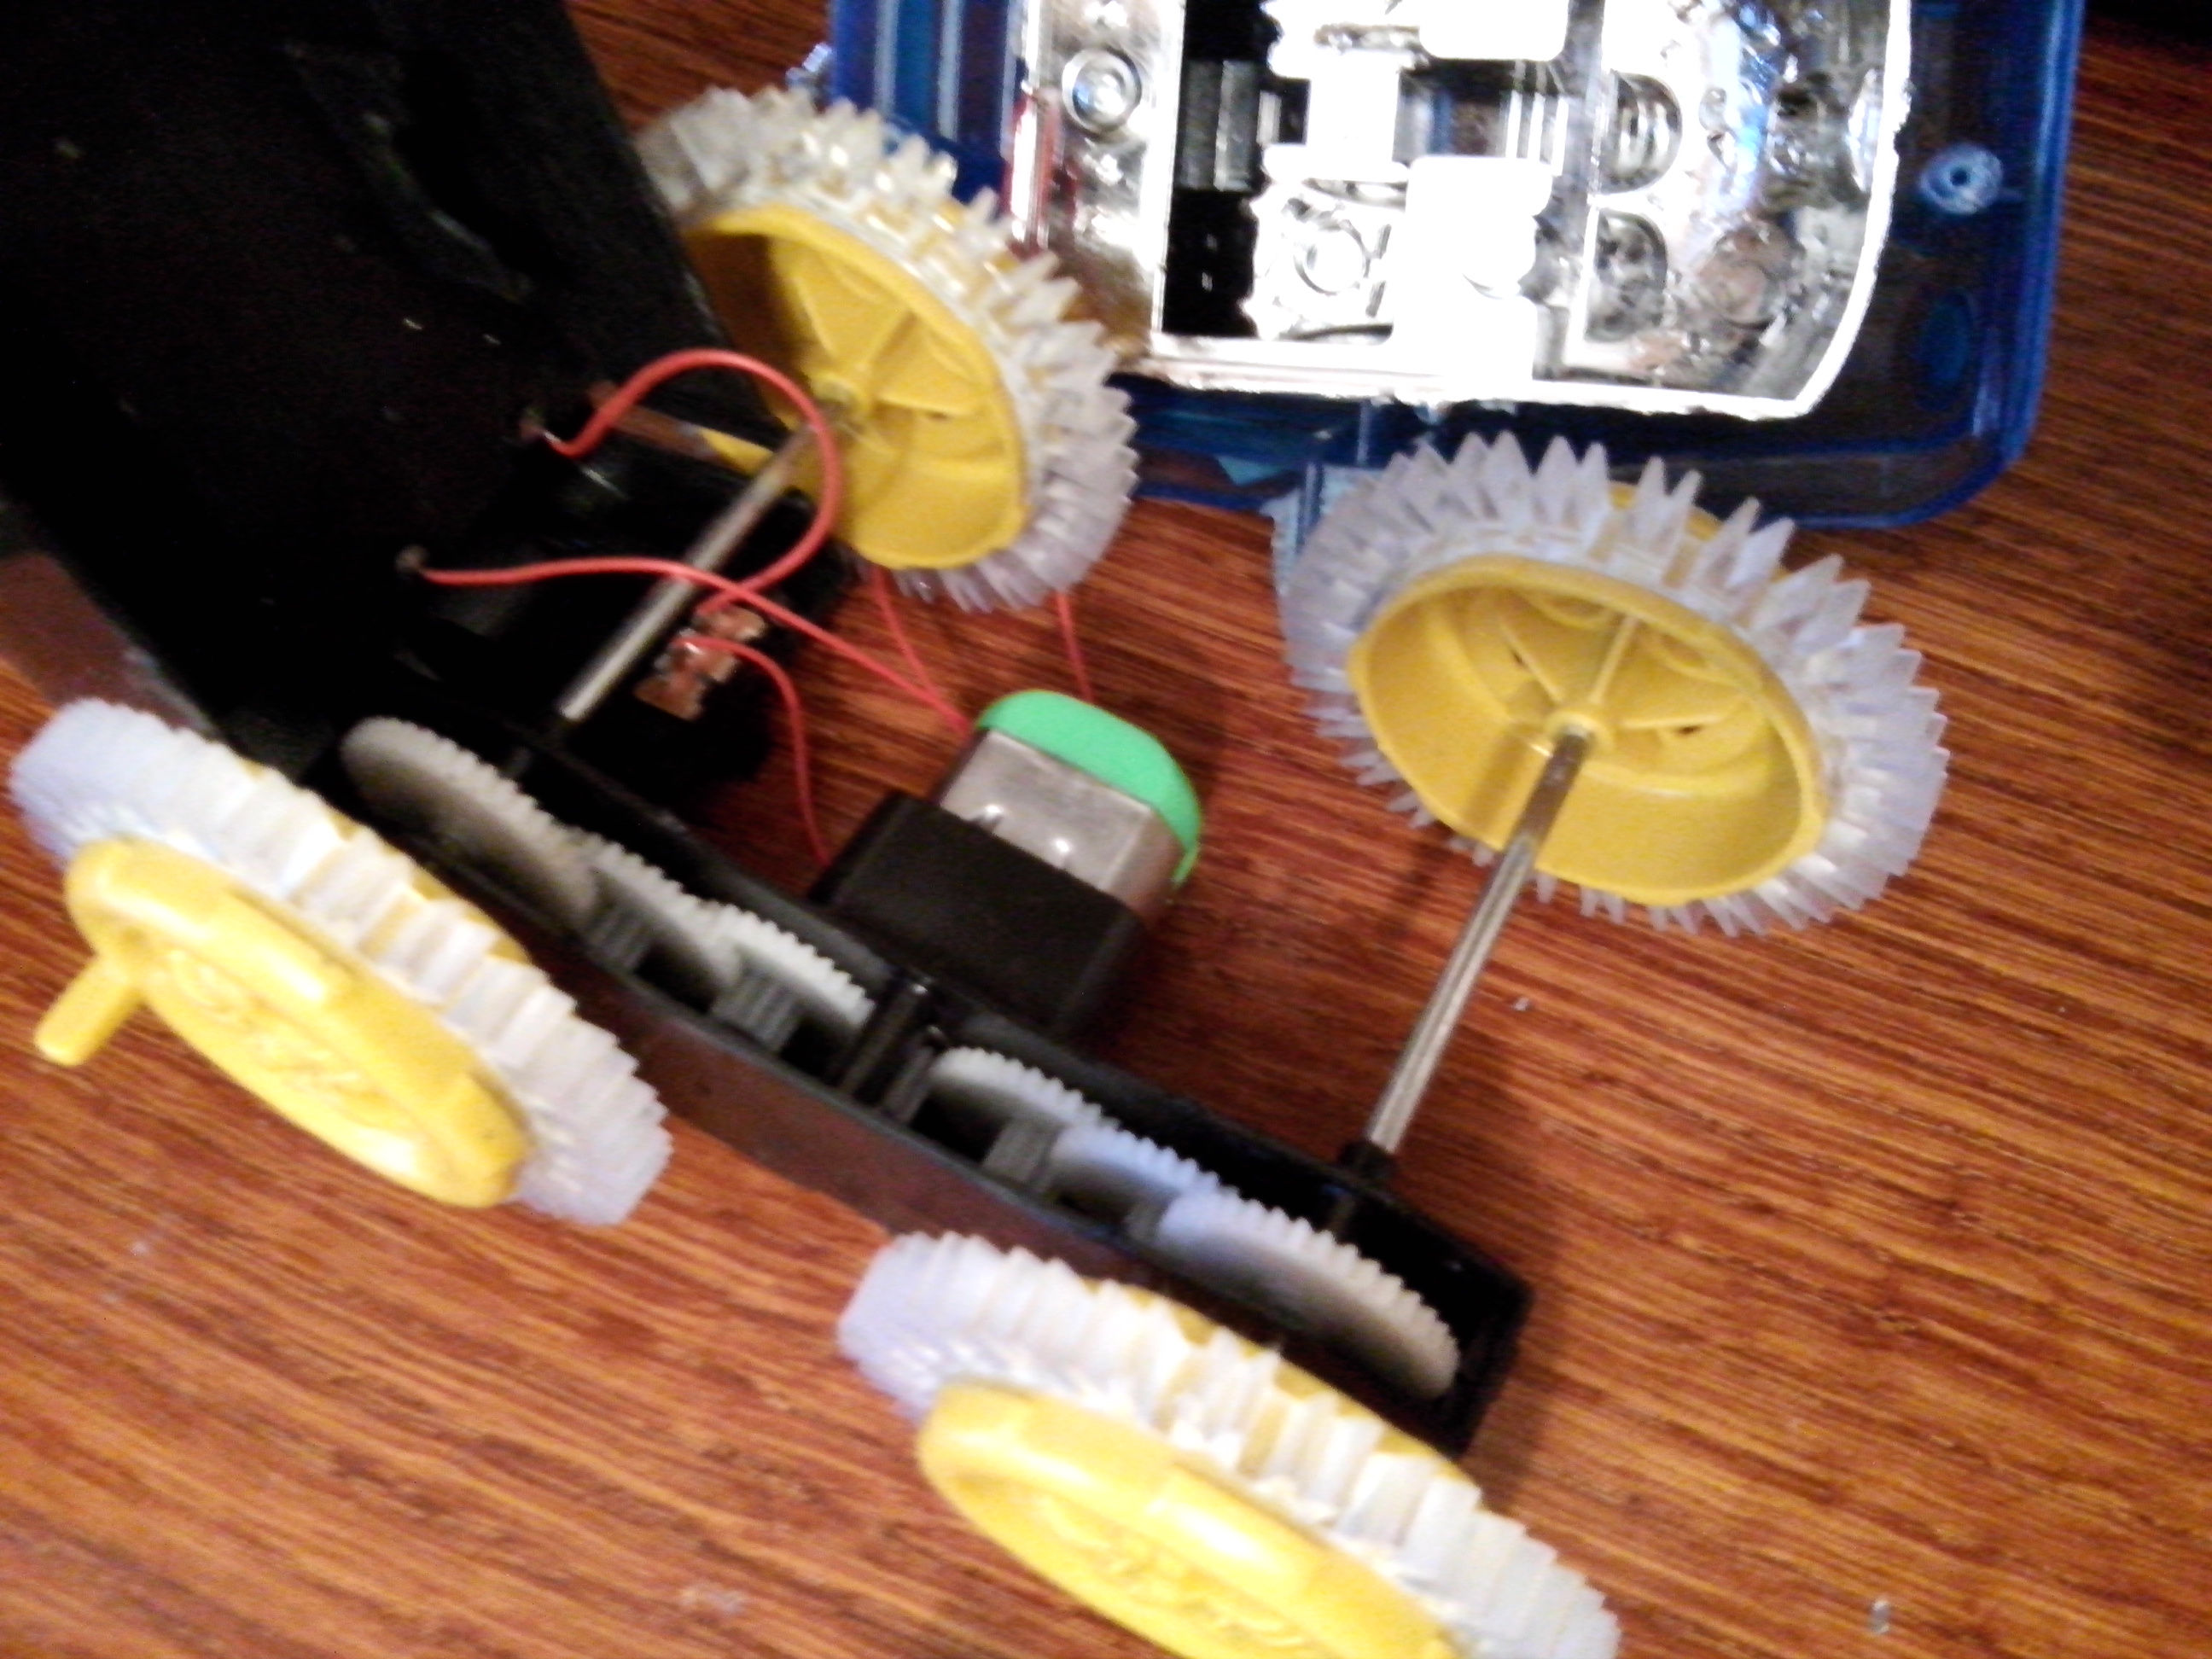
The geometry of the hull has changed a little because of new thoughts and a new brush. The robot's size is still 25 cm, but now it's half a circle and half a square. The width of the brush is 21 cm, the diameter is about 6 cm. I sawed the base of 8 mm plywood, fastened the wheels and a brush, tomorrow I will make a reducer and try to sweep something :)

23 December 2014. I screwed a gear to the brush and attached a reducer next to it, used a rubber band for money as a passer, screwed the motor with a screw for the test. Below on the video test at 6 and 9 volts.
Most likely the brush again I will redo it, too short pile and too hard. The pile should be without a pass, because there are streaks of dirt. In general, it turned out spectacularly :)
I figured I'd have enough room for three motors in the hull. Two motors will spin two wheels and one brush. Plus, a lot of space will be occupied by reducers. The idea came to replace the gear reducers with a worm gear, maybe I'll do a couple of tests.
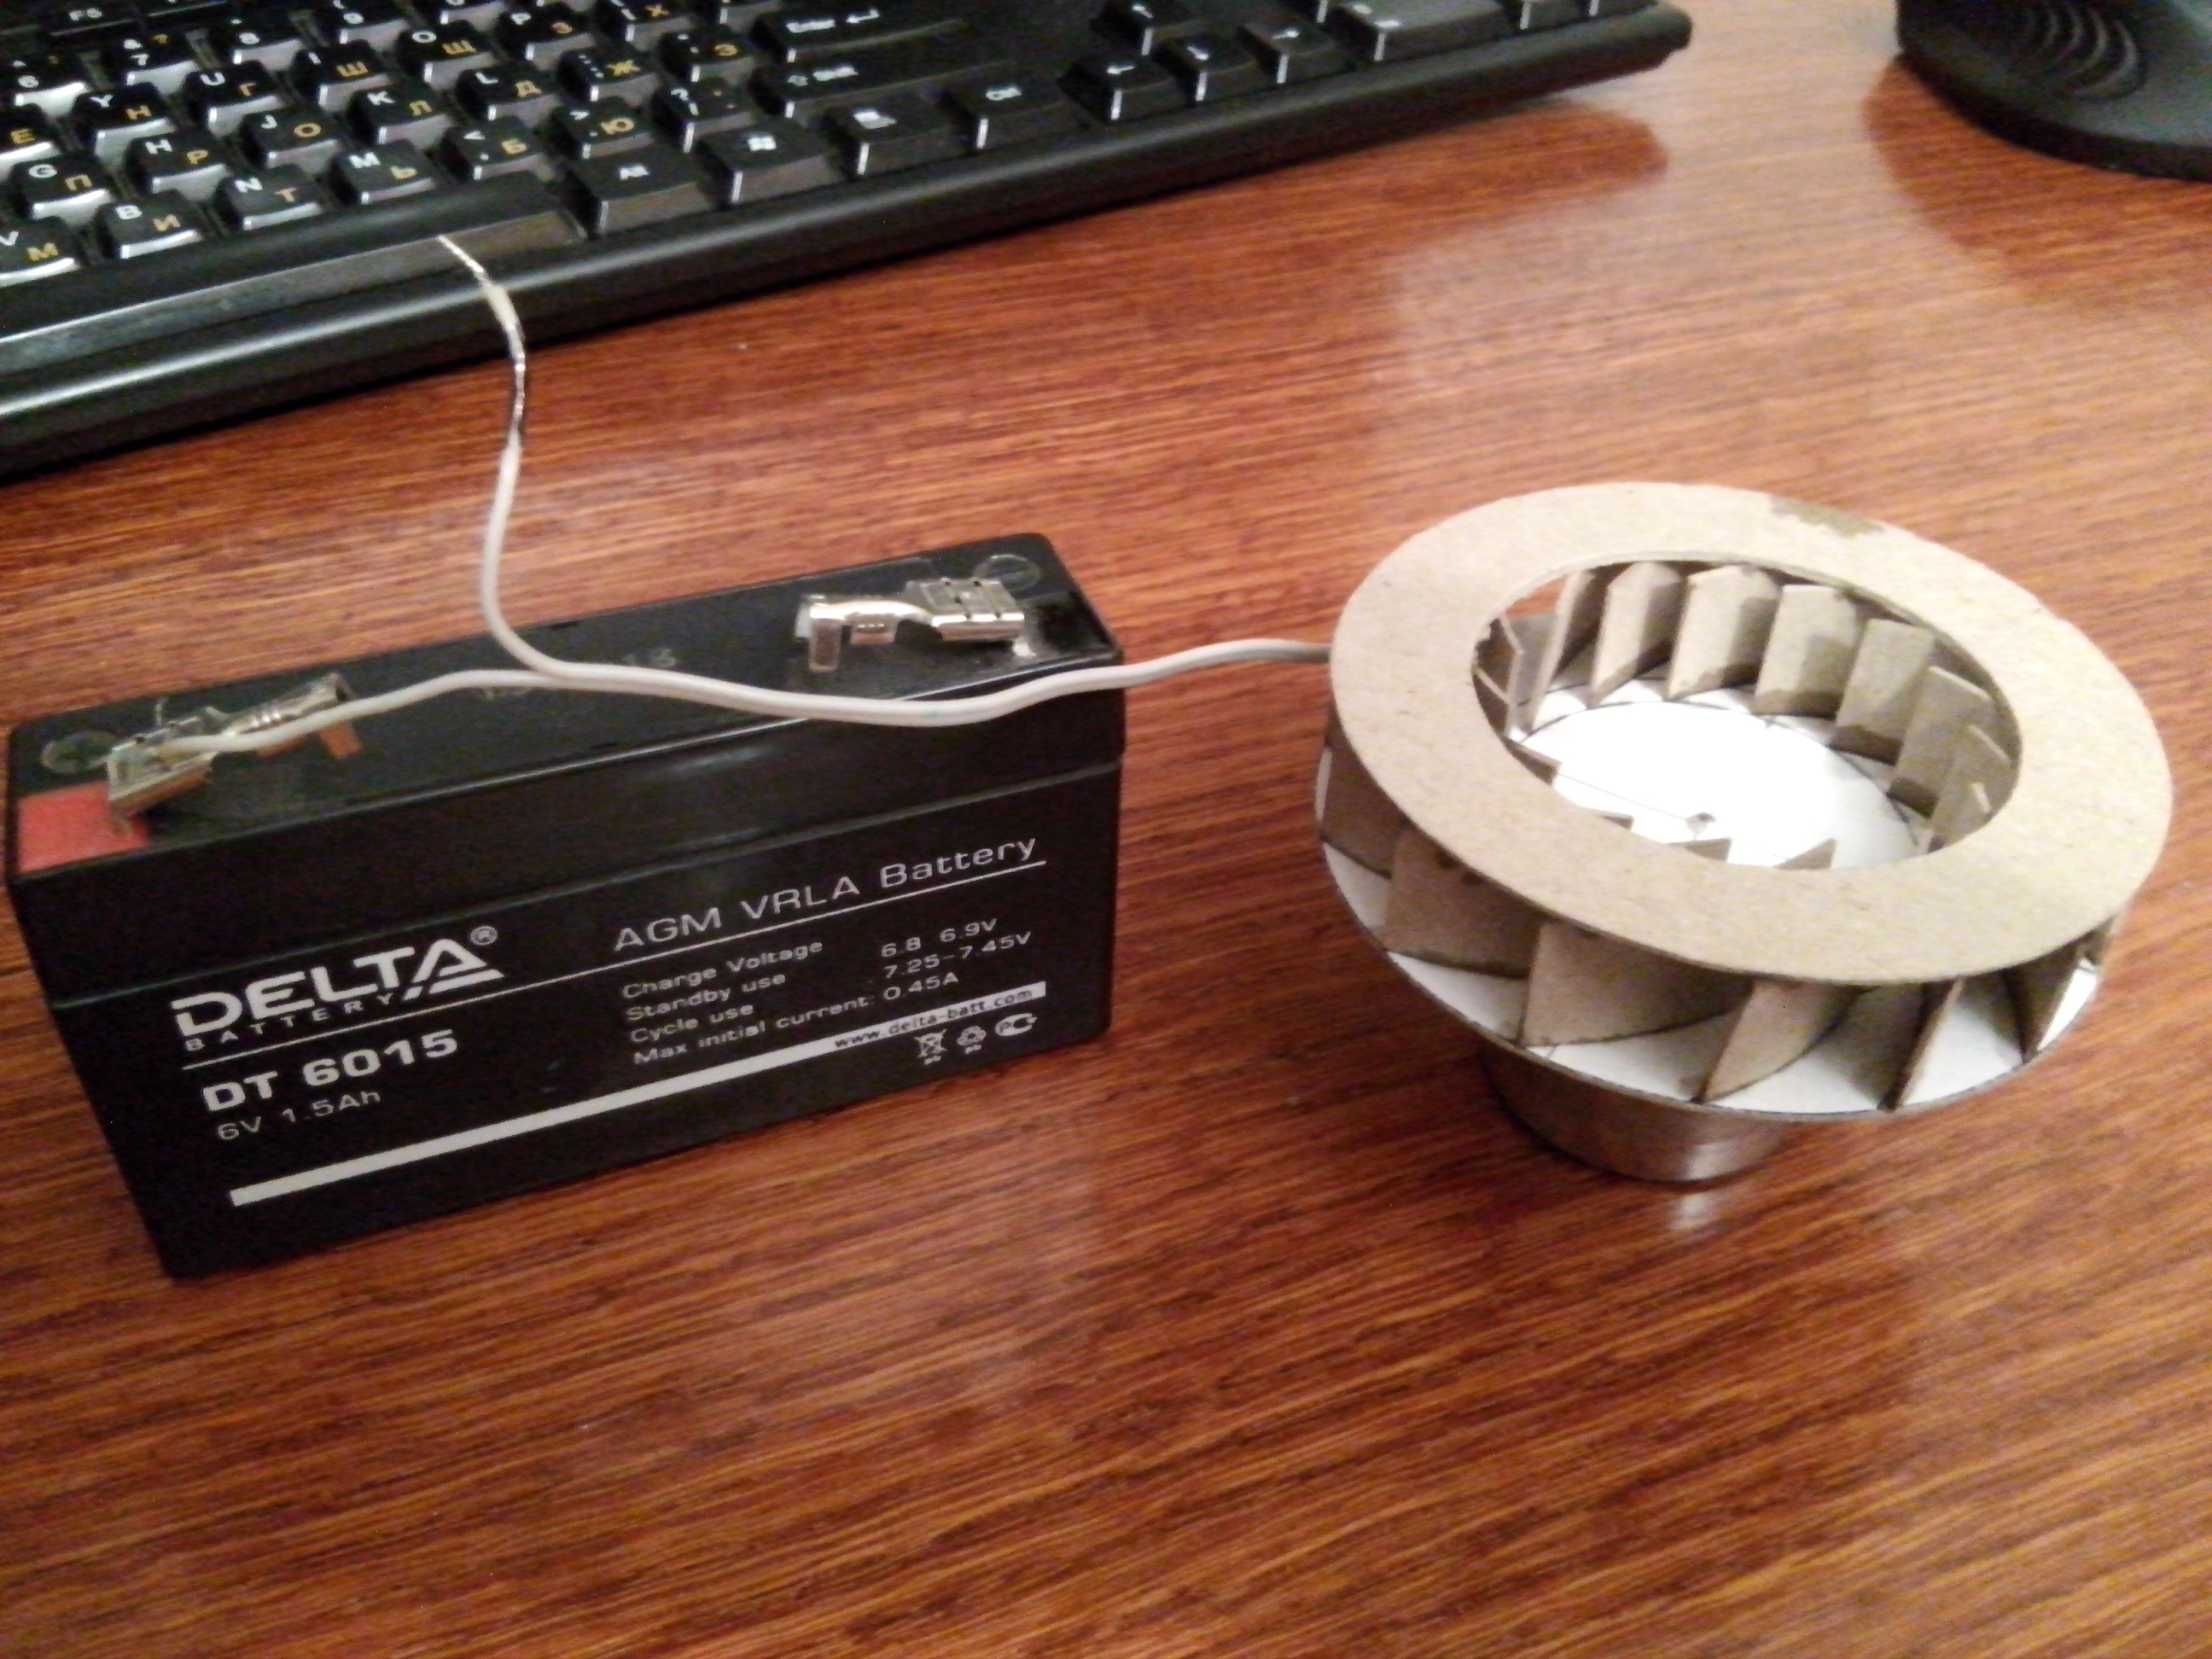
The suction turbine was covered two times with a layer of epoxy resin, it became plastic. The cardboard is no longer bent and if the water gets there everything will be fine. It did not have to center, it turns perfectly. Meanwhile, I am preparing the basis for a garbage can. He made a fine filter from the neck and the lid from the bottle of kefir. As a filter cloth took a one-time bag from a vacuum cleaner. While everything is glued, after a couple of days I will screw it onto the base and again I will test everything.

During the work on the robot constantly comes up with the idea of building a 3D printer. With a three-dimensional printer it would be much easier to create such details as I need and with high accuracy. When you drill a drill with a drill, the drill can pull away or the slope is not exactly 90 degrees, then you can only dream of high accuracy. In addition, the details of plywood are very cumbersome, on the 3D printer everything would be neat.
24 December 2014. In the morning I tested the turbine and the jar for collection of rubbish, in the afternoon I repeated the experiment with a higher voltage. The results are not impressive. The fine filter had to be unscrewed for now, because through it the power drops significantly. In the bank, rubbish turns very effectively, but really the suction power is not enough.
High-voltage turbine test.
At these moments, there was a desire to score everything, why did I do it at all. Now it's very easy to quit and forget - it's the easiest way.
In the evening I took a brushless motor and began to glue a new turbine for it according to the same drawings.
25 December 2014. Docked the second turbine for the brushless motor, I wanted to test, it turned out the motor rotates in the wrong direction. Tomorrow I'll go to the garage to solder the wires, but for now everything has been put aside.
26 December 2014. Soldered the wires between the controller and the motor, got the rotation in the right direction. The turbine began to work, but a couple of tests on the knee turned out to be sad again. Maybe even remodel the design of the turbine, adding a bit of taper, but more on that later.
The last two days I spent very little time developing, I'll try to allocate 4-5 hours tomorrow.
27 December 2014. I decided to try to assemble a worm gear for the running part of the robot vacuum cleaner. On the pictures earlier I showed that it is possible to make a worm from a nail and a piece of copper wire. The problem was in the process of soldering the wire to the nail. My soldering iron is not very powerful, so I additionally heated the nail on a gas burner. However, it was not possible to solder the wire qualitatively, so I took a round piece of wood and wound the wire on it, spilling the threads with super-glue. The worm was quite tolerable. Ignoring the ovality of the wooden base and generally the entire block of plywood, the mechanism worked fine, but the pancake is very slow.
It would be nice to get ready plastic worm gears, but for now let's put this aside.
Concerning the future consumption of energy by my robot. Now a snag with a turbine, something she does not want to suck as expected, even with the filter removed fine. If a normal collector motor is used for a turbine and it is powered by a voltage of 12 volts, it will consume about 0.6 amperes. If you use a motorless motor, it will consume about one ampere. Plus for the movement of the robot will be used two kolektoryh motor and for the brush one more, each will consume about 0.3 ampere. Electronics will also consume something. The total robot will & quot; eat & quot; From about 1.6 to 2 amperes, in peaks probably up to 2.5 amperes. I do not know much or not, it seems like industrial robots consume three or more amperes.
Again I reviewed a bunch of videos and photos on request "the principle of the robot vacuum cleaner". I found a cool picture of the turbine from an ordinary household vacuum cleaner. I read at some forum that the longer the turbine blade, the greater vacuum it can create due to the centrifugal force.
28 December 2014. Got two more turbines today, differ only in thickness. The blades did as long as possible. In the photo below, the first thin (5mm blade height) turbine, it is very quiet at work, but does not suck :)
The second turbine is thicker (15mm blade height).
Once again in the garage I tried to pull a brush on the floor, the motor is often plugged from the load, the bristles still turned out very rigid, and the diameter of the brush would not hurt to reduce. Tomorrow, in any weather, I'm going to buy a brush with the softest bristles, I'll also go to the toy store to look for machines with a worm gear for the running gear of the robot.
In the garage I tested a new turbine with a voltage of 12 volts, I thought that 9 blades are probably small. At home I glued a third turbine with long blades and a quantity of 15 pieces per day, I attach the photo:
One more day is over. Until the new year, I can not make a vacuum cleaner as planned, but I want to believe that everything will be fine :)
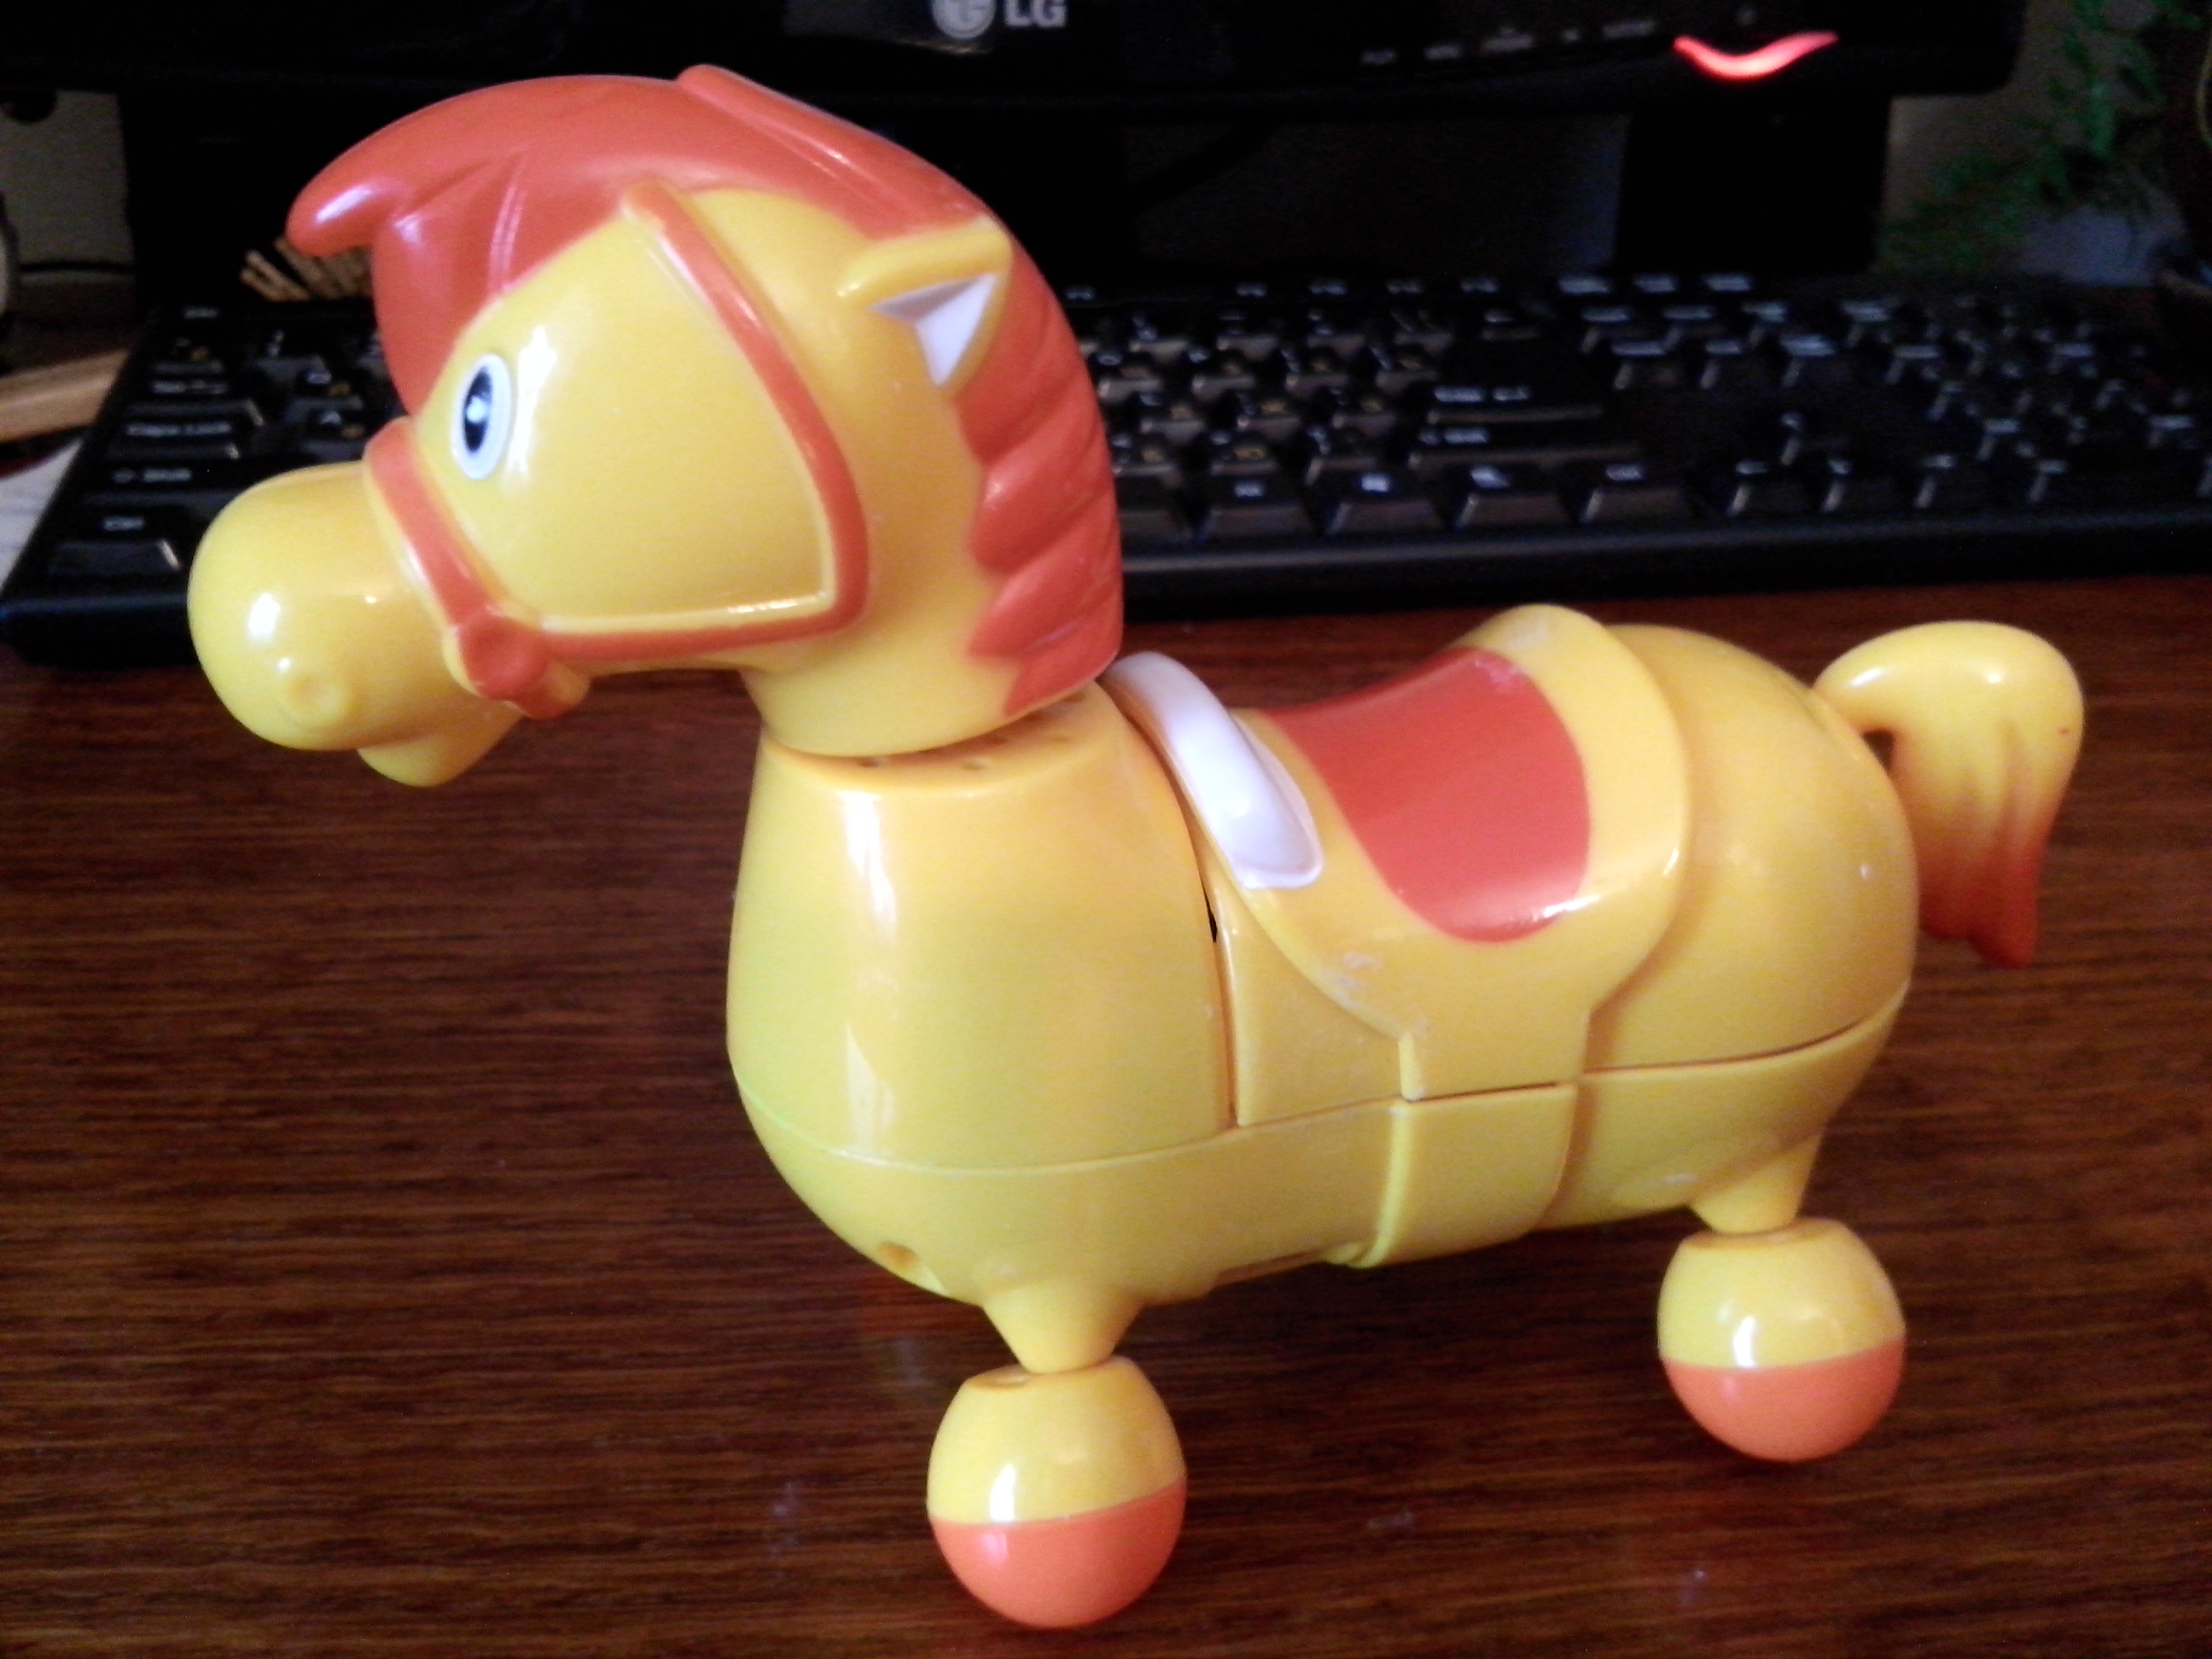
29 December 2014. I went to the store with toys in search of a worm gear today. On the way, I remembered about my daughter's toy - a horse. This horse did not really like my daughter, and in general, and he does not really :) But he has two worms and 4 + 4 gears inside.
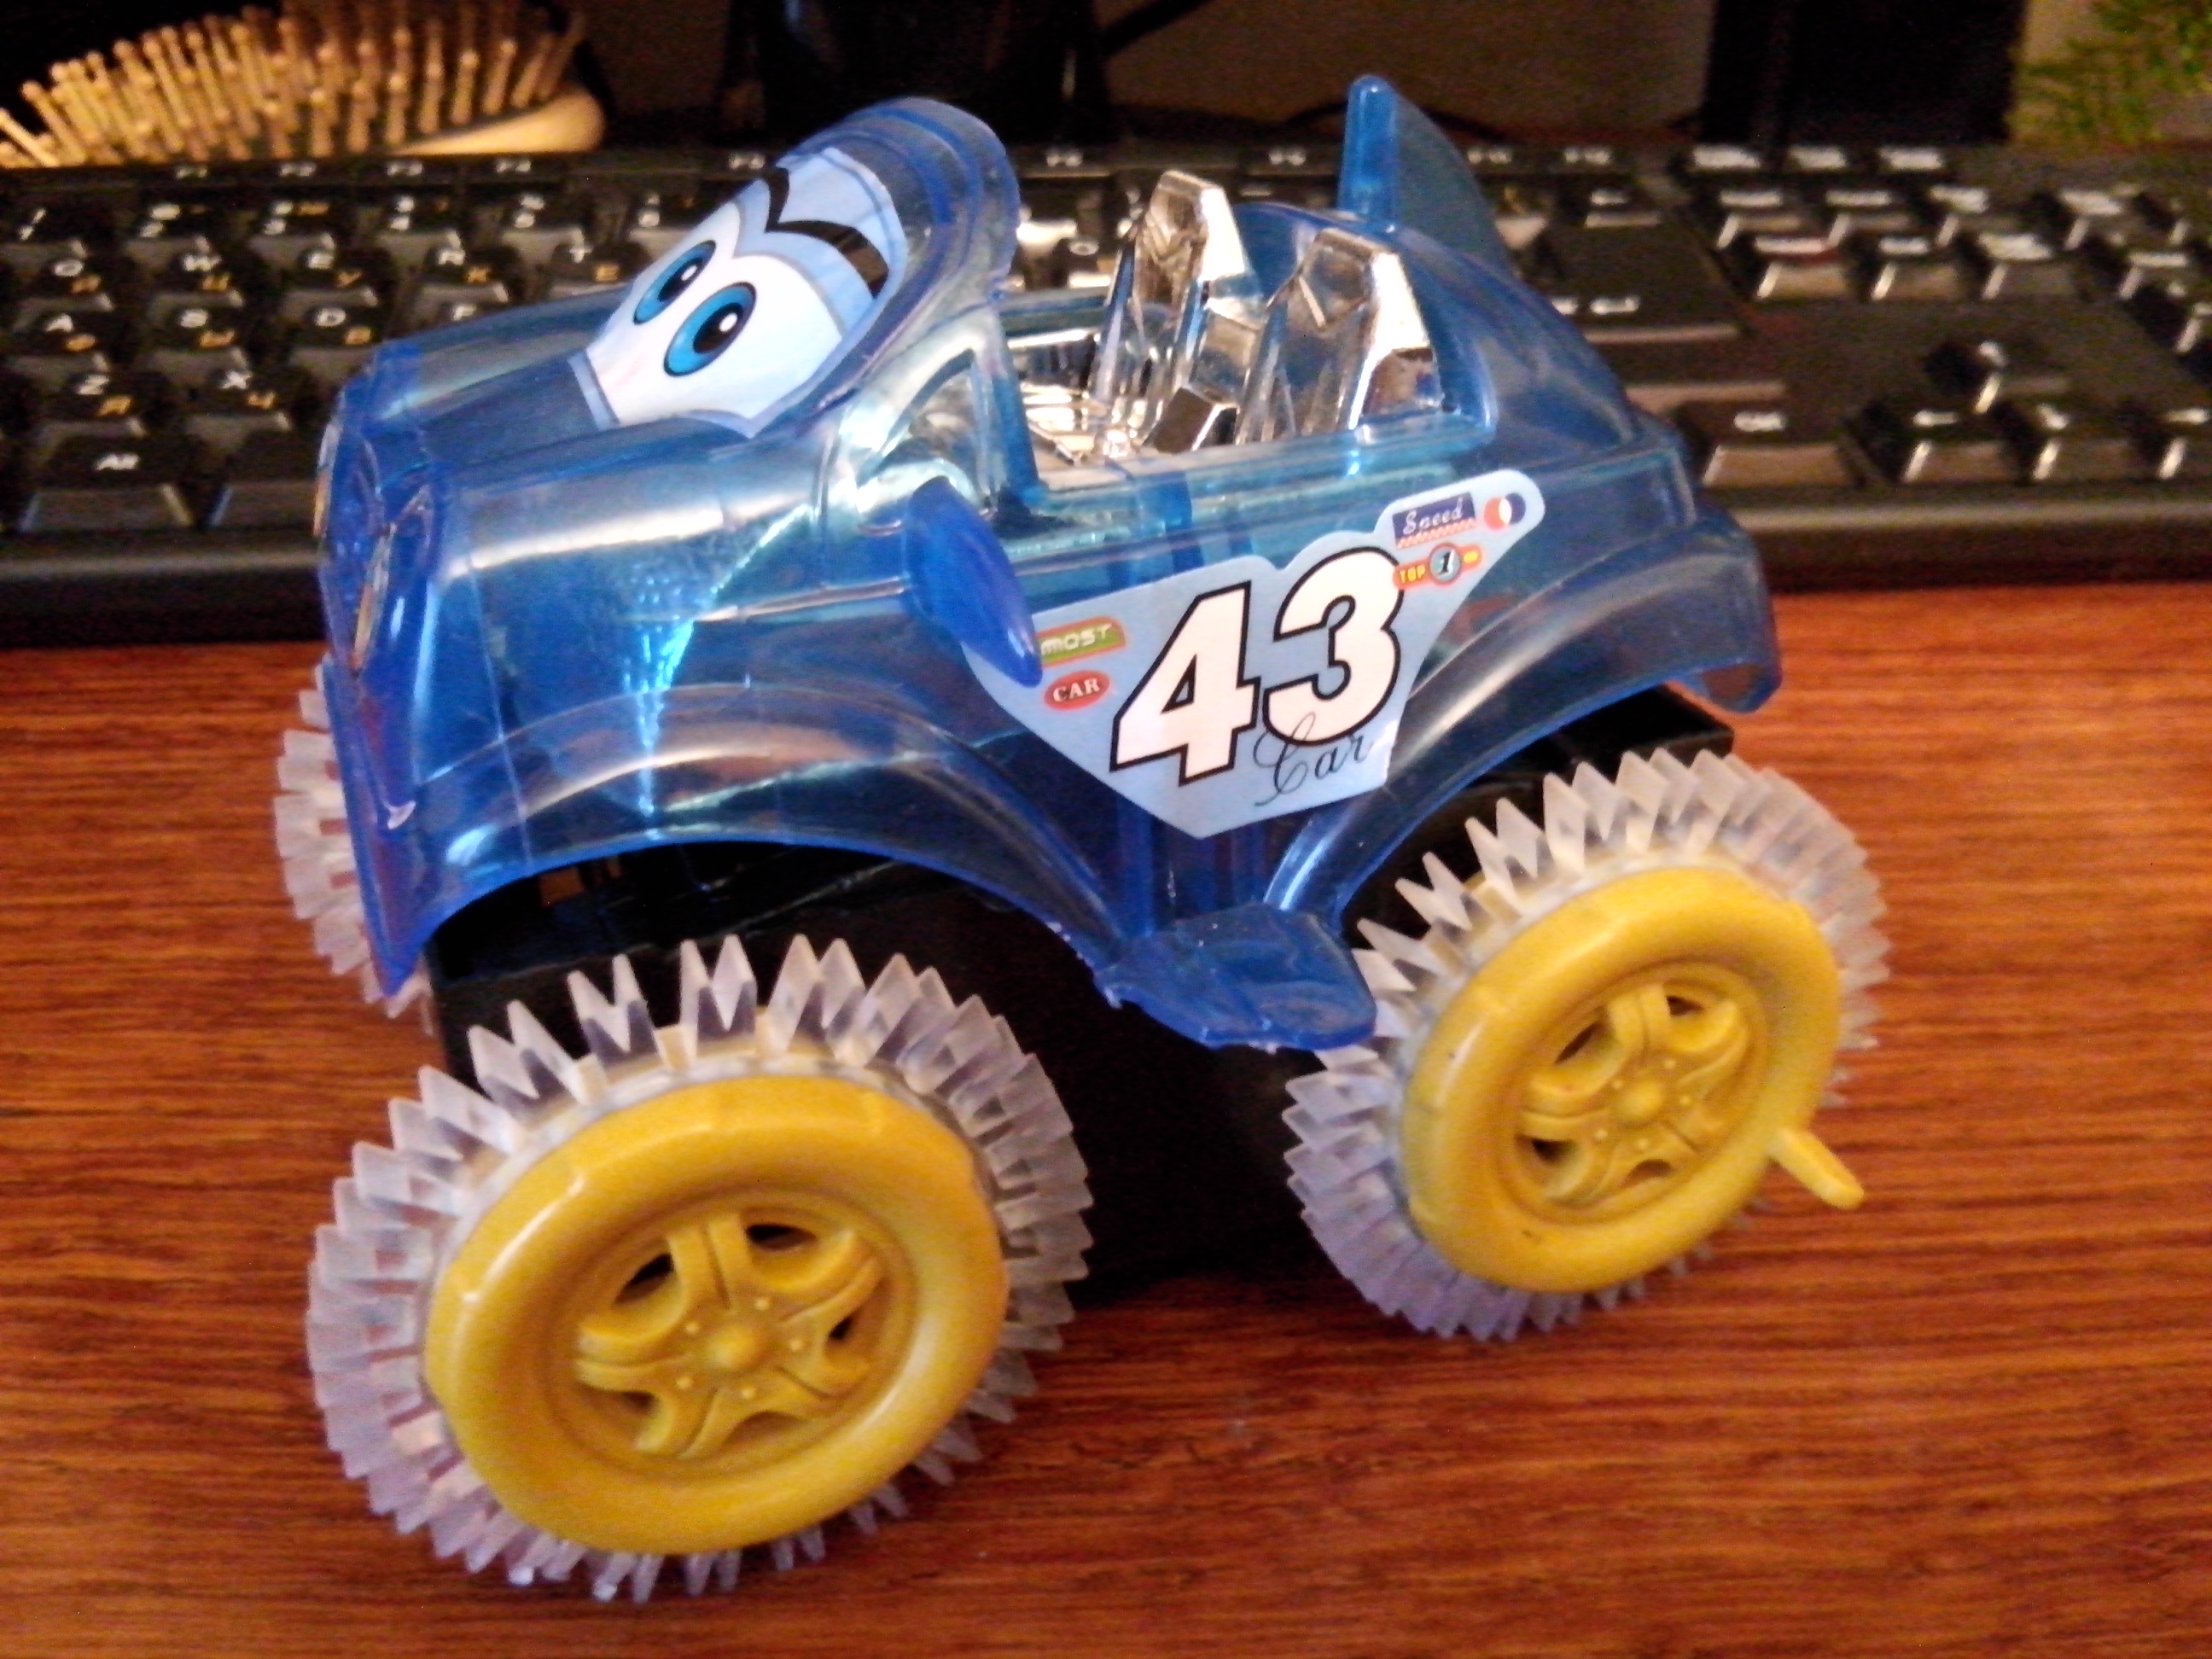
In the toy store, I still looked, then in the second and bought a machine-perevortysh. The machine bought not so much for the mechanism, how many for its wheels, they climb on any surface. Inside, the machine worm gear was not. I quite possibly use the wheel for a self-made robot, but for now the car gave the daughter - she is delighted :)
In the afternoon came to mind the idea of making a robot-elektrovenik, i.e. The design is the same as now, only there is no turbine, garbage is simply going into the compartment. When in the store I was looking for a new brush with a softer pile (I never bought it) I accidentally saw this:
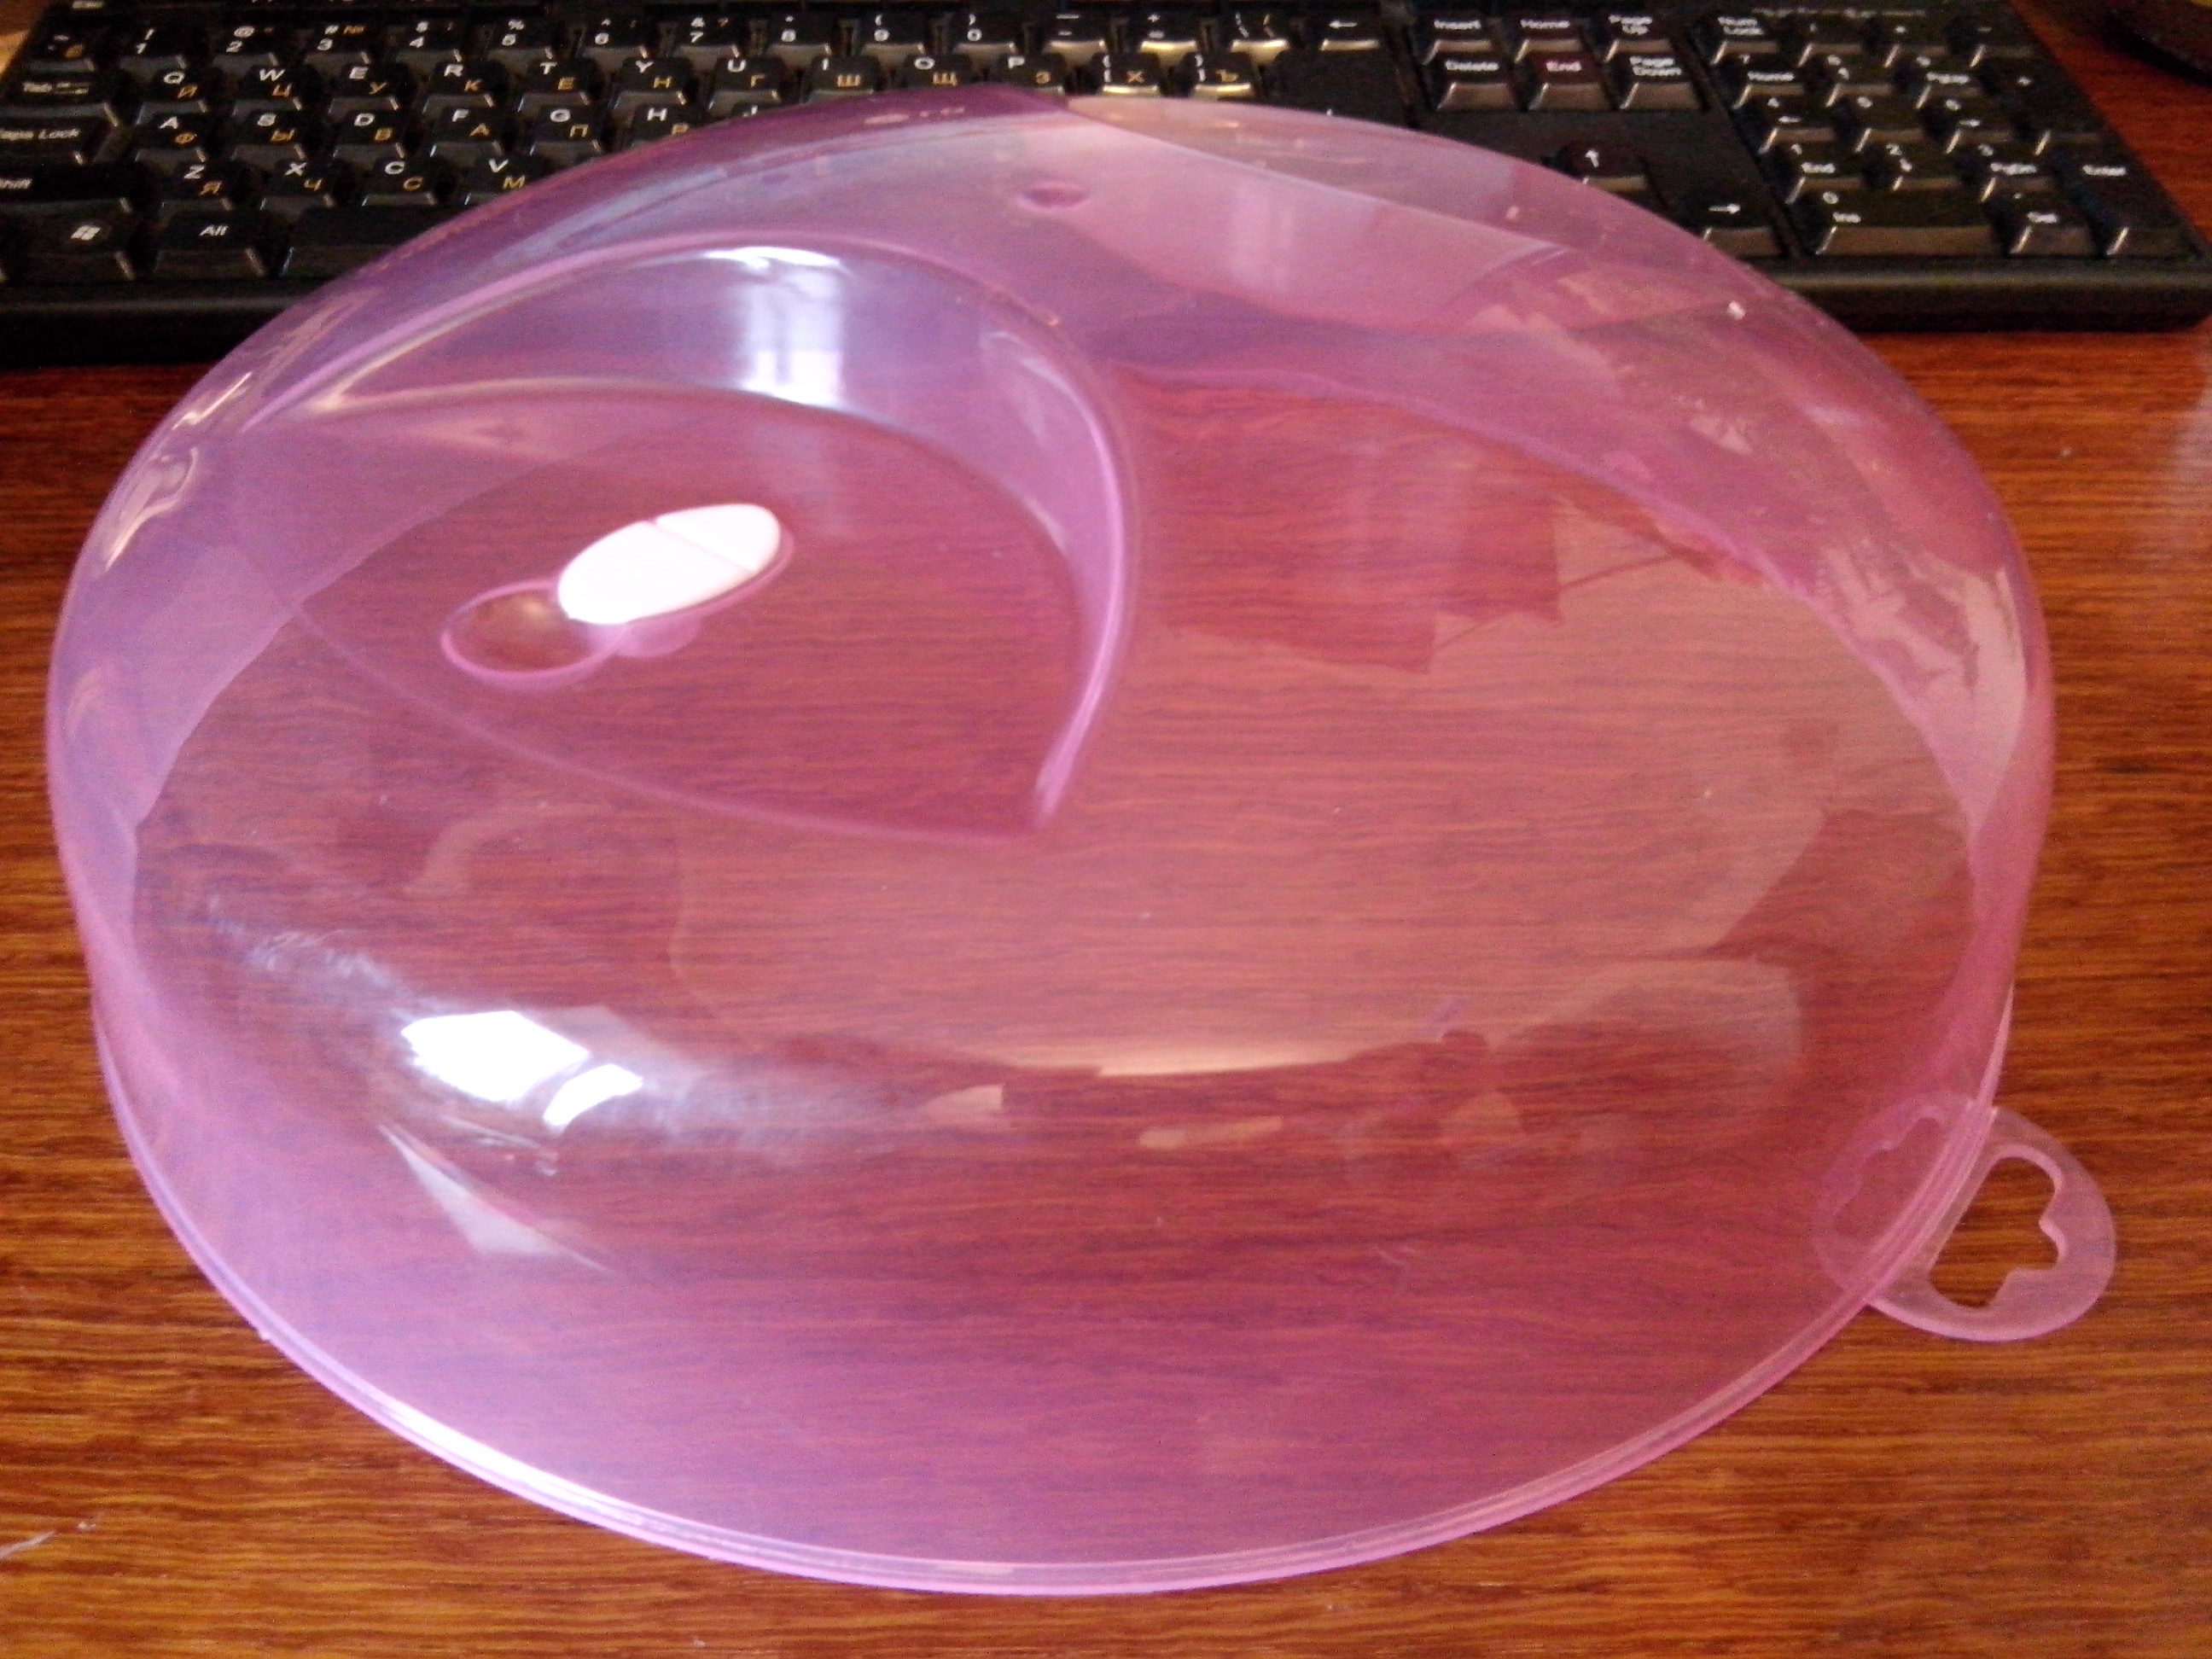
I immediately bought this cover. This is a ready-made robot body, according to the modern transparent and even there are no unnecessary elements. And in fact it's the "Lid for the microwave oven". (Diameter 24.5 cm), what to cover and why I do not know, but the robot should turn out beautiful :) But about this already in another article.
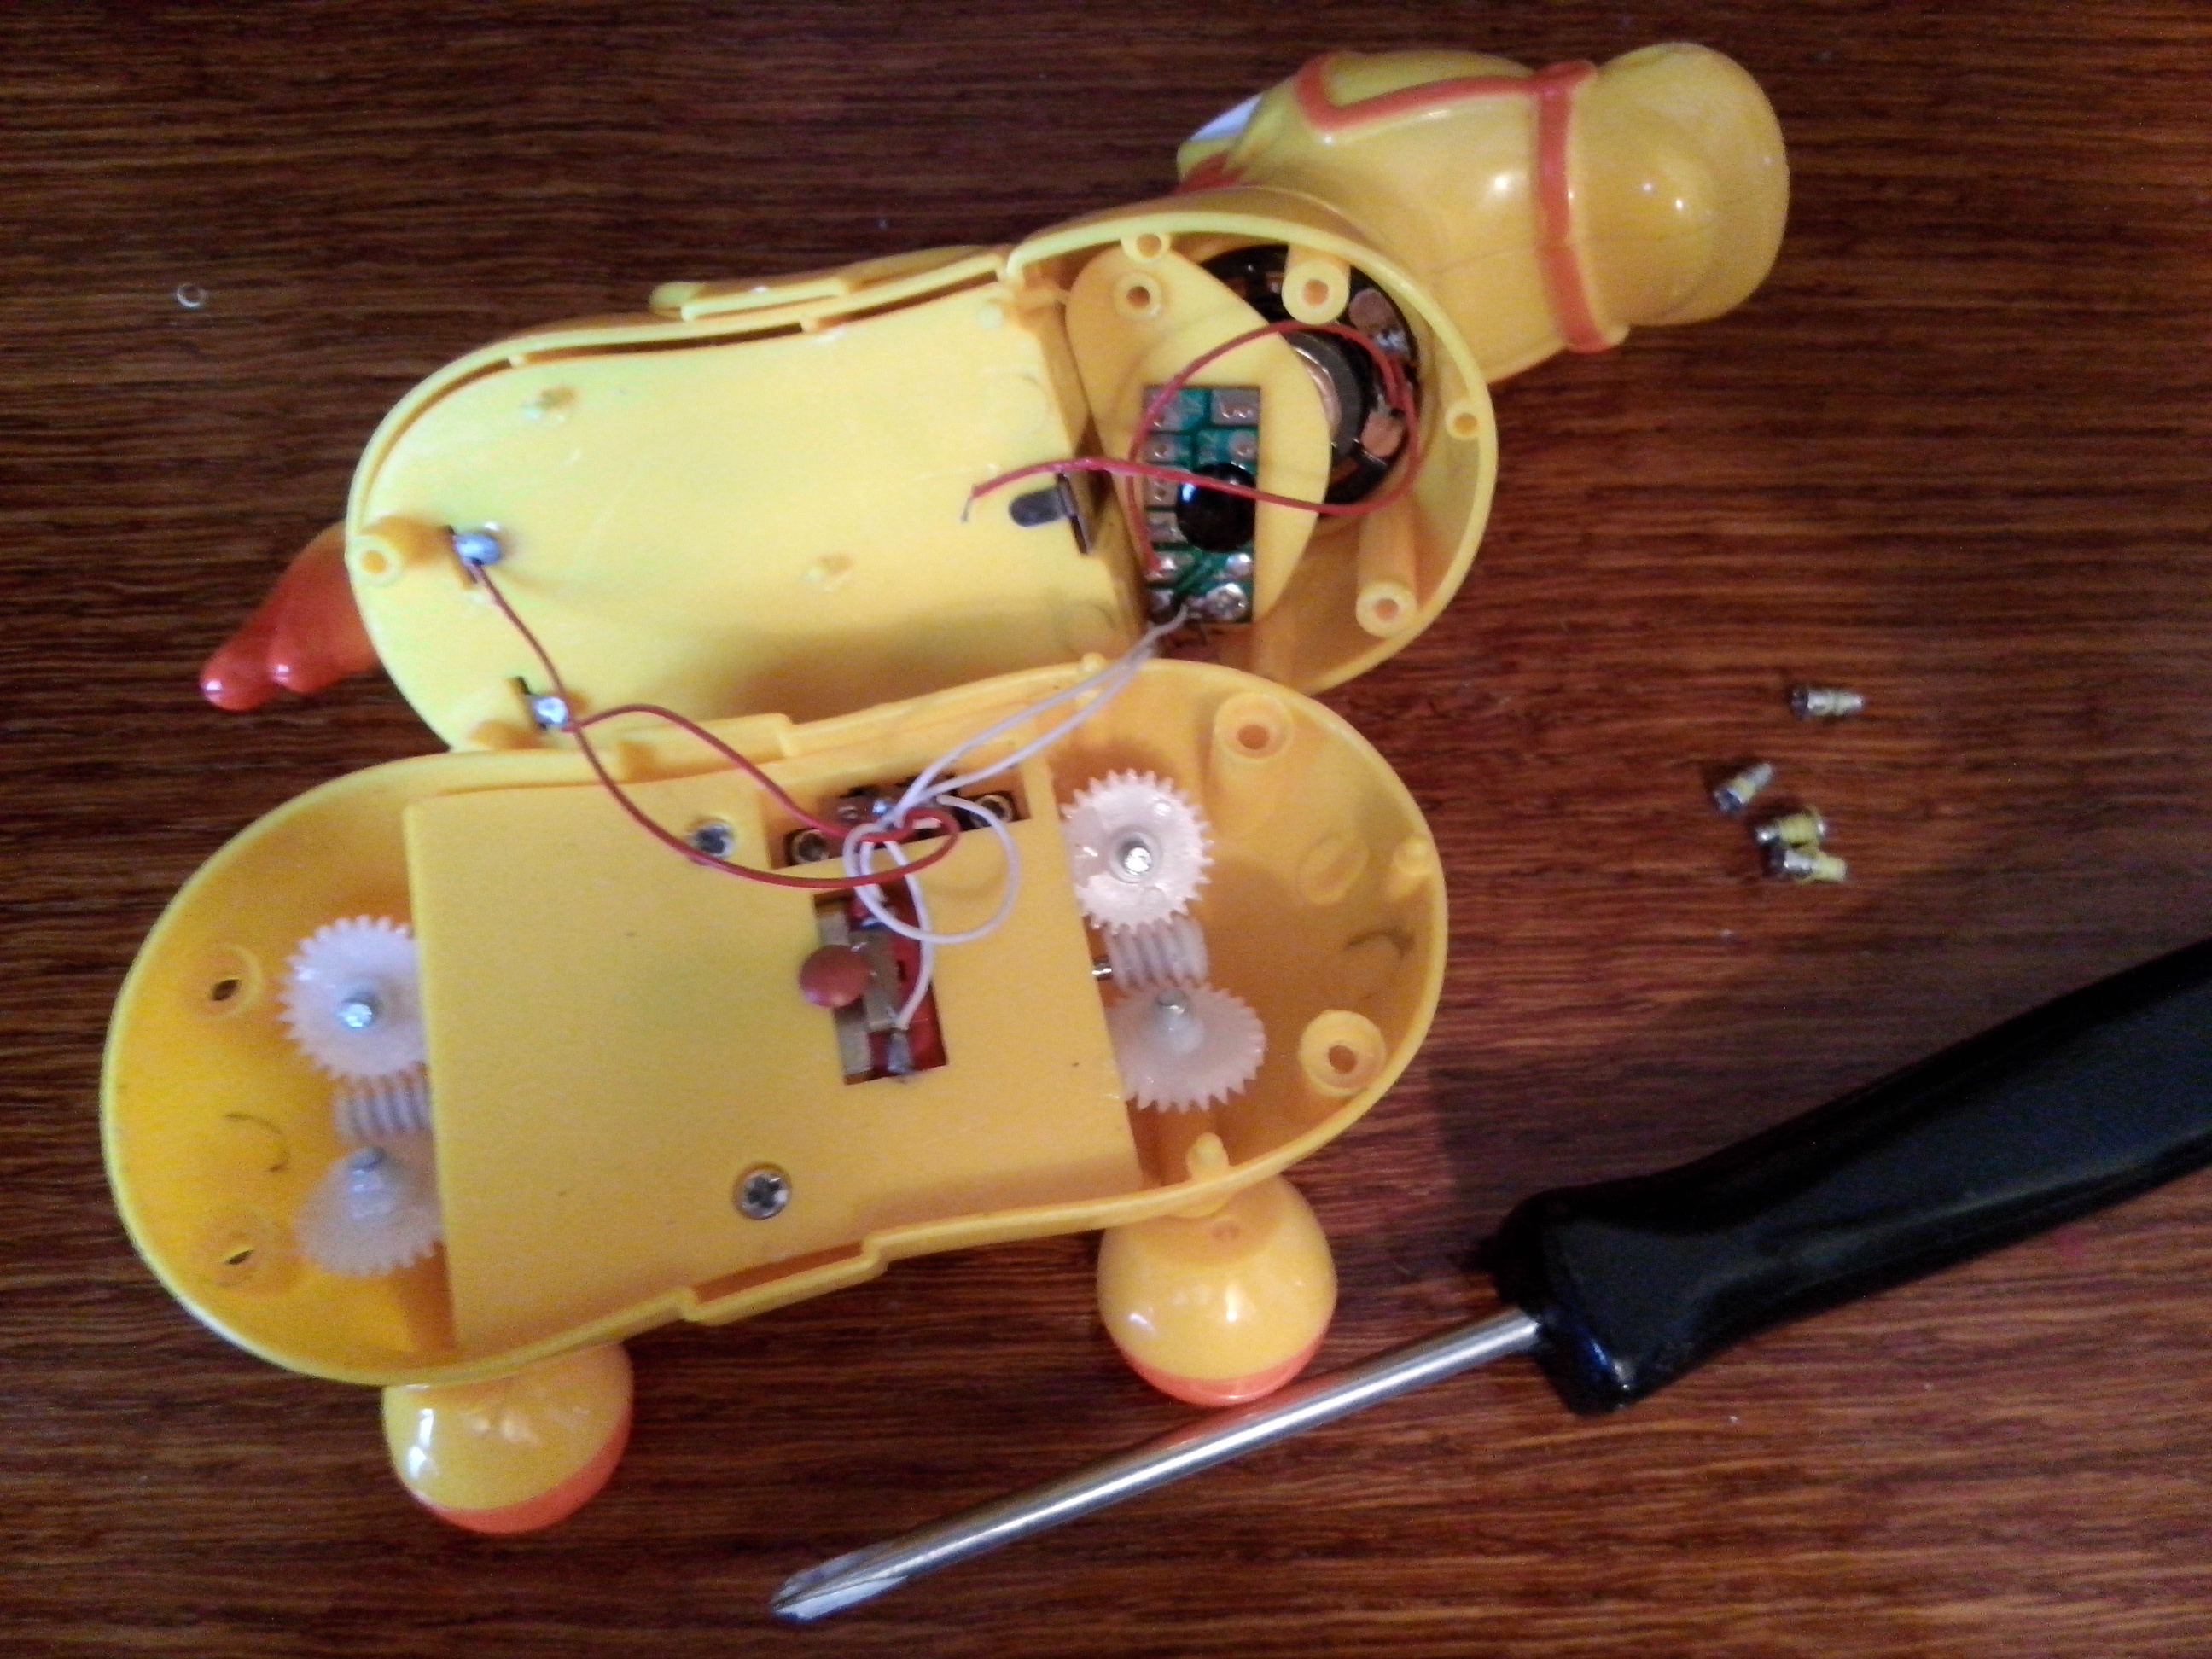
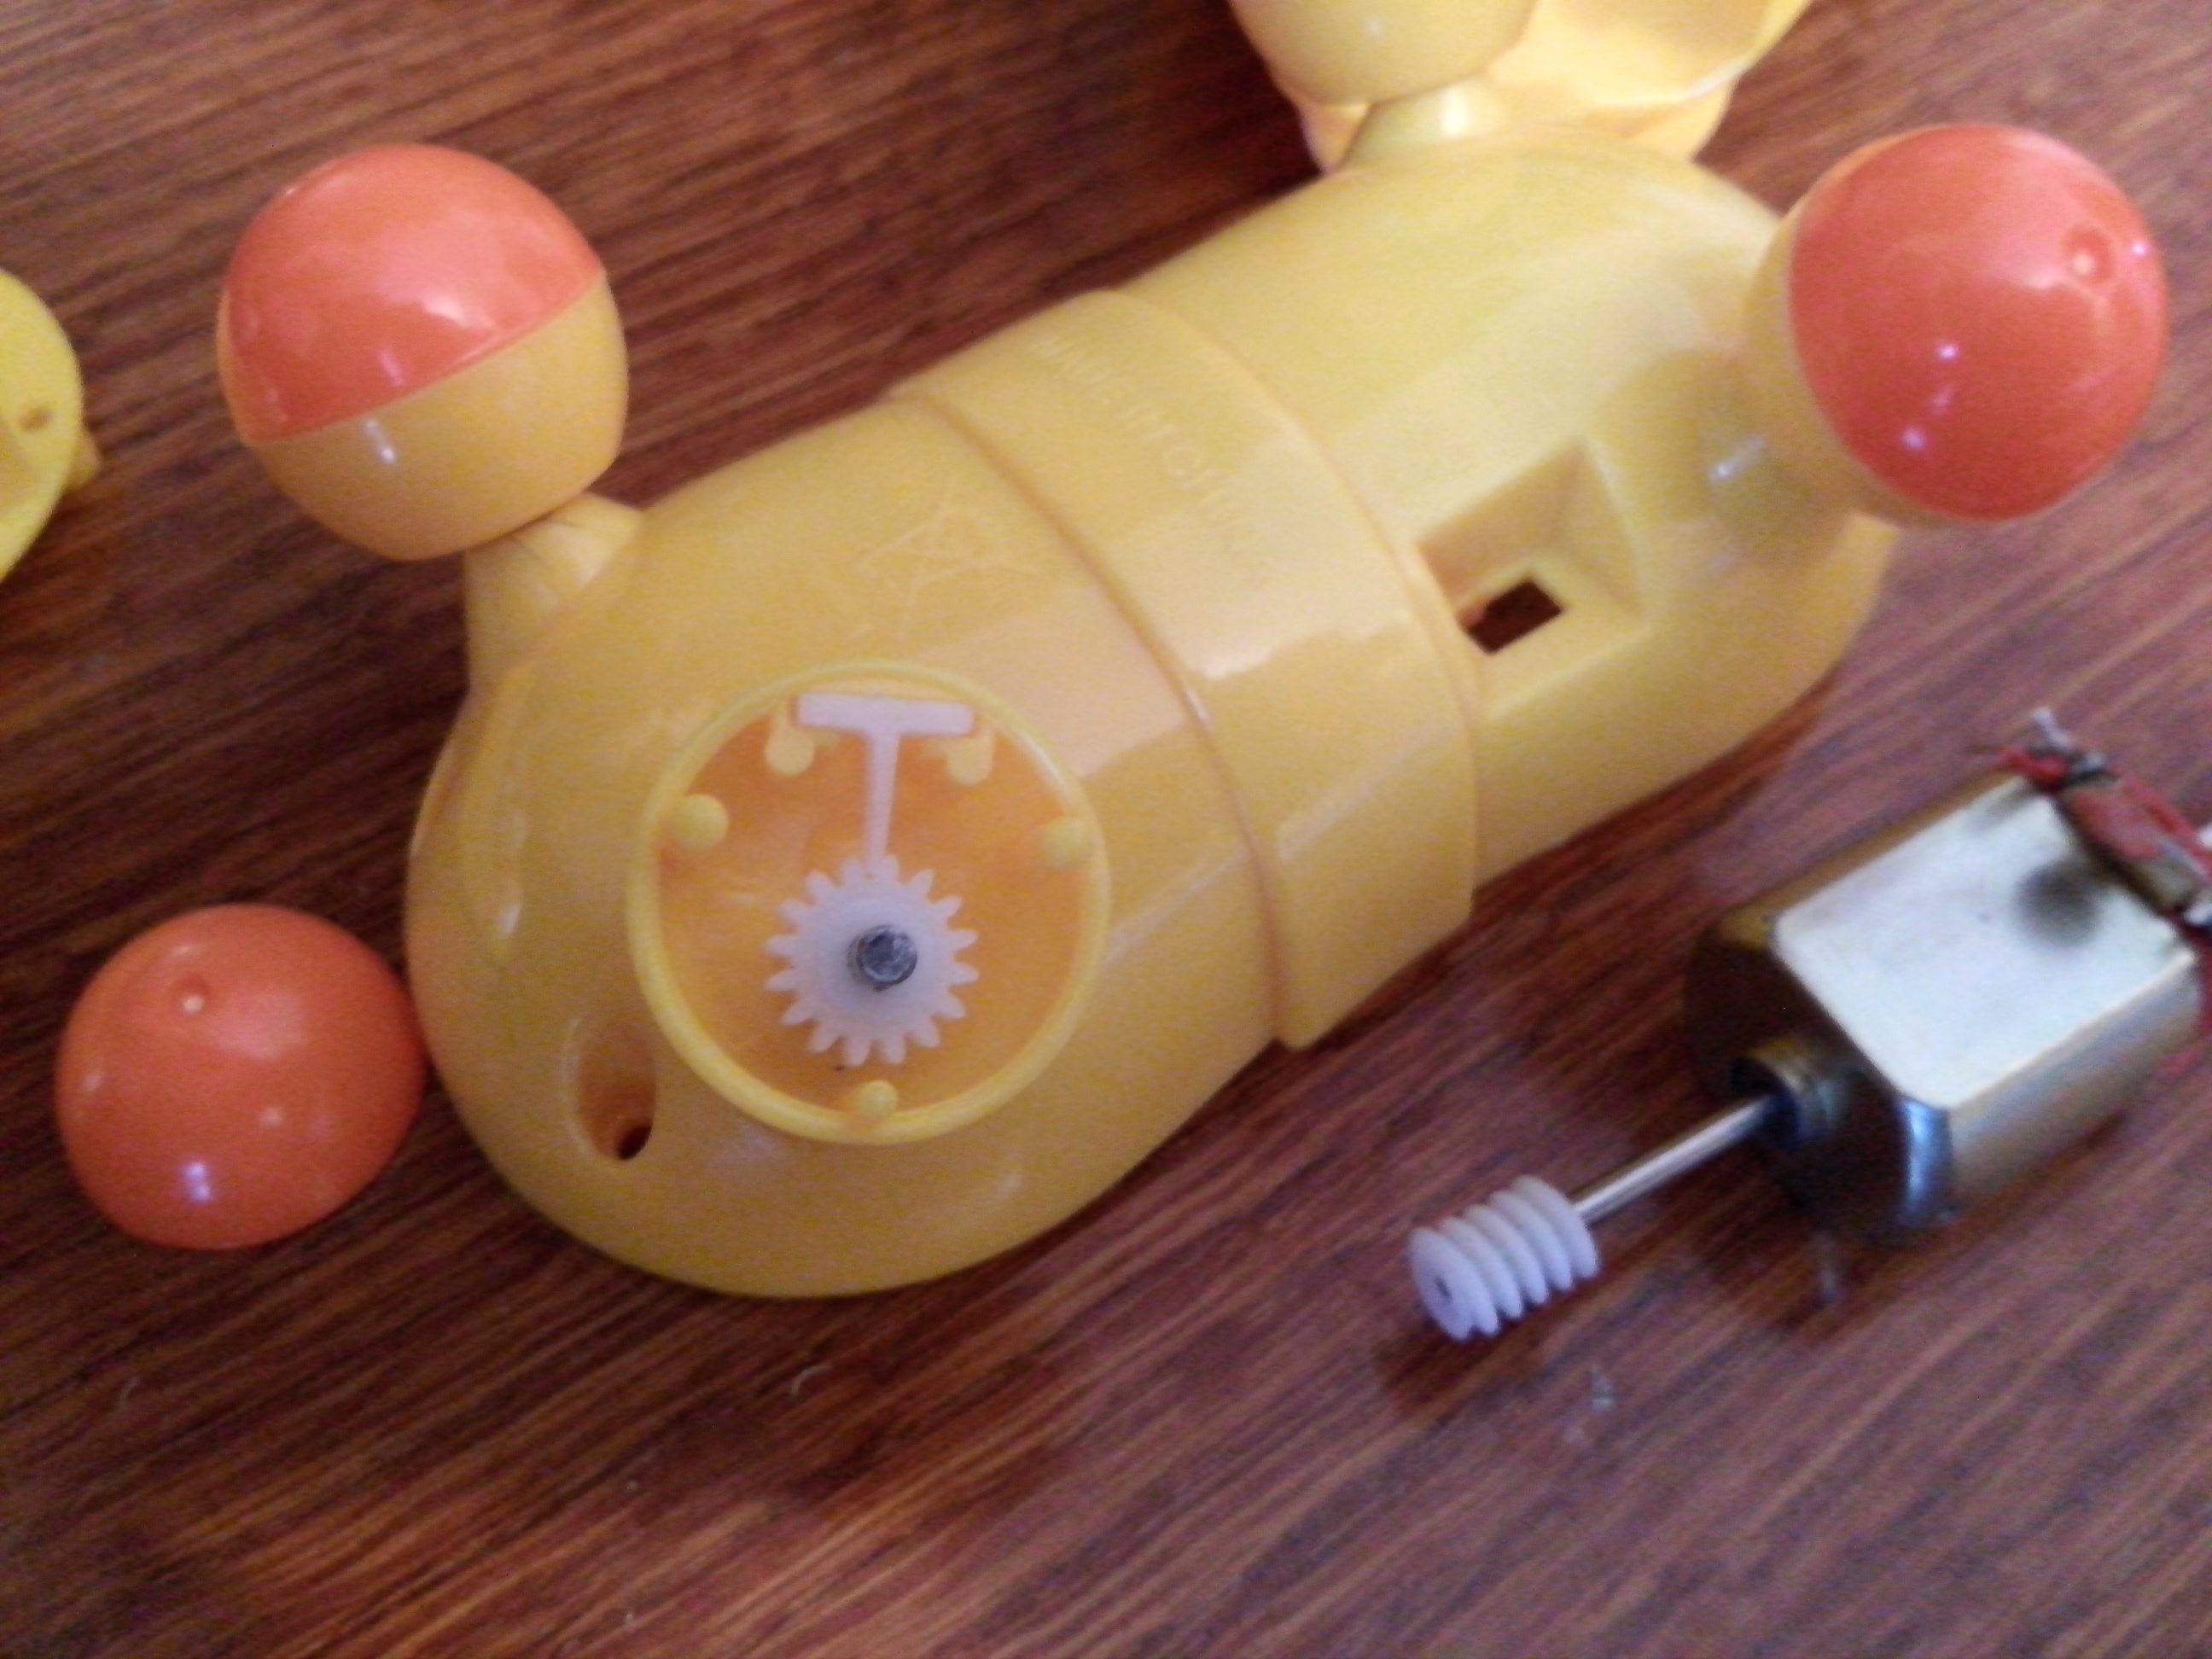
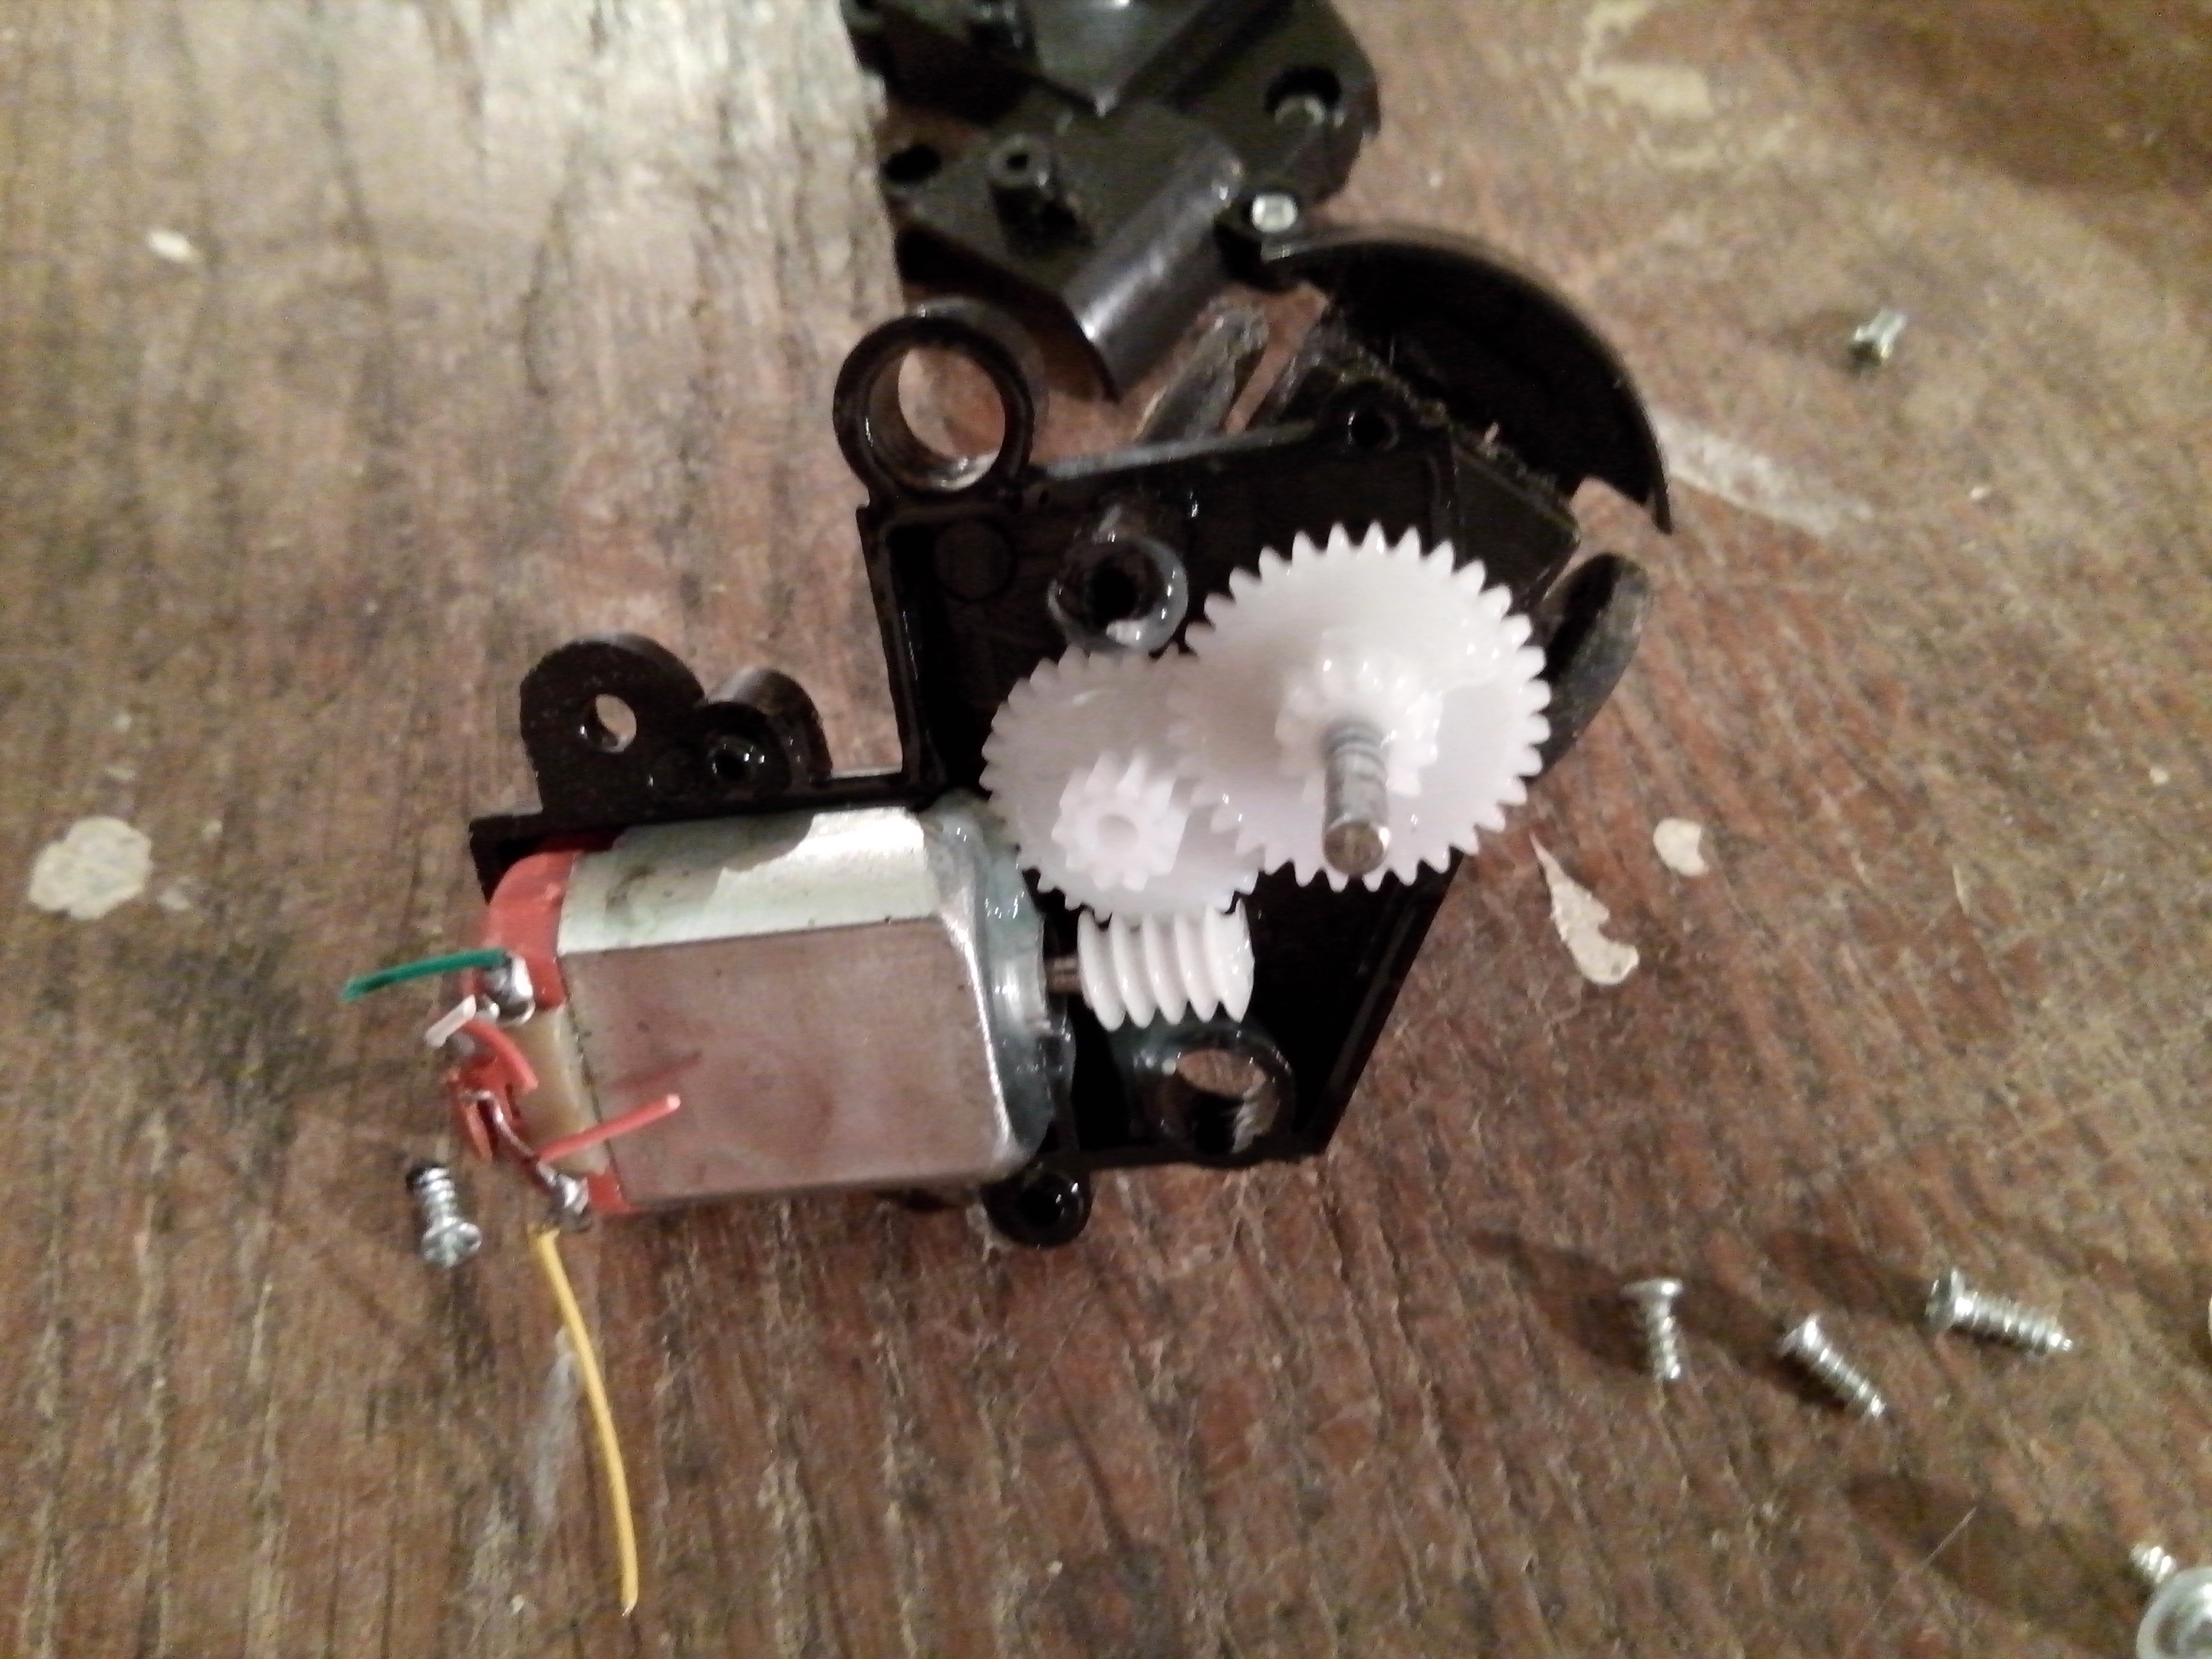
In the evening, broke the conic, took out the gears and screwed it to your robot, it turned out great! The mechanism takes up a minimum of space and is strong enough to move the platfoma. So far I have not collected everything, so the pictures will be later. In the meantime, bear the idea of how to make a new brush, reduce its diameter to 3-4 cm and replace the gearbox with gears for worm gear.
By the way, for a note, a worm can be removed from other toys. So we had a broken elephant lying around, but in principle it's not important, the main thing is the mechanism, which in many toys (typewriters, tanks and others) is the same, see the pictures:


Oh, yes, I forgot to write about a new turbine, it was much more productive than all the others. For better air flow, I added a cone to the middle of the turbine.
05 January 2015. Despite the New Year holidays all the previous days, I tried to somehow move forward in the work. A lot of information reread about 3D printers, if there was such a printer in my arsenal, I have long printed most of the details. While in my head I make plans for the future how to build a 3D printer with my own hands.
To date, I have made a new brush. I took a wooden stick with a diameter of 10 mm and drilled a spiral of holes. In the holes inserted bristles and sealed them on the back of the wood burner.

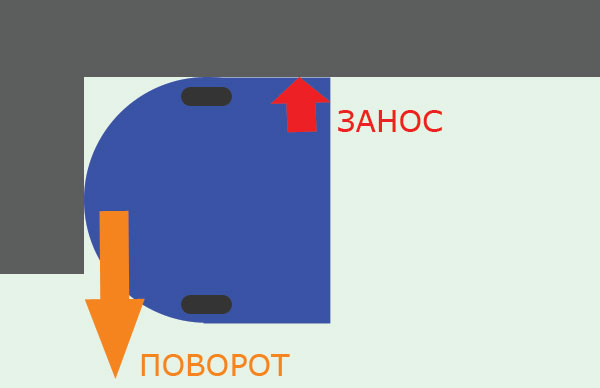
Assembled the chassis, until tested, the glue dries. A new brush was also put in place, it turned out a lot of jambs, without them anyway, still it's my first robot. By the way, I refused the rectangular back part and made the base under the round case. My decision is connected with a rethinking of the robot's movement, if we imagine that the robot is moving along the wall and in some way rests, then to turn it will have to make a maneuver with the movement back, because the square ass will be brought to the wall.
A lot of time I spent on finding a solution for the & quot; view & quot; robot. The mechanical bumper does not suit me very much, it spoils the outside though it is the simplest scheme for determining obstacles. I stopped at the infrared sensor. While there is no way to assemble the sensor due to the lack of infrared phototransistors.
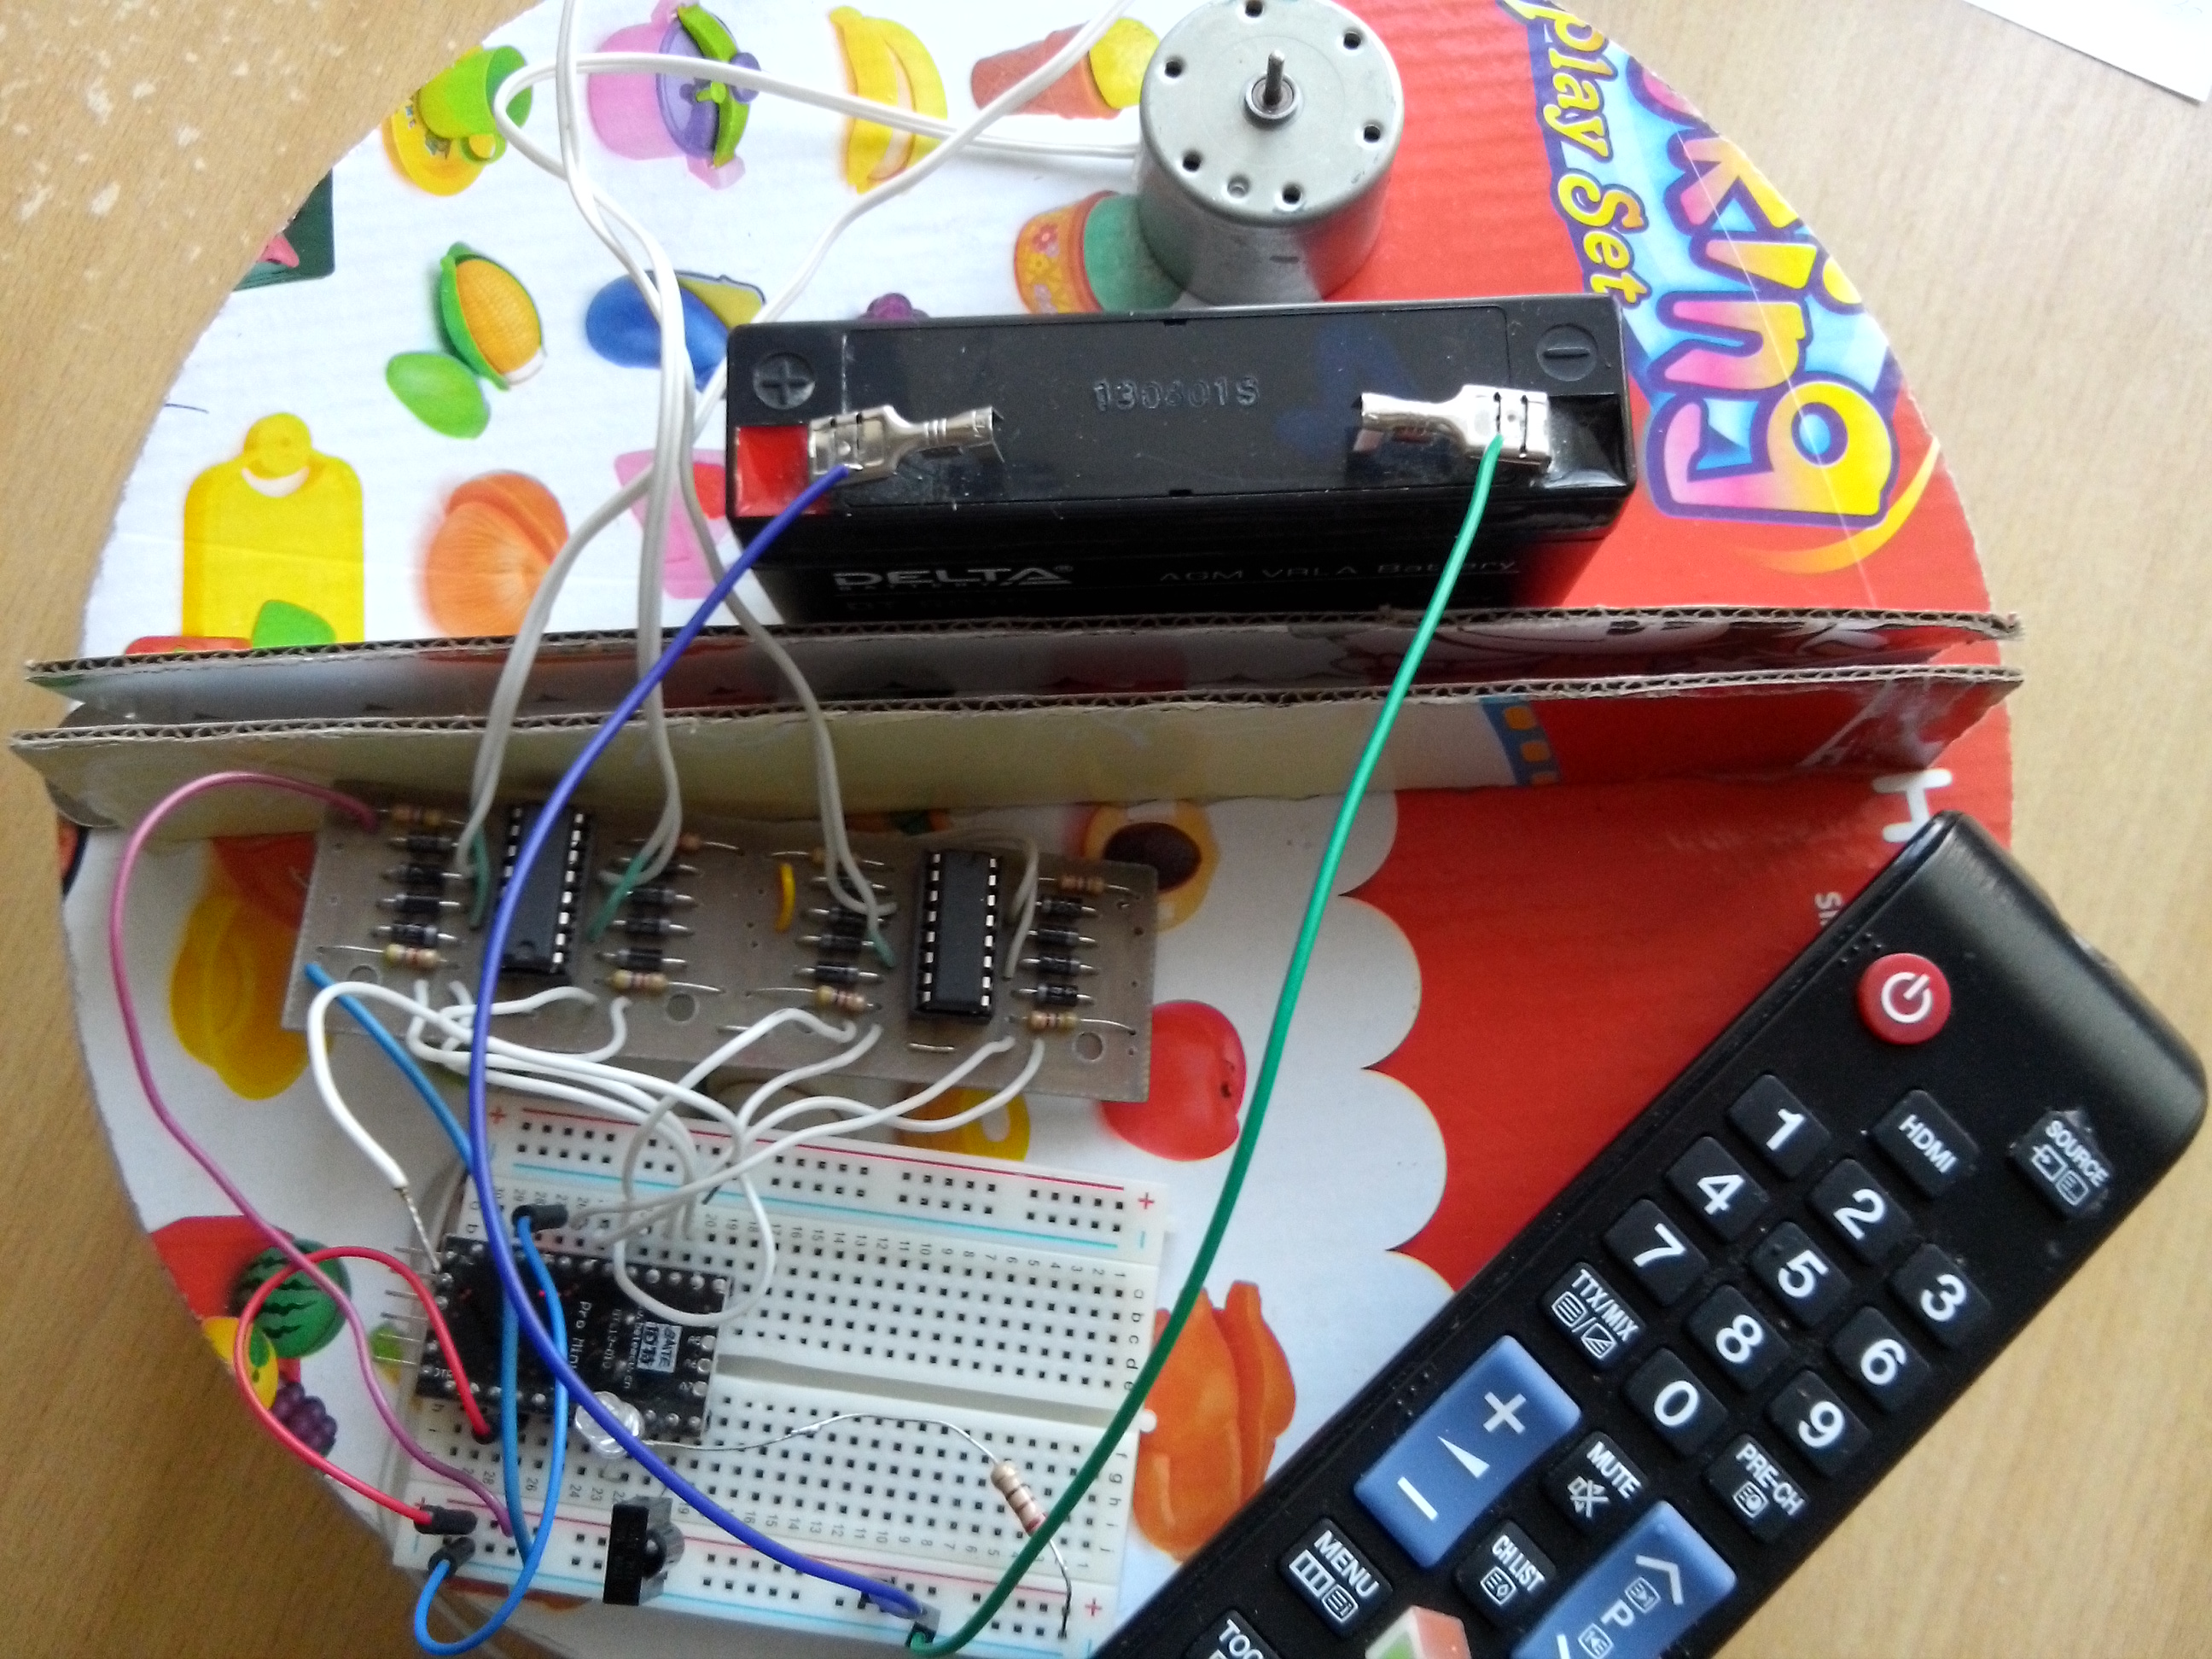
07 January 2015. Yesterday until one in the morning, I gathered a robot to at least somehow test it, play :) As a "brain" Arduino Pro Mini + motor scooter is used on L293E chips with strapping (I used this card in my first project for engine management online). Control is carried out from the remote control from the TV. Short video:
The design looks liquid, in fact it is, almost all the mechanisms barely breathe. Today I realized how much a seemingly simple robot is so hard to do. At the moment, almost all nodes have problems, it requires a global redesign of almost everything.
The drive of the wheels on the worm gear for speed turned out all right, but its performance leaves much to be desired. Part of the drive is located in the compartment, where there will be movement of air with garbage, this will not work for a long time. On wheels, I wanted to drill holes that would serve as an additional motion sensor. On one side of the wheel will be located an IR LED, with another IR phototransistor. This scheme when the robot moves will pulsate, if there are no pulses, then the robot rests against something and does not move.
For proximity sensors, I bought infrared LEDs and IR phototransistors, but after testing such an IR bumper it became clear that the idea was bad. The sensor reacts to sunlight, but does not see black objects at all. The design has the right to life, but in more simple homemade products. Who is interested in the scheme is divided:

If the sensor is brought close to the hand, then the LED on the breadboard will light up.

Also I tried the ultrasonic sensor. It perfectly measures the distance, but only by the & quot; forehead & quot; method, if the plane of the object is at an angle, the readings are distorted. In general, even with such a bumper sensor the robot normally will not work.

Download sketch ultrasonic distance sensor
To control the console using the IR receiver TSOP, what kind of markings do not know, in principle, you can use any caught. You can control from any remote, even from a mobile phone, but before that you need to know the codes of the buttons being pressed on the remote. In the sketch, a simple scheme that sends the button code to the port monitor when you click on the remote. Connection example and sketch below:
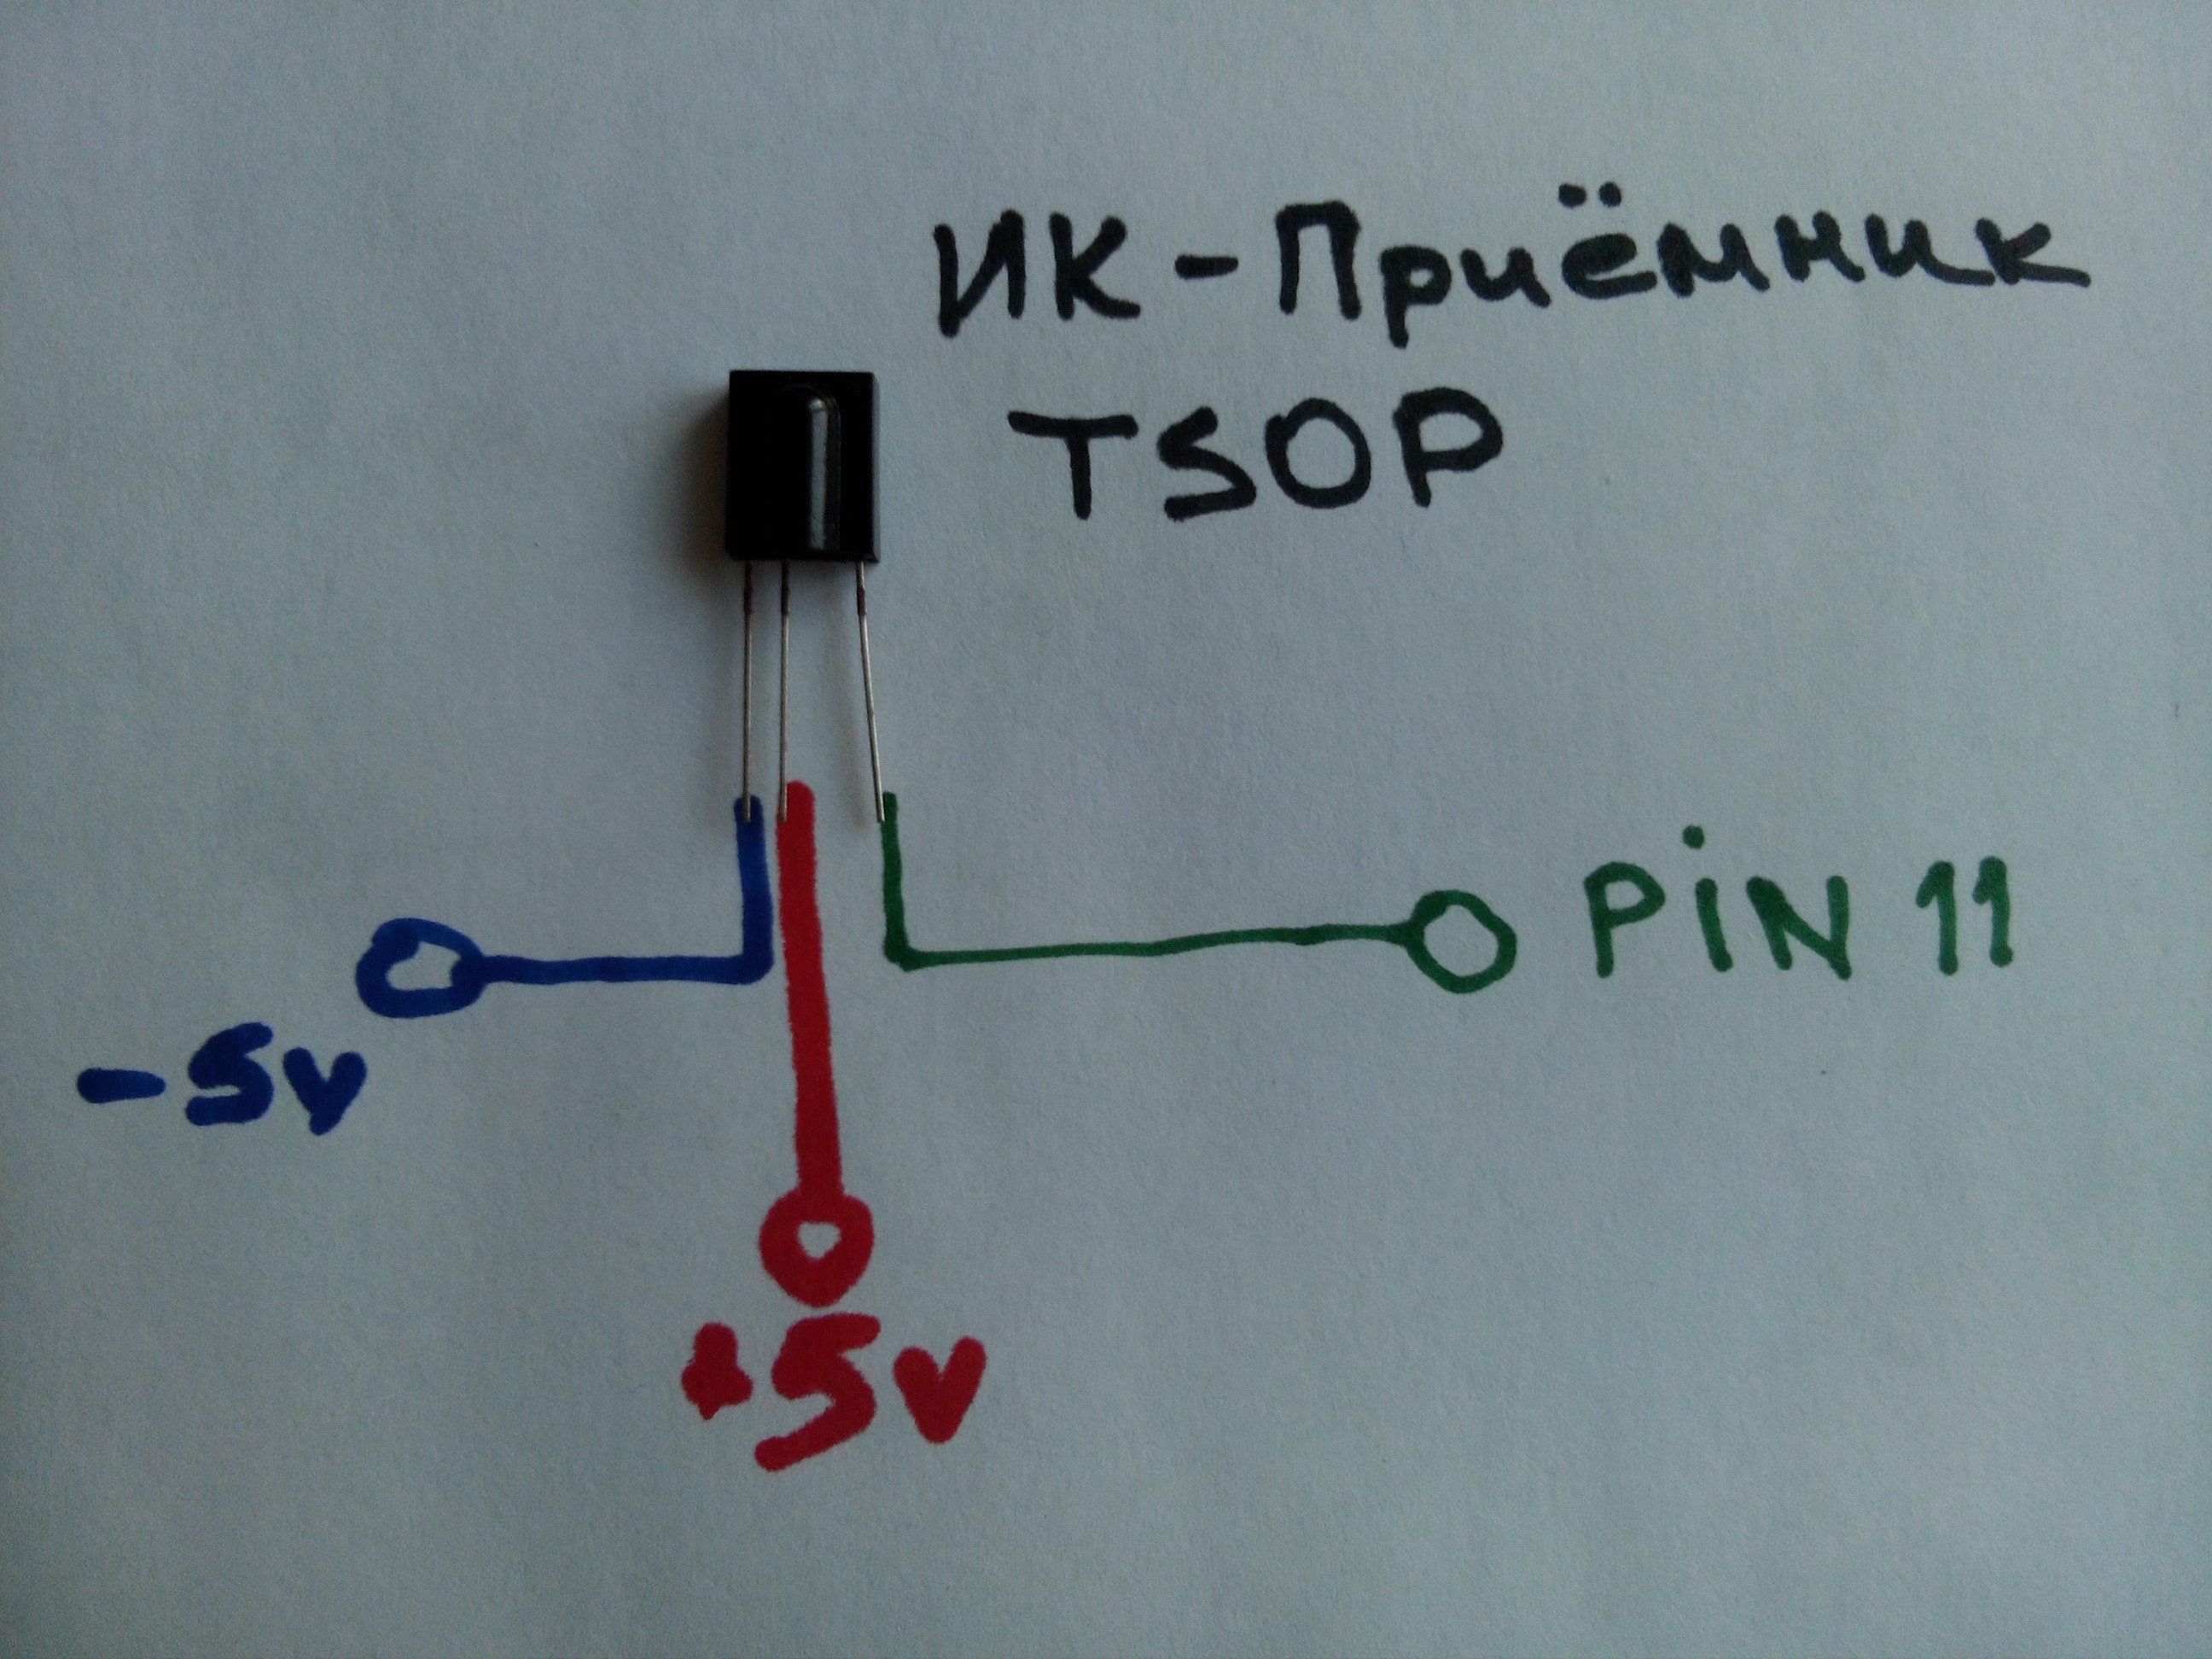
Download the IR control from the console + Library IRremote
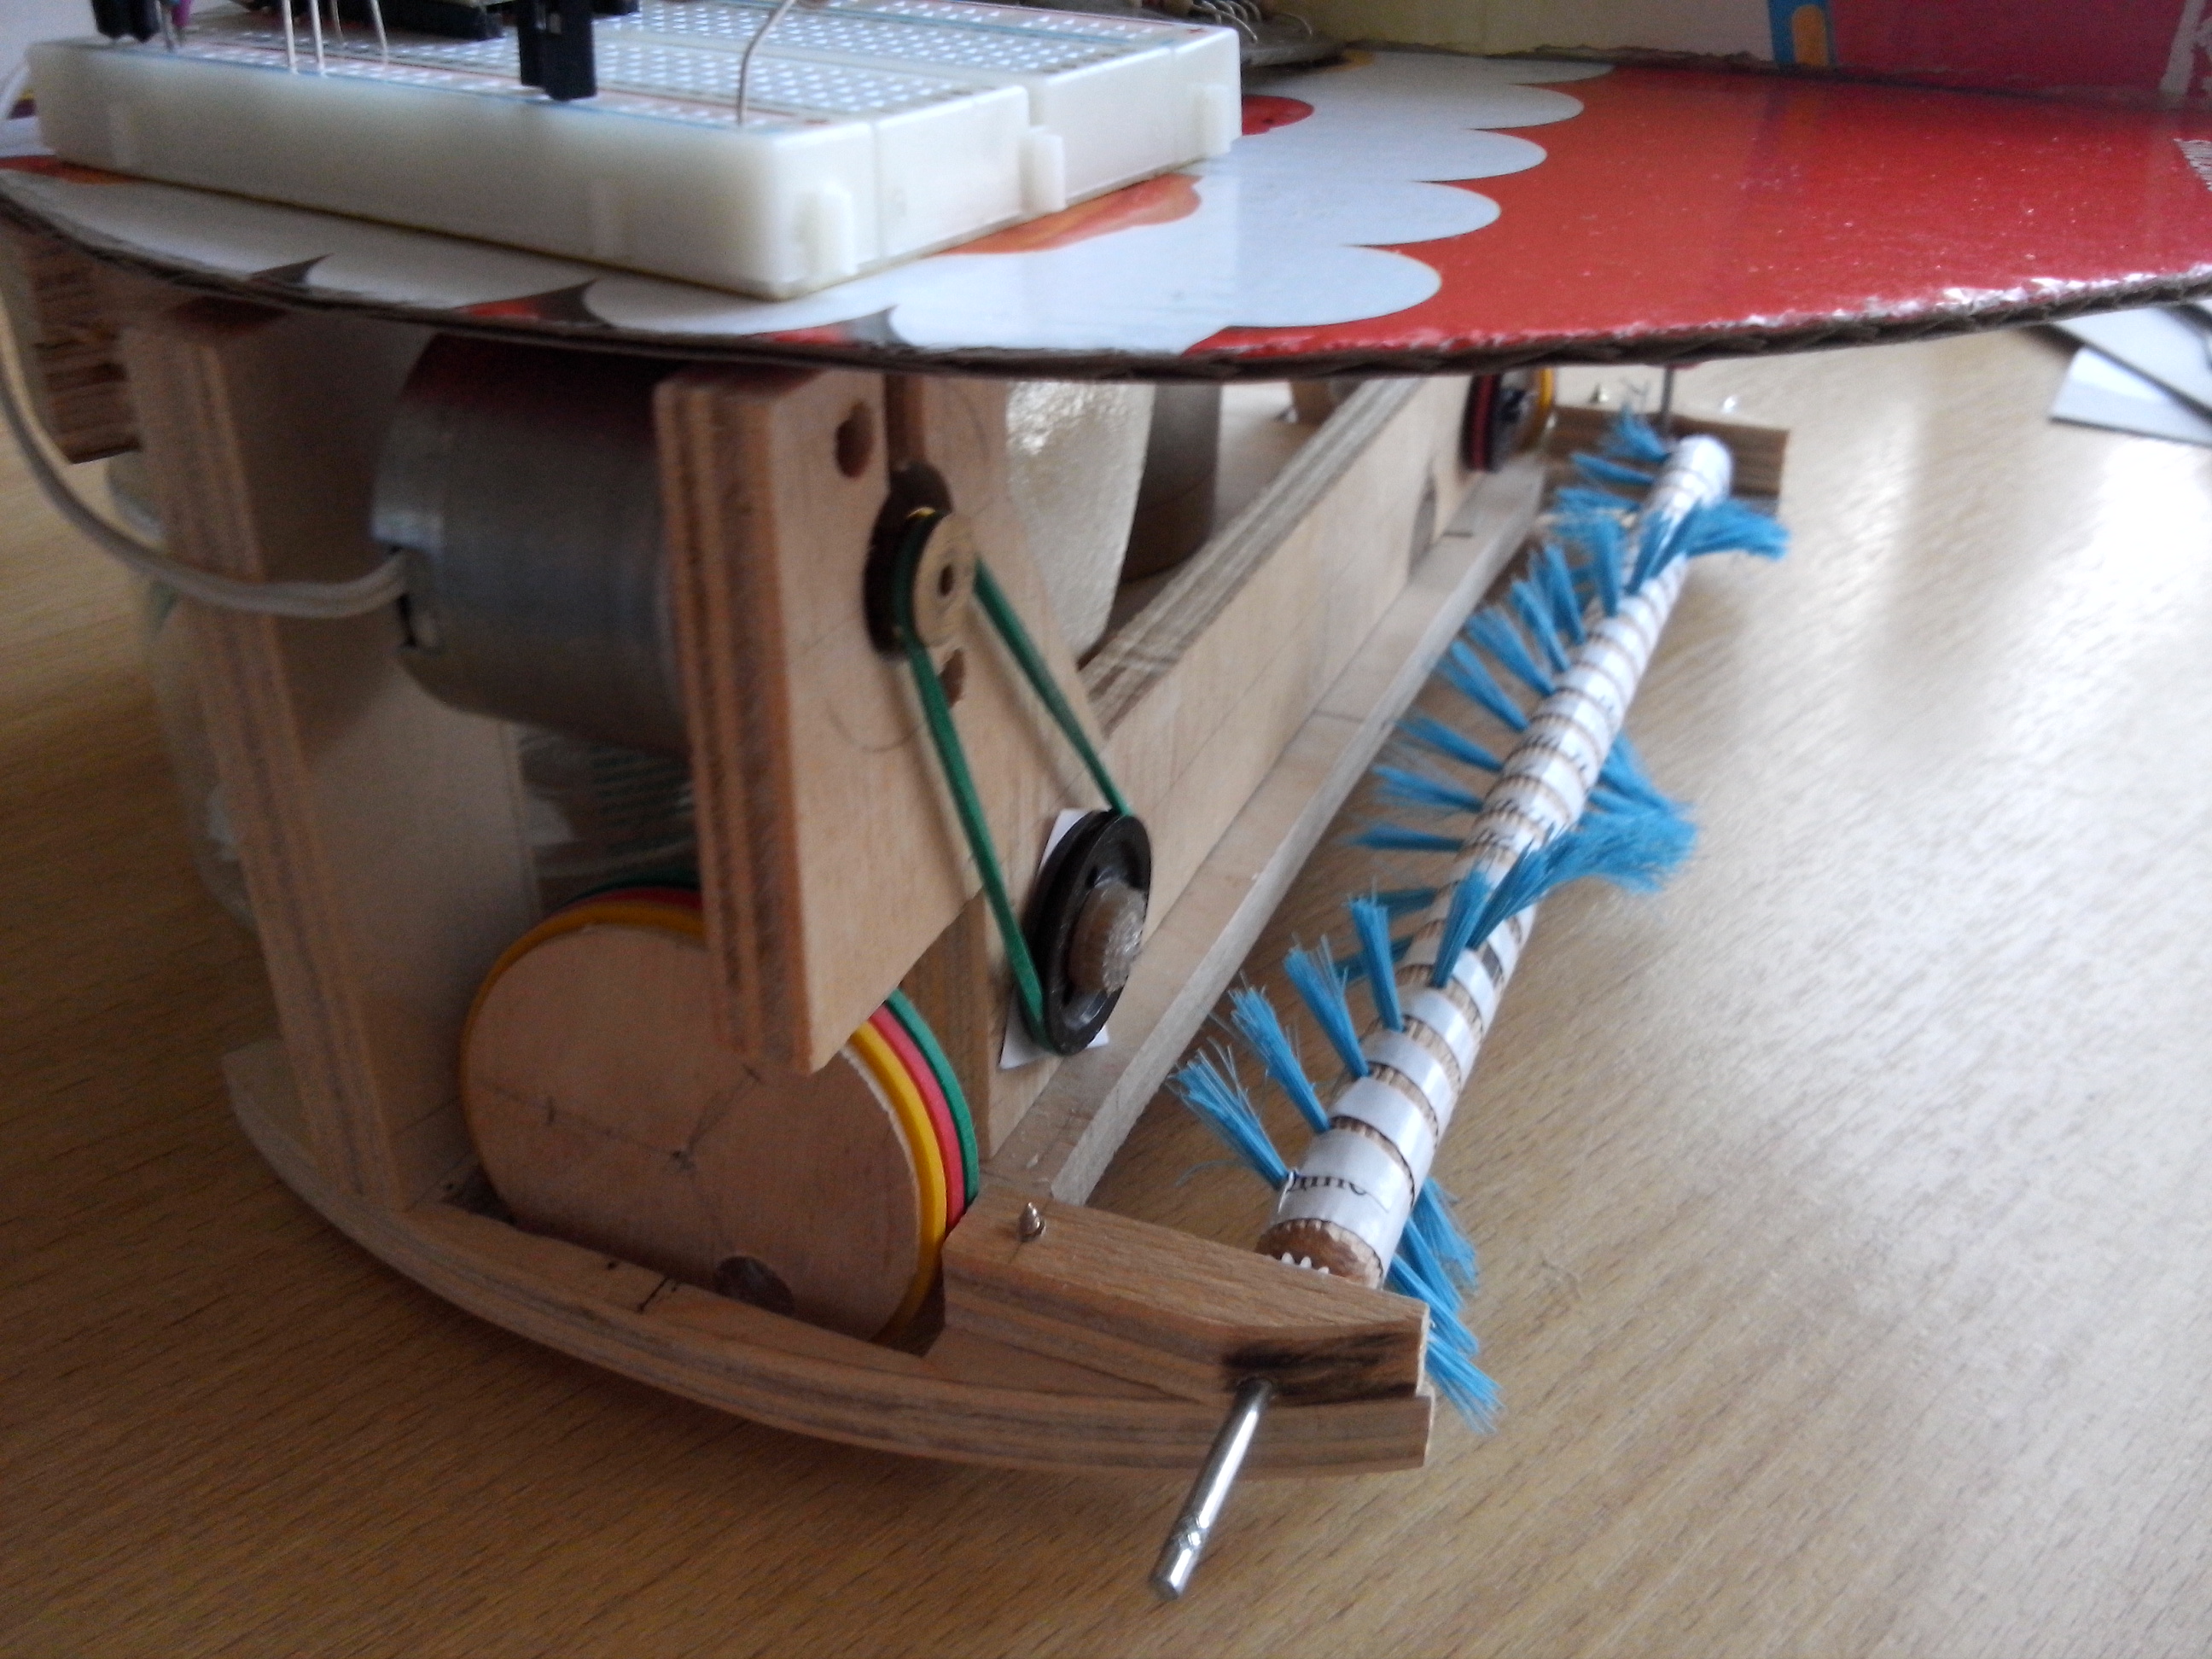
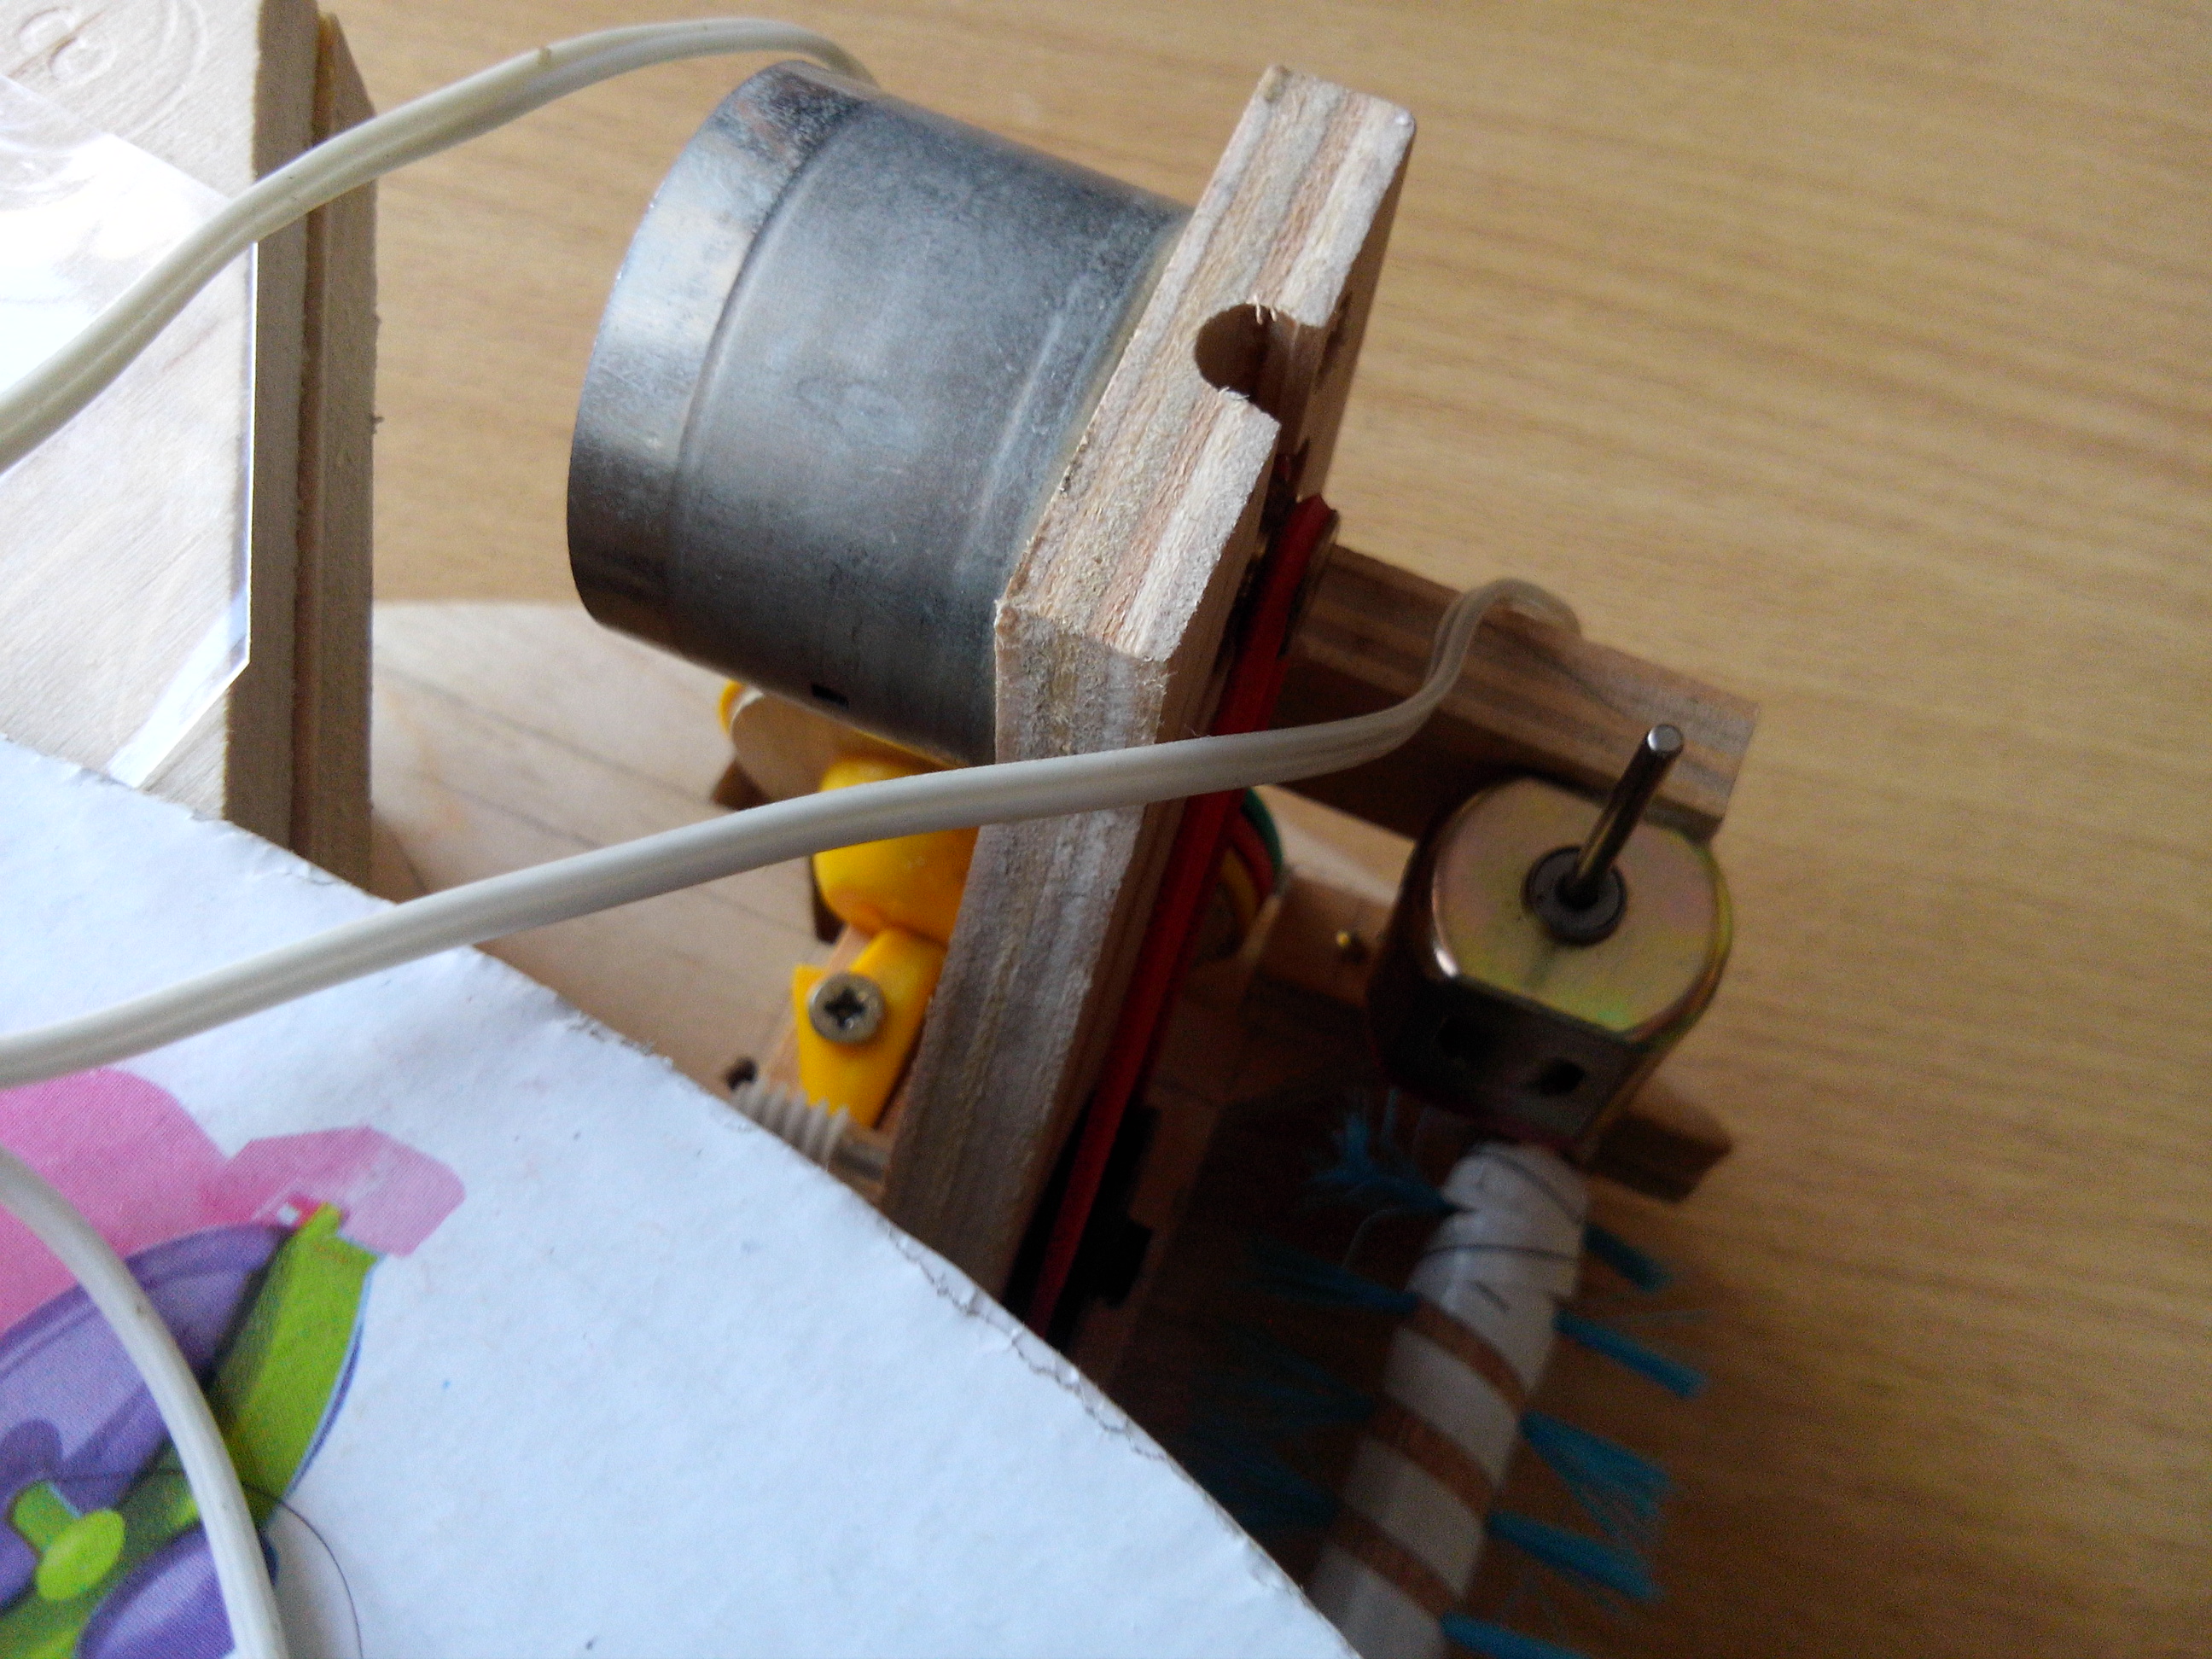
As for the brush for sweeping, it turned out perfectly, the width is almost 21 cm, with a housing of 25 cm. There are nuances: the villi are not restored if they are crushed. The drive mechanism is not closed, it will wound the hair in 3 minutes of operation and will stop. Brush is immovable. The motor is very weak, but the number of revolutions is very good, on the table it marks very effectively.
What's next?
Now this robot vacuum cleaner will be dismantled and rethought. Most likely, the diameter of the body will increase by 3 cm. Initially, I thought to make the wheels on an independent suspension to hide if suddenly someone stepped on the robot. The drive wheels all the same I will do on the gears, instead of the worm. Pile for the brush you need to look for another, more elastic and to keep its shape. Bumper apparently have to do a mechanical. Many questions on the suction turbine.
Despite all the defects, the robot liked his wife, and her daughter was generally delighted:)
To be continued. So often I will not write about the robot, but I'll try to publish photos and video reports at least once a month.
March 2015. I bought an electric heater.
June 2015. I collected CNC with my own hands.
Robot vacuum cleaner is still in the project!
September 2017. I'm collecting a 3d printer :)
Comments [1]
Add comment
Random DIY
-
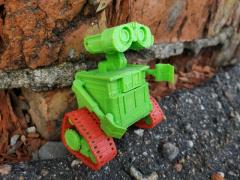 For my daughter, I printed a little Wally made of plastic, she is crazy about this toy, especially since dad made a toy.
 -
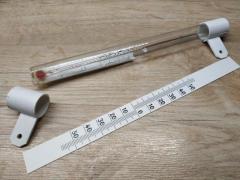 This thermometer hung outside the window for several years, due to temperature changes the plastic mount literally crumbled into small pieces in hands. Repairing a thermometer with a 3D printer cost ten minutes of modeling and a few grams of plastic.
 -
 Soon February 14, Valentine's Day, the Christmas garland on the address LEDs still hangs on the window. I decided to diversify it a bit. I wrote a simple script and added a colorful heart to the firmware.
 -
 A dancing robot with a height of 60 cm. You can use costumes and accessories. There is wireless control, you can control the movements of the robot.
 -
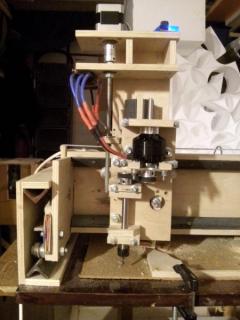 This is my first CNC machine assembled with my own hands from available materials. The cost price of the machine is about $170.
how be your project now?...i made a vaccum cleaner too...see my video
https://www.youtube.com/watch?v=_8J0xE1IOxc&t=6s