3D printer V3.1 do it yourself (mechanic)
Have you already seen this 3D printer? If not, here’s a link to first review of this 3d printer .
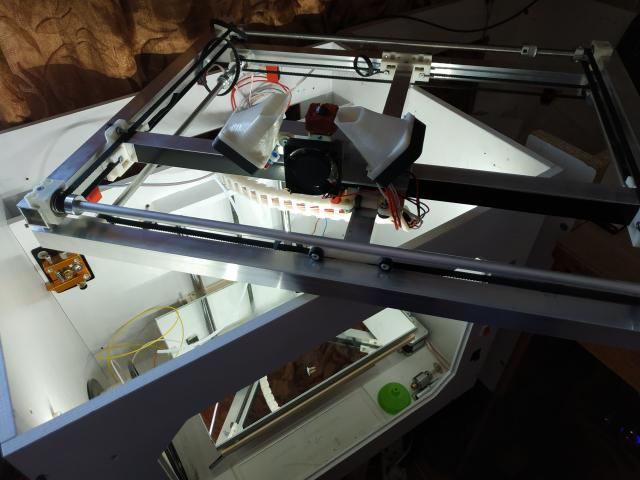
The mechanics of my printer is similar to Ultimaker, only here there are separate guides and rotating shafts. This design is unpretentious to the quality of the used shafts and bearings.
Today, instead of round guides, the printer got square, using a conventional aluminum profile tube with a cross section of 20 * 20 mm. Bearings roll along the pipe 623zz. All plastic parts were printed on the same printer before it was altered.

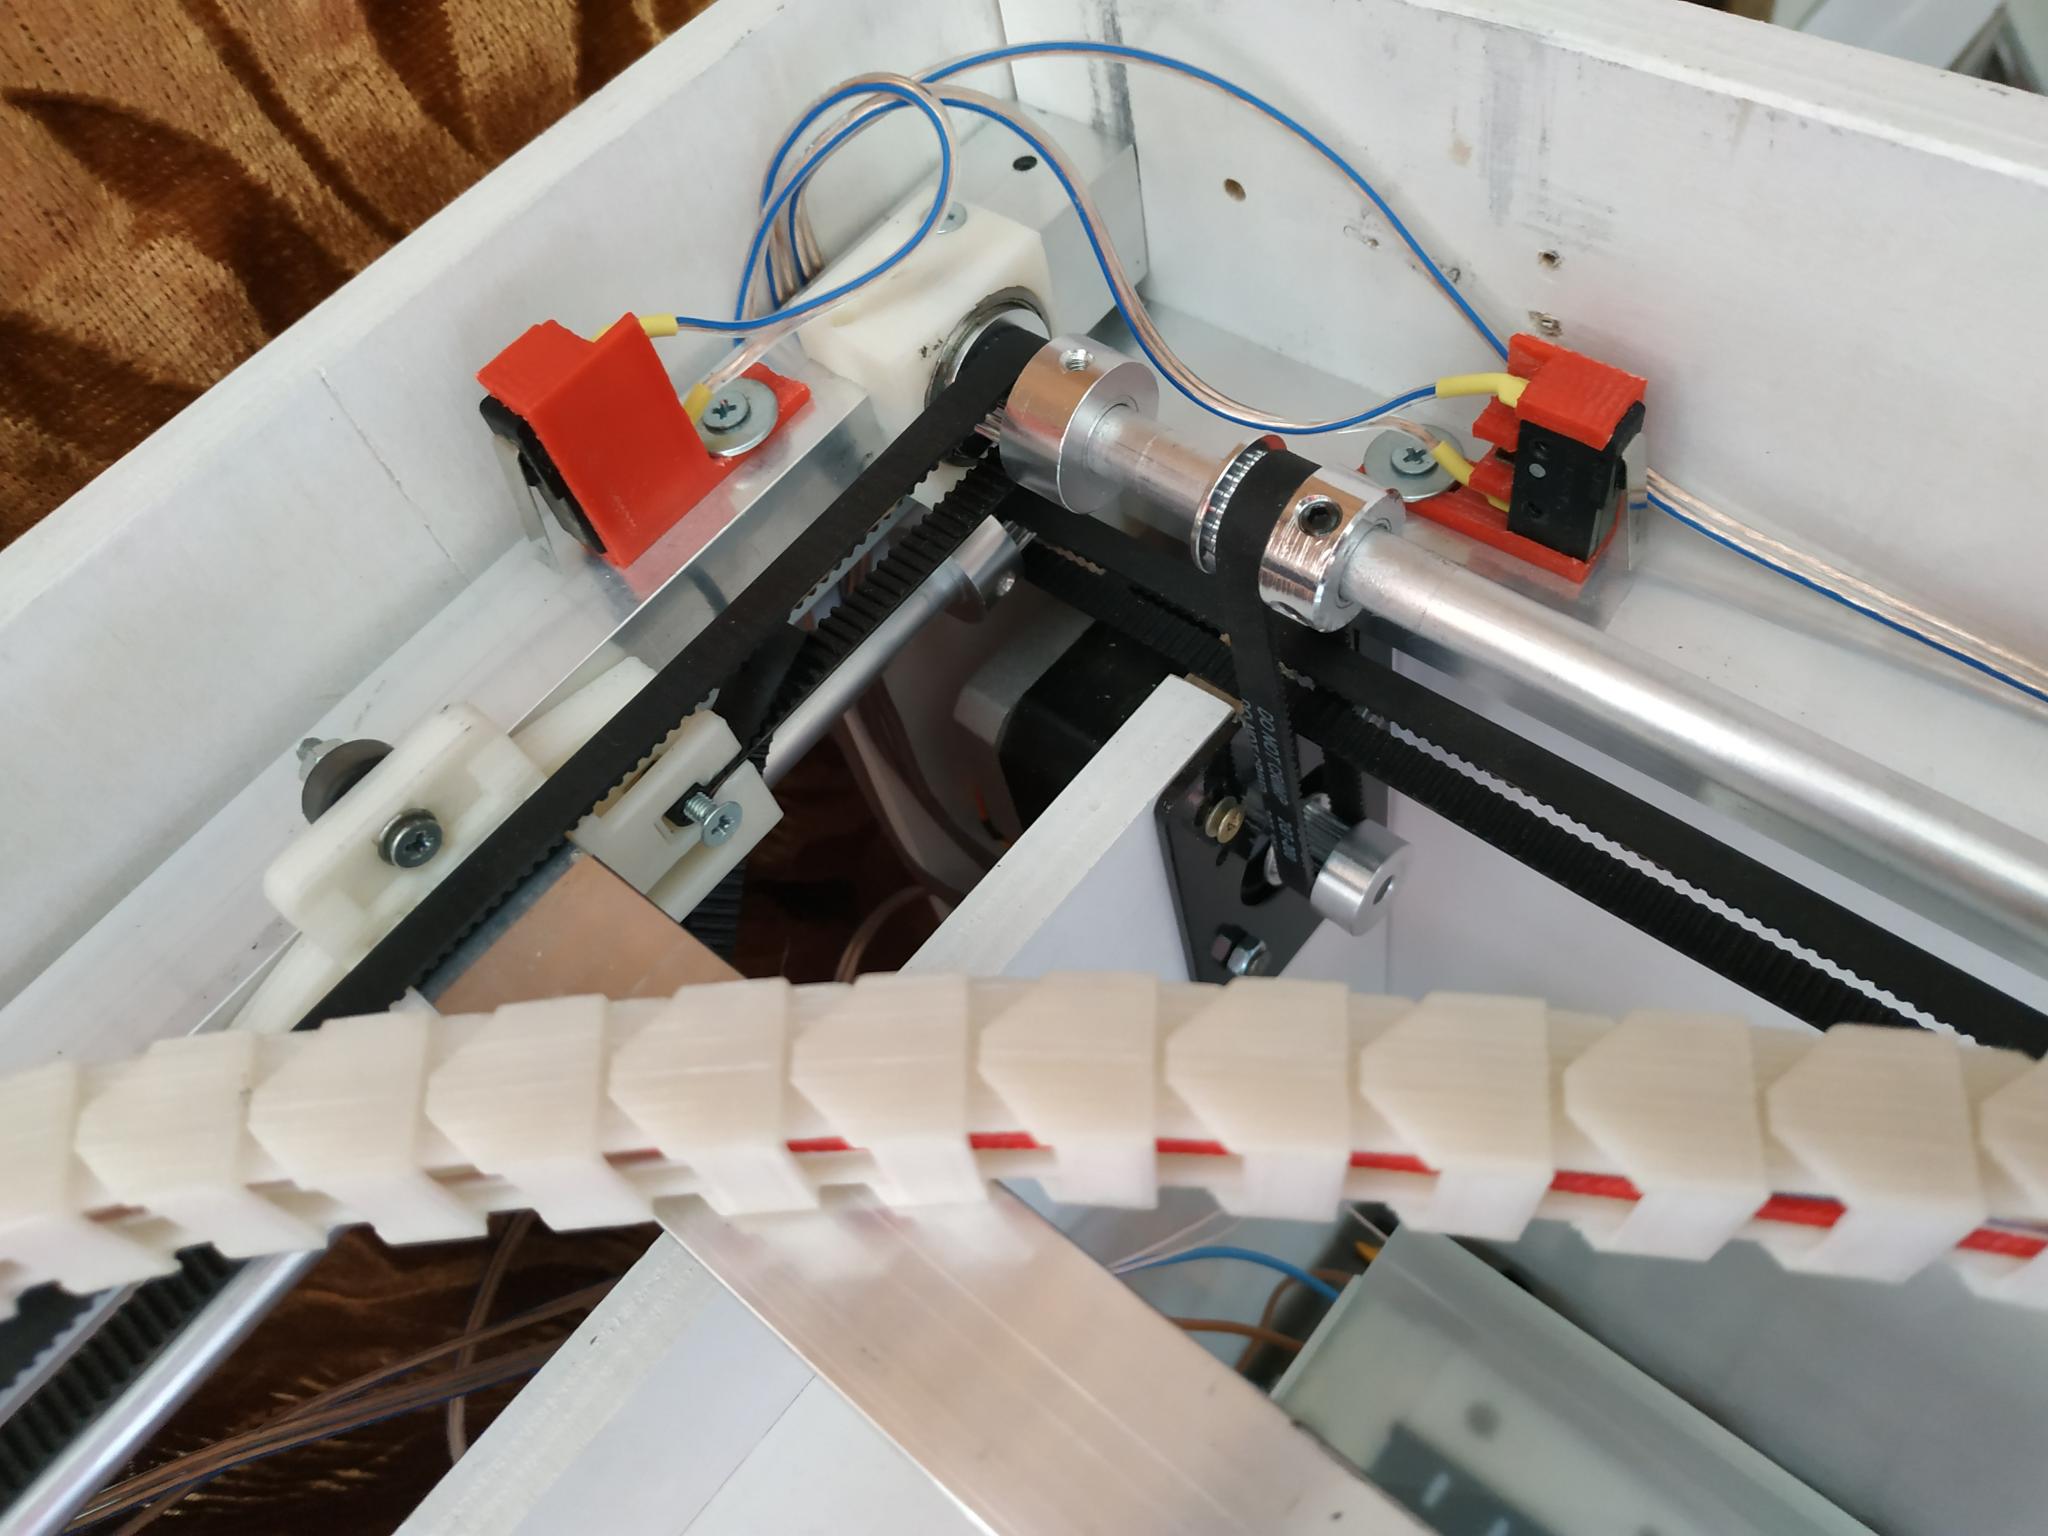
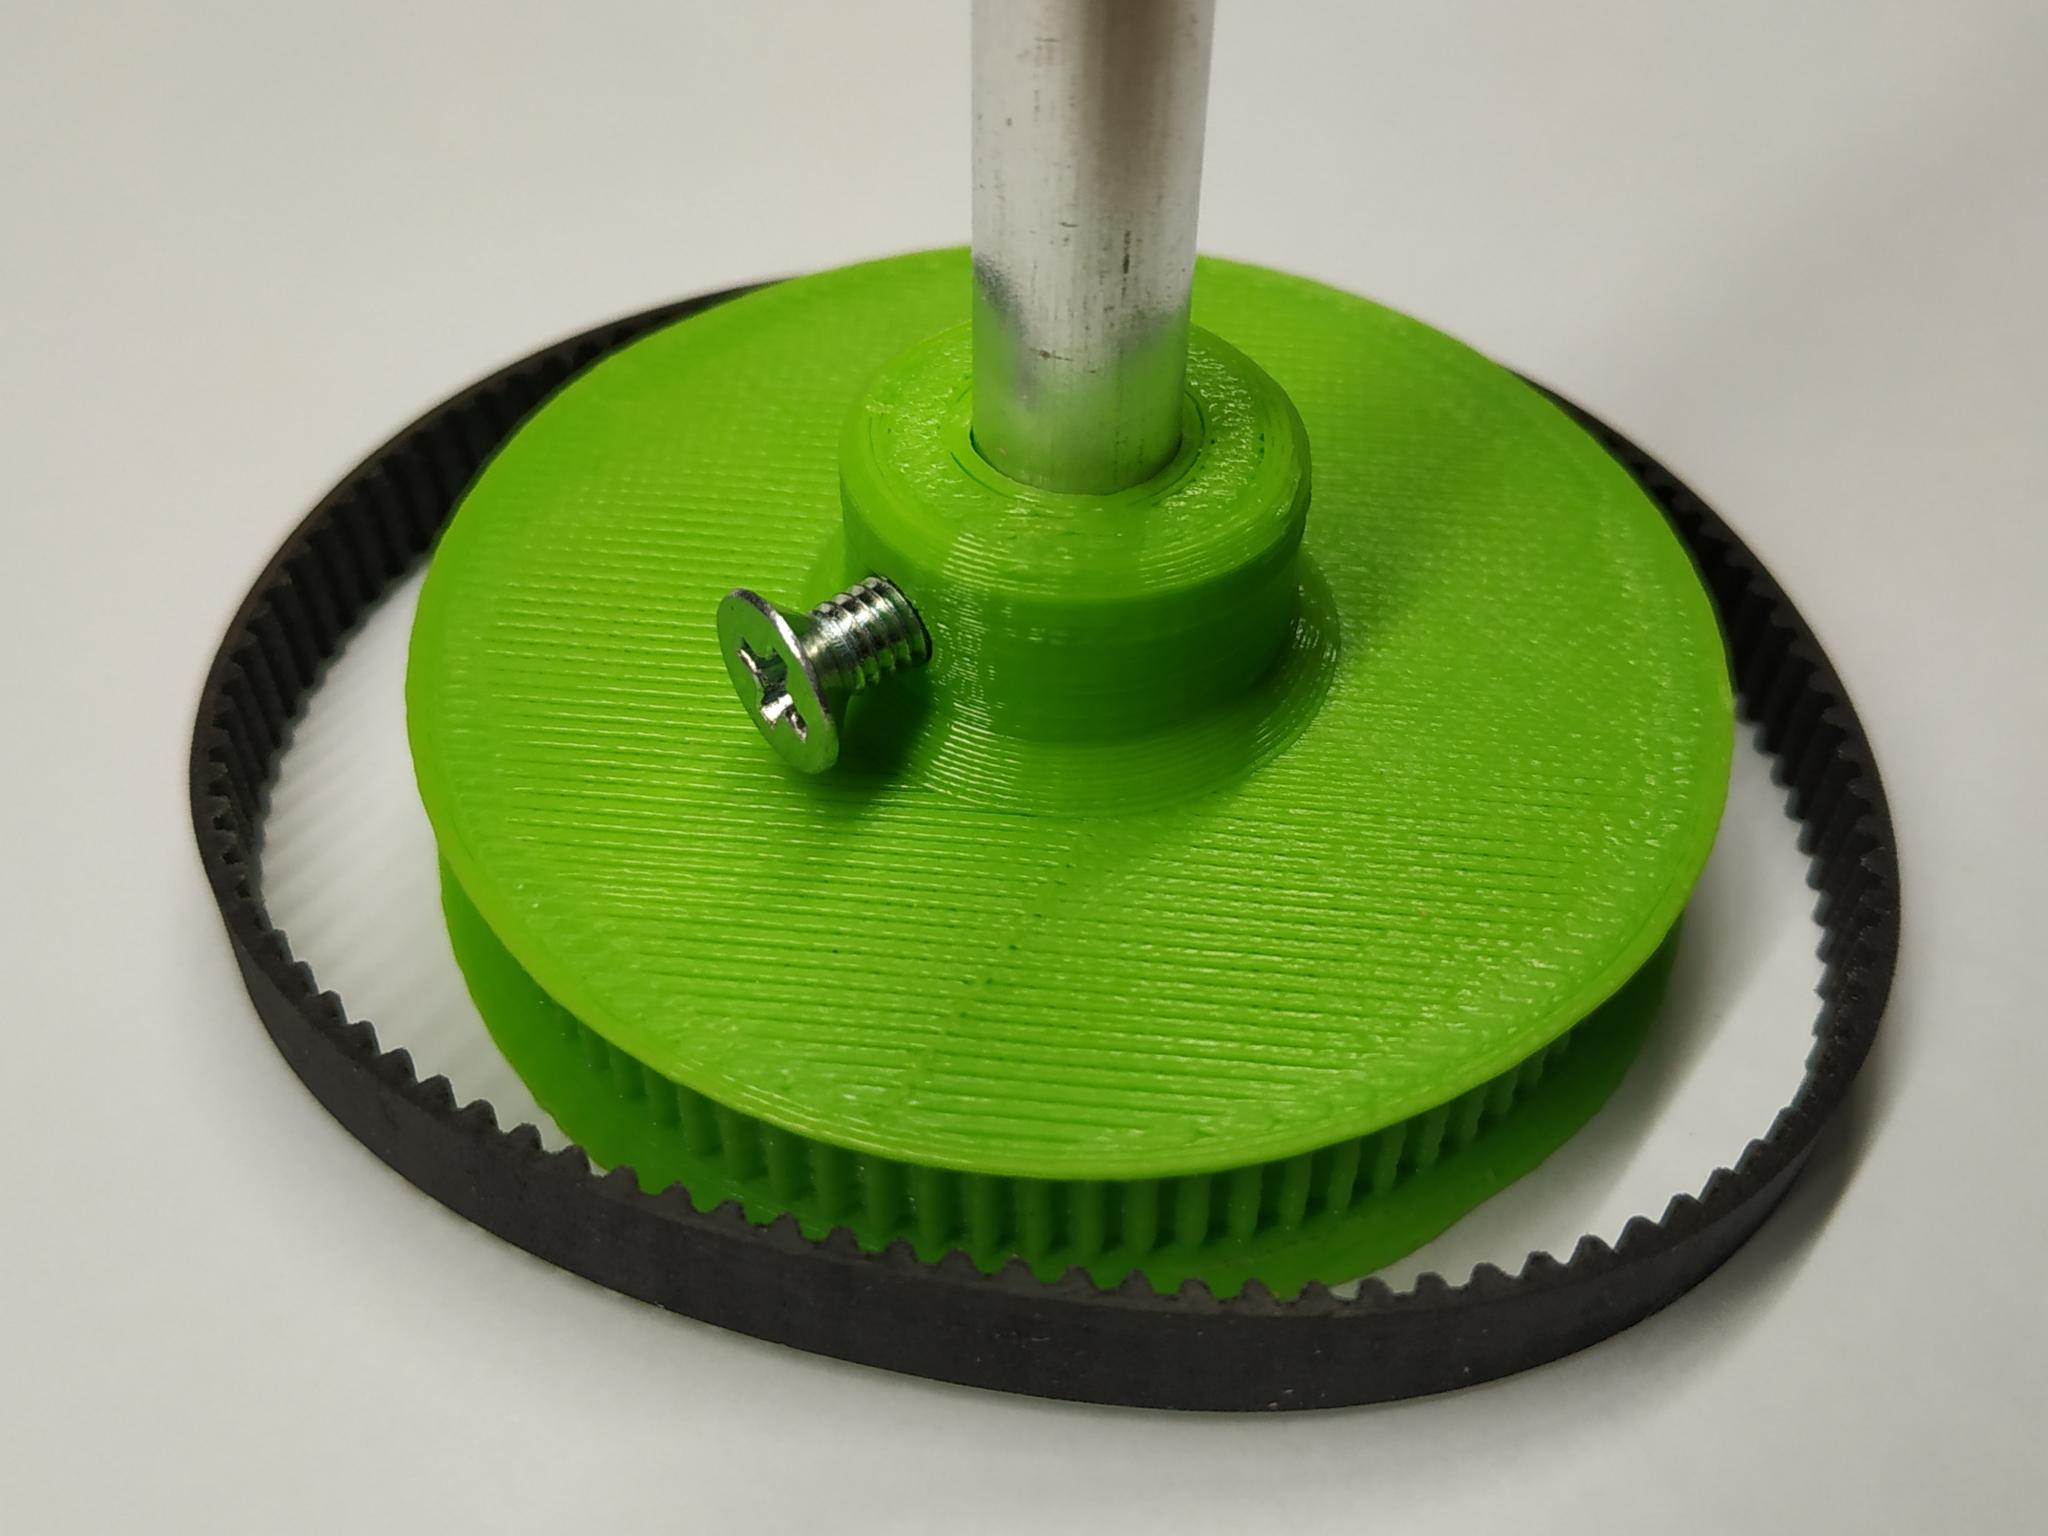
I also replaced the construction studs with aluminum tubes. The problem of heartbeat from this has not changed much. The tubes are a little less than 8 mm, the gear pulleys are dressed with backlash and when you clamp the two screws, the centers of the tube and the pulley go astray. There is no desire to put steel shafts here, so I will look for another solution.
The 3D printer after printing began to print better, much better. Considering that this project is a great experiment and the cheapest and most affordable materials are used, the printer prints just fine! The most terrible problem is the lack of even circles, but all this will be solved in subsequent modifications.
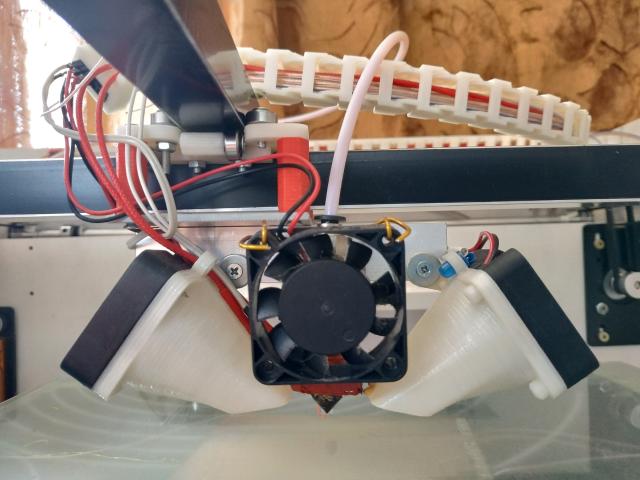
The cooling system of the radiator and the printed part has been completely replaced. Now, instead of long ducts that have not justified themselves, there are two cones. Fans remained the same, sizes 40 * 10 mm. With this blow, I printed a cube on the printer at a speed of 300 mm / s, the full video is on the channel. Without a powerful blow to print small parts at high speed will not work, everything just melts and flows. Cooling radiator while temporary, screwed the fan on the wire. Generally ideal for cooling use fans with a snail, they create an excellent air flow.
Well, I'll talk about the jambs, which this time spoiled the whole raspberry. Firstly, these are aluminum tubes, they are of smaller diameter, I tried to fix it with scotch tape, it helped 50/50, the heartbeat remains, I will fix it.
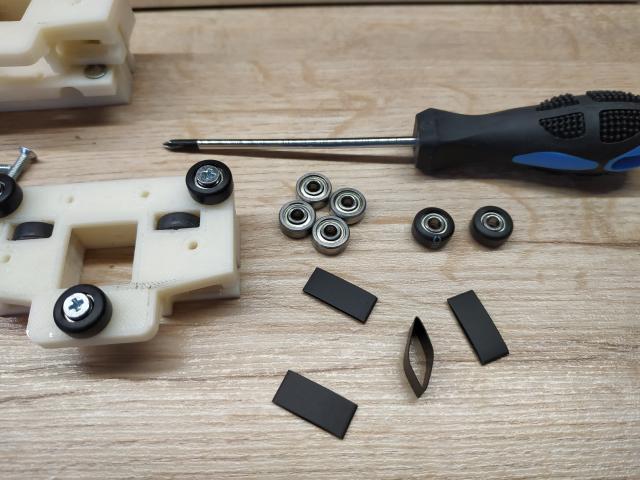
The second huge joint is the 623zz bearings, they were very cheap from Uncle Ali, some literally falling apart in their hands. In the future, all the bearings will be replaced with special rollers, these are used in tandem with the structural aluminum profile. When I was developing this 3D printer I expected that the bearing should be rubberized so that it would not chew on the aluminum profile, such ready wheels are only large and expensive. I put 623zz purchased bearings into heat shrinkage, it works until the heat shrinkage starts to stretch and fall off, all the same not rubber. Then I tried instead of shrinking to use electrical tape on the guide, while it works, but I do not recommend repeating it, it is better to use rubberized rollers.
In general, these are all shoals, from the critical one can also point out the Z axis, which works on an ordinary building pin, it creates a number of problems, so in the near future I will try to make a table on the belts, have already cut out new parts from plywood and printed out gear pulleys.
I also don’t like the location of the extruder, don’t say that it’s a big problem, it’s just inconvenient to fill plastic there, you have to put your hands through the entire printer, it’s very inconvenient, especially if you’re still hampered by a sliding table.
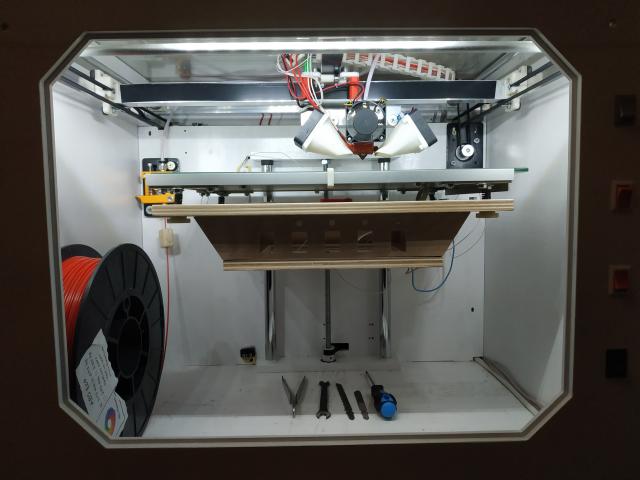
The rest of the 3D printer is very good, I am happy as an elephant. Now to disassemble the kinematics, you do not need to disassemble half of the printer, a pair of screws and kinematics are removed completely. The bowden tube is 60 cm long and does not stick out from the top of the printer. You can put a flower in a pot on top of the printer :) & nbsp; All 4 NEMA17 motors are cold, they are located at the back of the printer, outside the heat chamber, there is also electronics. The plastic coil is inside the heat chamber, the plastic is always dry, you just need to think of a bracket for mounting the coil.

The printer has a cover, while it's just a sheet of glass 6 mm thick. Later probably add a frame of plywood and furniture gas lifts, they will hold the cover in the open position. The cover is great for saving the printer from dust. Now the glass is just lying on top, I don’t touch it. While there is no front glass door, I have not figured out how to attach it, but it prints perfectly without a door, there are no drafts inside.
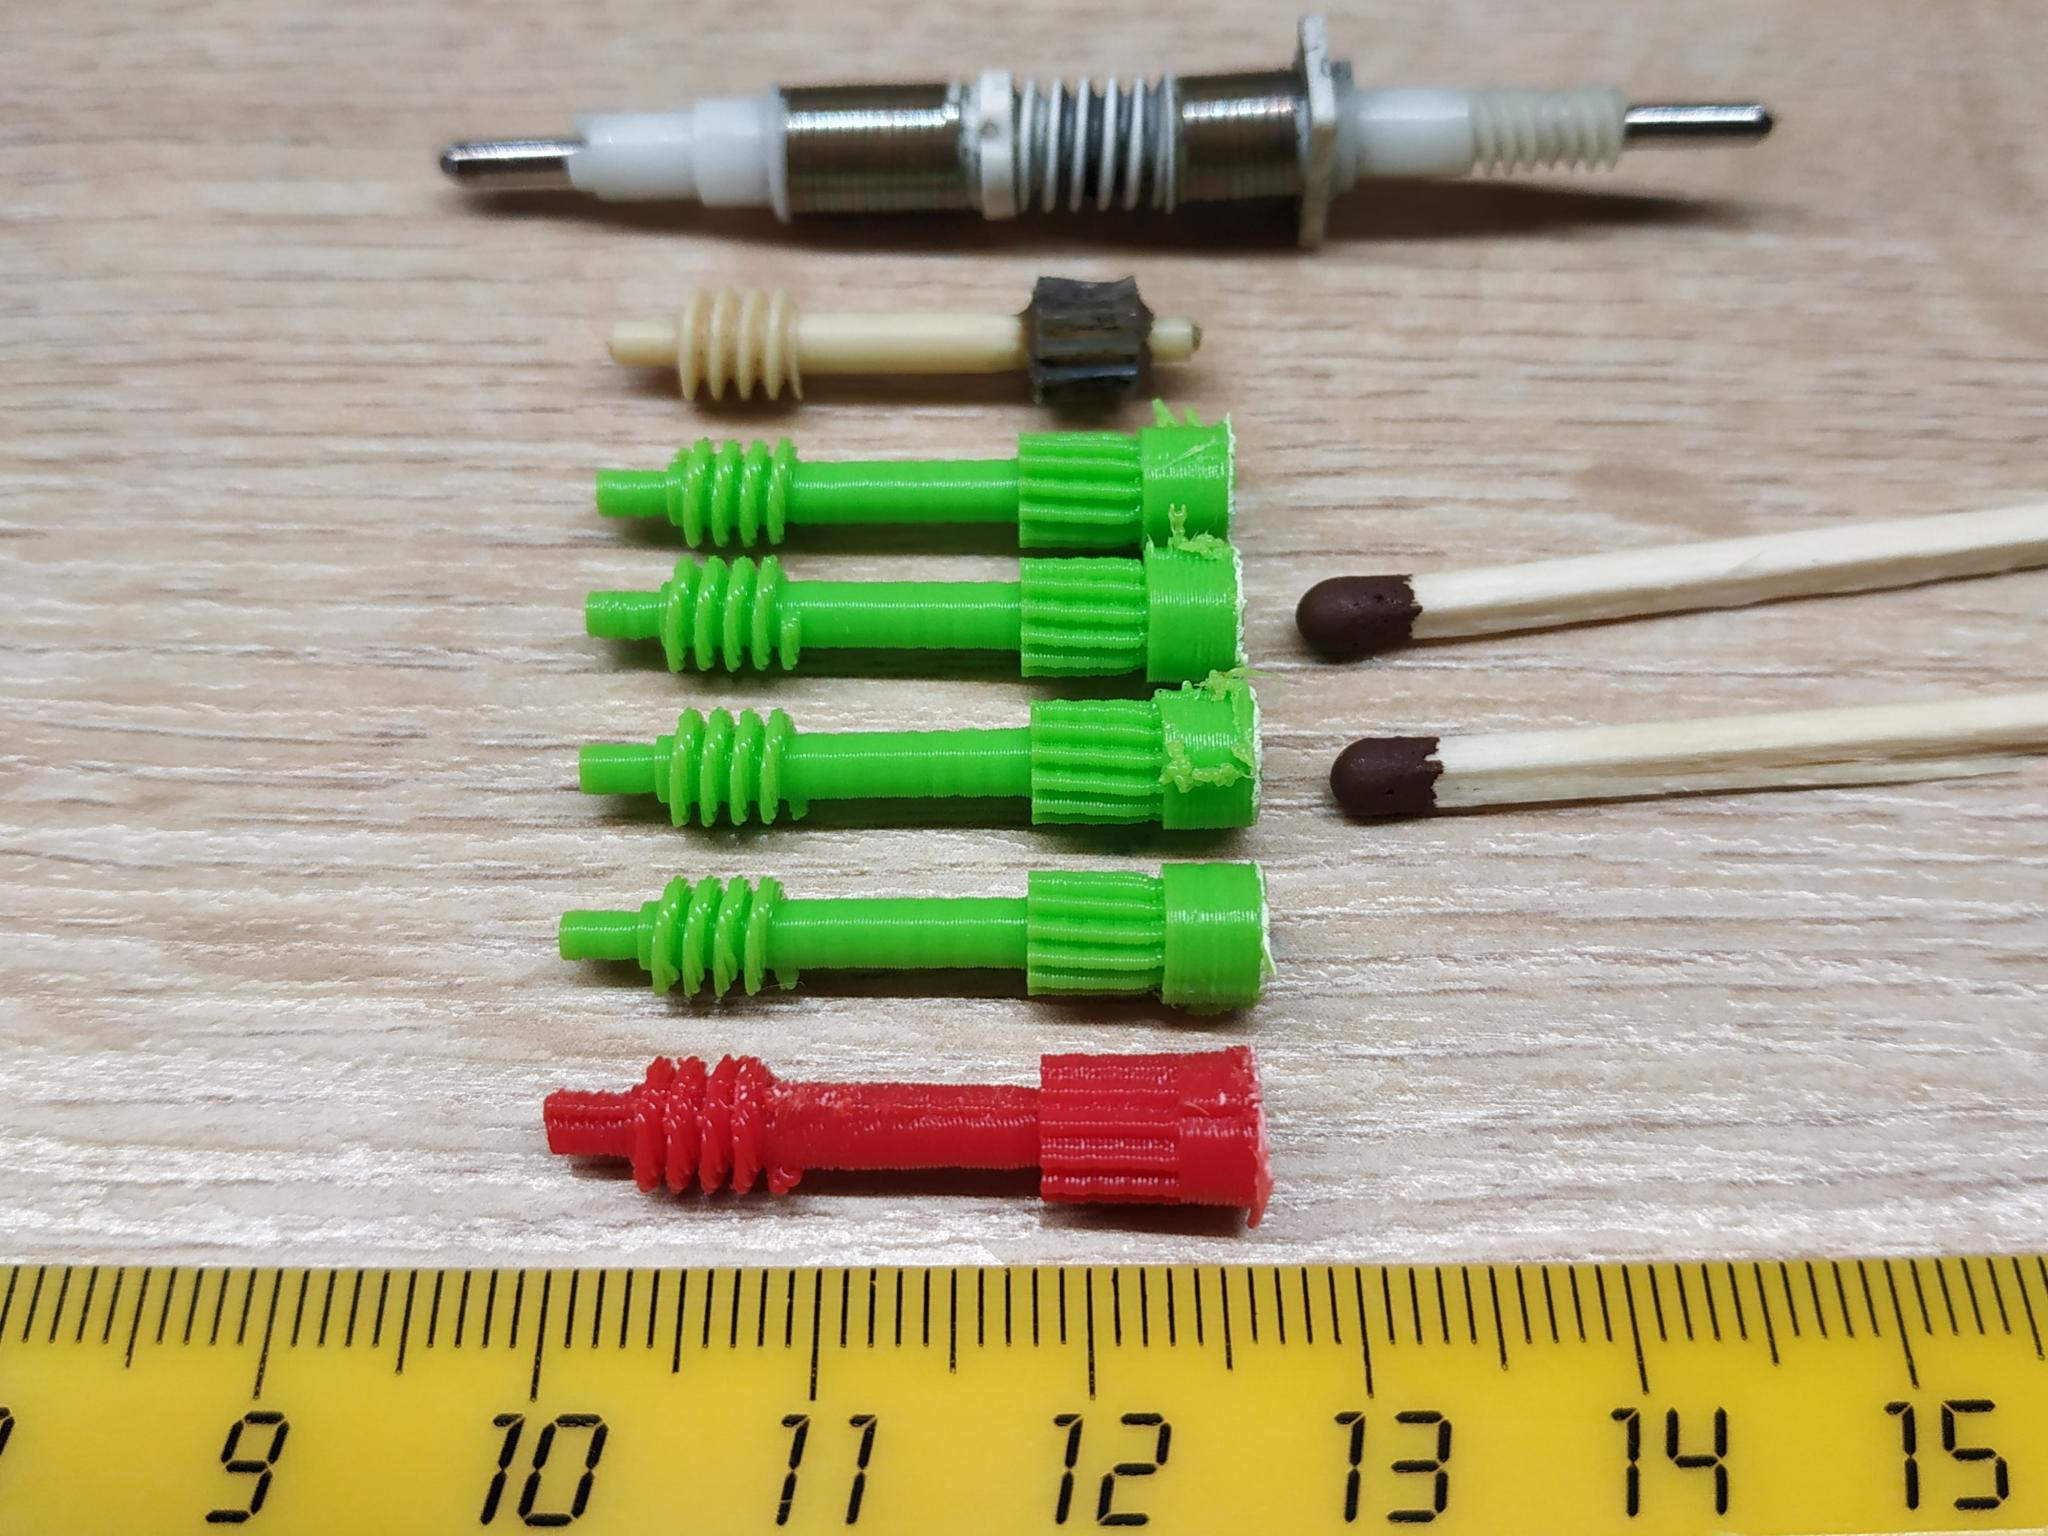
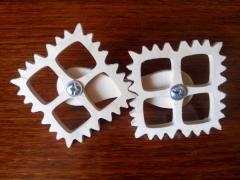
For example, the photo of the smallest gears that managed to be printed on this printer is 5 mm in diameter. And the biggest gear wheel is 80 teeth under the GT2 belt.
Some kind of super innovation in this design probably will no longer exist, it is necessary to bring order to the fact that there is already. About all the improvements I will shoot a short video.
If you like my 3D printer, write what you like in the comments or vice versa:)
Add comment
Random DIY
-
 This device helped me to saw a bundle of rolled metal at an angle of 90 degrees without effort.
 -
 A friend said like acoo kie, his wife said some windows :) And yet they spin!
 -
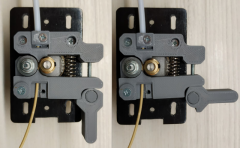 Bowden extruder for a 3D printer with minimal gaps and no extra parts. An eccentric is provided for compressing the spring and releasing the filament rod.
 -
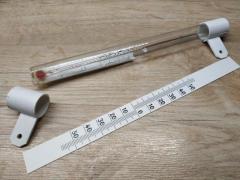 This thermometer hung outside the window for several years, due to temperature changes the plastic mount literally crumbled into small pieces in hands. Repairing a thermometer with a 3D printer cost ten minutes of modeling and a few grams of plastic.
 -
 Almost all toys bought for the daughter do not cause the child's interest, which can not be said about developing toys made by themselves. Below is a photo of the simplest developing mat, which the wife made for a couple of evenings from old buttons.